Physical Terminal
Paystack Physical Terminal is one of the easiest and fastest ways to accept in-person customer payments.
The Physical Terminal device is a Morefun M960 and runs on the latest Android software. With it, you can accept payments from multiple channels, including all local cards, USSD, and bank transfers. You can also integrate the device directly with your existing sales channels, such as your inventory and sales management systems.
The Paystack Terminal is currently only available to Nigeria-based registered businesses.
You can get started with our Physical Terminal in three short, easy steps:
Create a Paystack account for your business if you don't have an existing Paystack business. You are required to sign up as a Registered business to request a Paystack Terminal.
Activate your Paystack business if your business is not yet live.
Request a Live Terminal from the Terminals page on your Dashboard. For Test (debug) devices, toggle your Paystack Dashboard to test mode before requesting from the Terminals page.
Sit back and relax. We’ll deliver to your location in 3-7 working days.
Key features of the Physical Terminal
Our Physical Terminal strives to provide the best in-person payment experience possible, and we are constantly improving its features. We've highlighted some of the cool features of the Physical Terminal:
Variety of payment methods: You can receive customer payments through multiple payment channels.
Visibility on all transactions from the Paystack Dashboard: You can see all transactions processed on your Terminal devices from your Paystack Dashboard. This is helpful to know your average order size, plan for inventory, and resolve disputes.
End-of-day accounting: Each Terminal payment is available in real-time on the Paystack Dashboard and the mobile app, saving you countless hours during reconciliation. You can also print out an end-of-day report to show all transactions processed on a particular Terminal device on a given day. Transactions are also available via the API.
Control staff access: You can create multiple user accounts for staff with varying access levels or permission according to their role. For example, while a cashier may only need permission to print end-of-day reports, the branch manager may need access to see and manage transactions online. You can create different user accounts for both employees and give them different permissions.
Success rates: We have a monthly average success rate of 90%. The 10% of failed transactions include customer errors such as insufficient funds, wrong PIN, etc.
Quick settlement: We send your funds on a T+1 settlement basis, meaning one working day after the transaction date.
Receive payments how you want: Unlike other POS solutions, you are not restricted to using one bank account to receive payments. You can get your daily payouts in any bank account and change this whenever you like. You can also split payments between multiple bank accounts using our split payment feature.
Seamless integration and customisation: The Paystack Physical Terminal is completely programmable. This means that developers and businesses can build custom apps on it to create unique branded experiences. Physical Terminal integrates seamlessly with existing point-of-sale systems and different accounting, inventory, and business management software.
Instant refunds: Businesses can handle disputes and make refunds easily.
Invoice payments: You can use Paystack Terminal to collect payment for Paystack Invoices. For businesses with an online and physical store, this allows you to bridge the gap between online and offline payments.
Cost and charges
The pricing for Paystack Terminal card readers varies according to the type of device, Test or Live.
Test Terminal cost
Test Terminal devices, or debug devices, are used by developers to test their custom Terminal apps or integrations to ensure they work correctly before going live and receiving payments from customers. These devices are unavailable for sale; merchants will undergo a screening process before receiving loaned devices for a specified period.
Live Terminal cost
Live Terminal devices are used for processing real payments, and they cost NGN 86,000. Once you pay the fee, you own the terminal forever, even if you stop processing payments with Paystack.
Transaction charges
The transaction charges for using Terminal vary according to the payment channel used by the customer.
Payment channel | Fee |
Card | 0.5% capped at 1000 |
USSD | 1.5% + 100 NGN capped at NGN 2,000. NGN 100 waived for transactions under NGN 2,500 |
Transfer | 1.5% + 100 NGN capped at NGN 2,000. NGN 100 waived for transactions under NGN 2,500 |
Getting started with your Physical Terminal
Turning the device on/off
The power button for the Terminal is located at top left side of the keypad. Simply push and hold the power button for 3-5 seconds. to turn it on or off.
Setting up your device
Your device comes pre-configured with all the necessary settings. When you turn it on, it will take a moment to download and automatically set up your Paystack Terminal app.
Once this is done, you can start using your device immediately. All completed transactions will appear in real-time on your Paystack Dashboard.
Device status
A Terminal can either be active, inactive, or disabled. An inactive (a Terminal is considered inactive if it isn't used for two weeks) or disabled Terminal will be unable to collect payments.
You can see these statuses from the Terminal section on your dashboard. If you need help reactivating an inactive or disabled Terminal, please reach out to us via support@paystack.com or our contact form.
The Paystack Terminal App
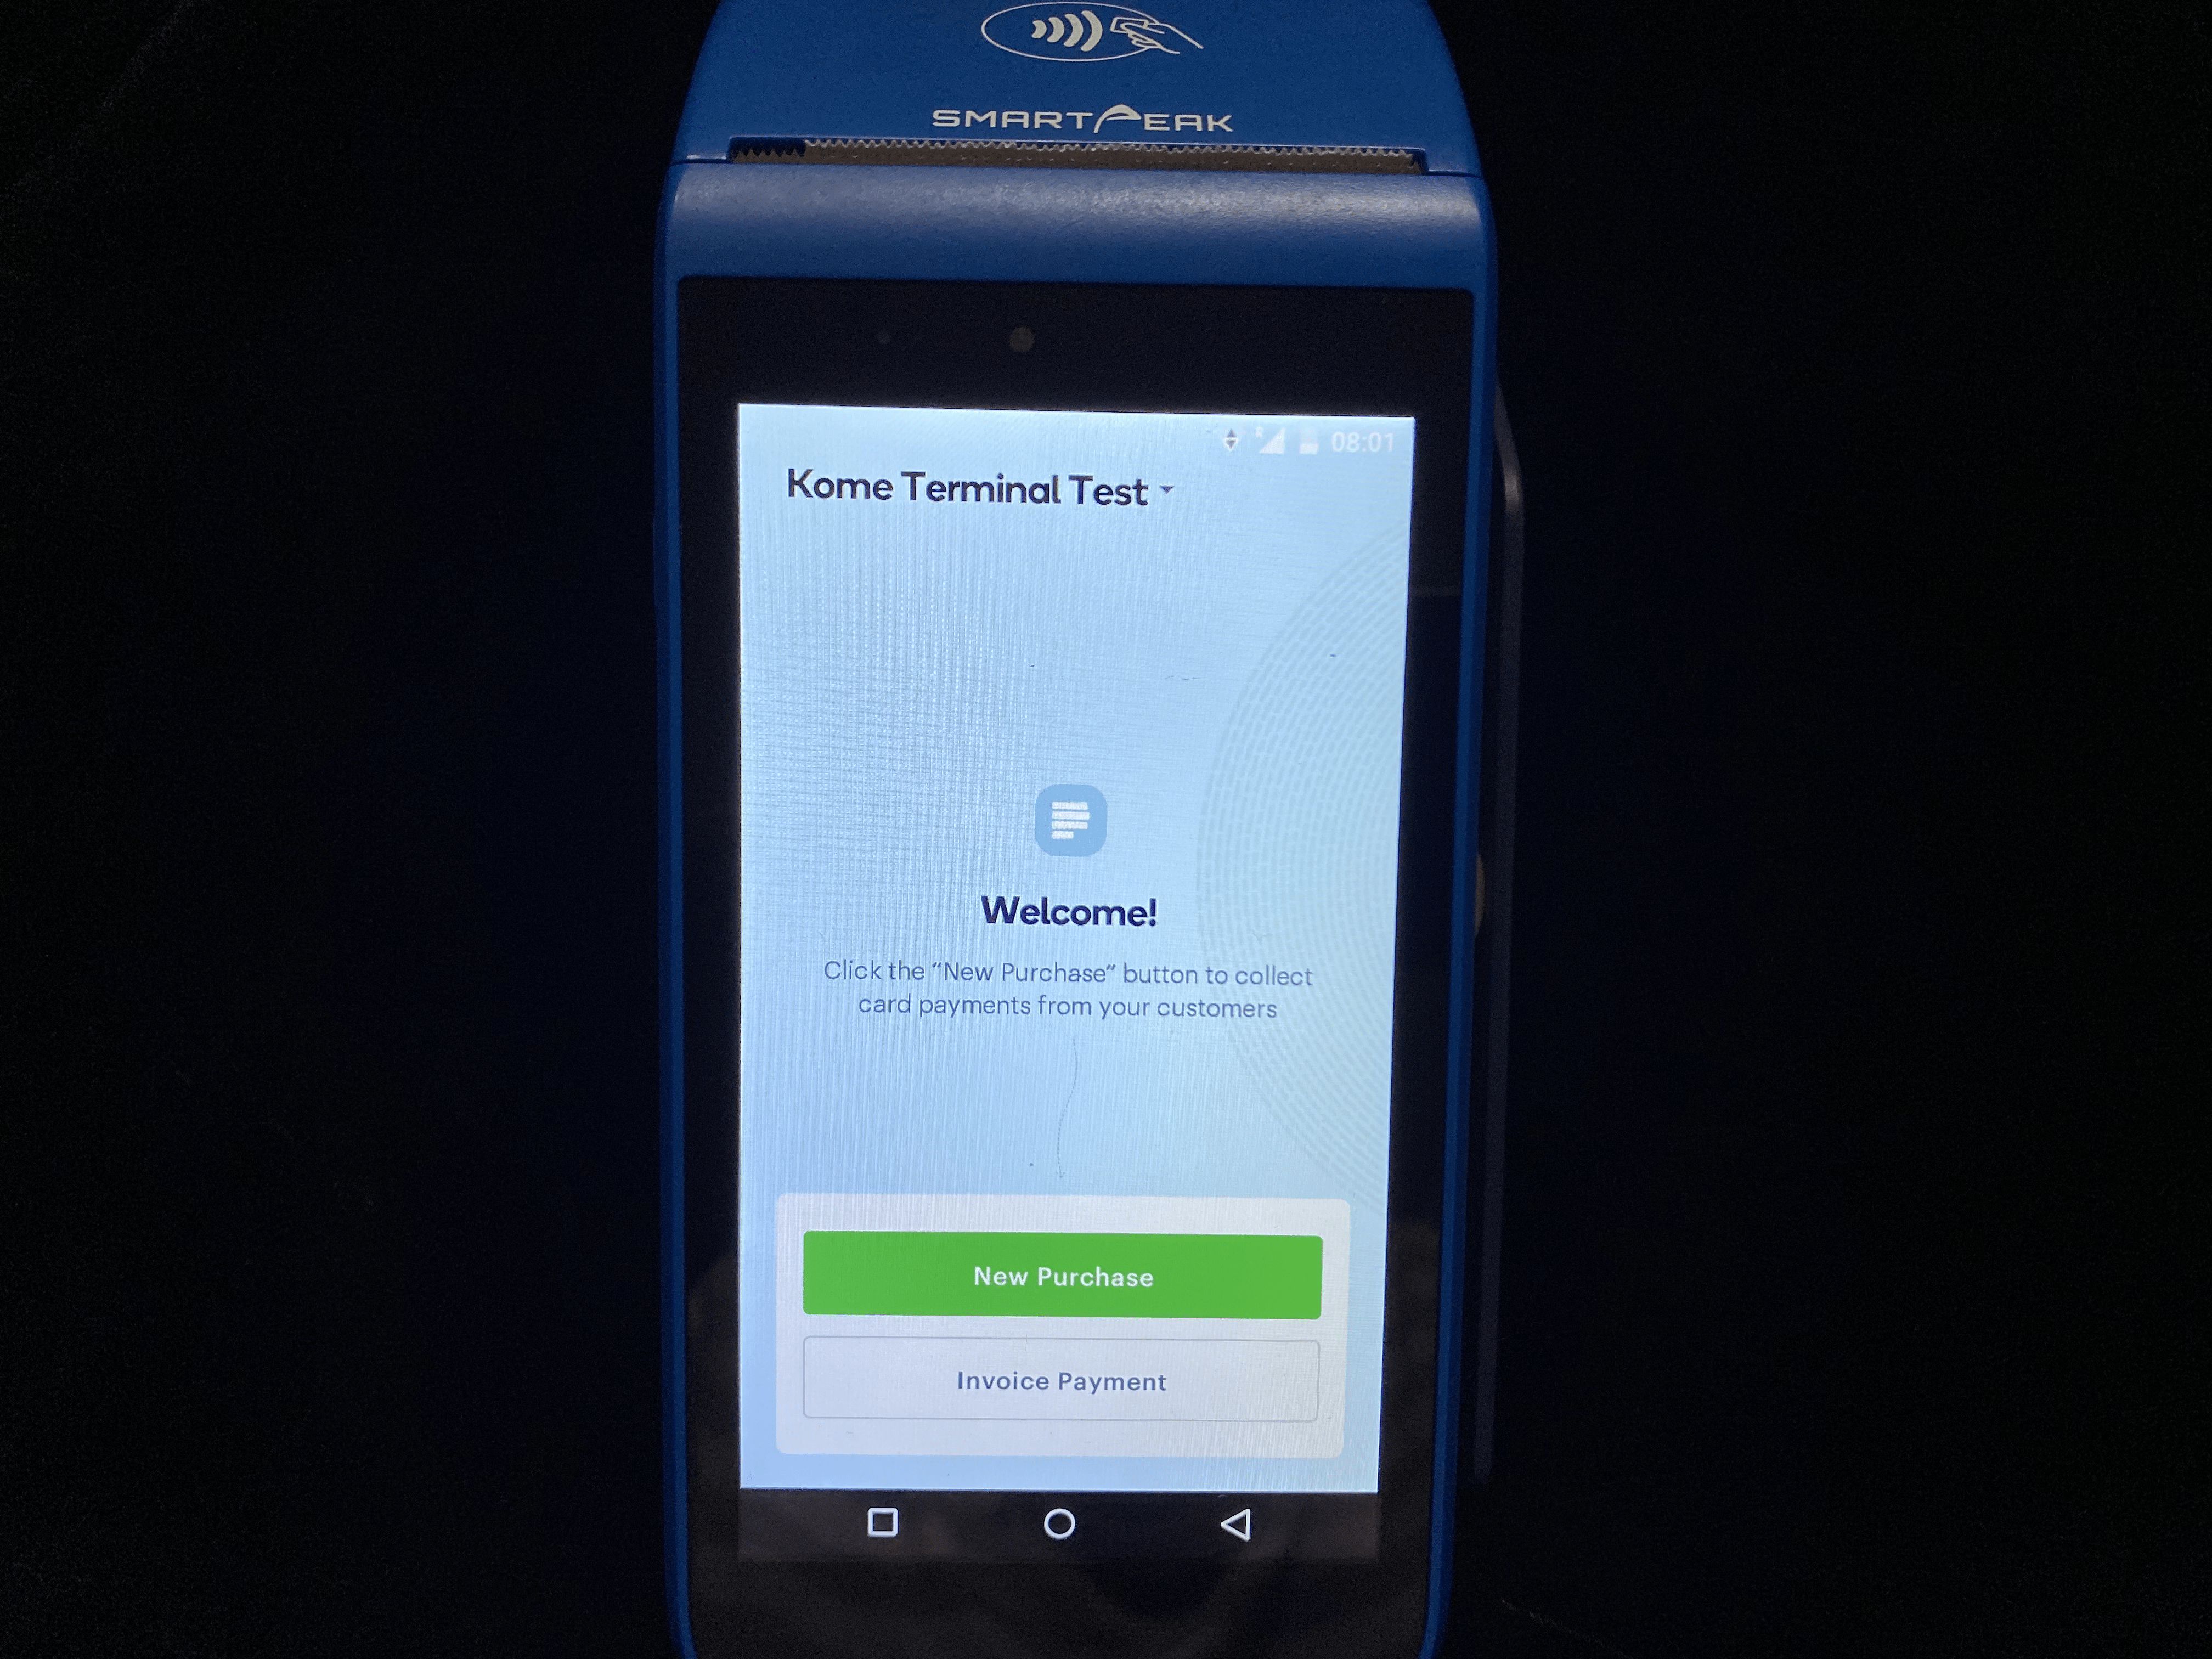
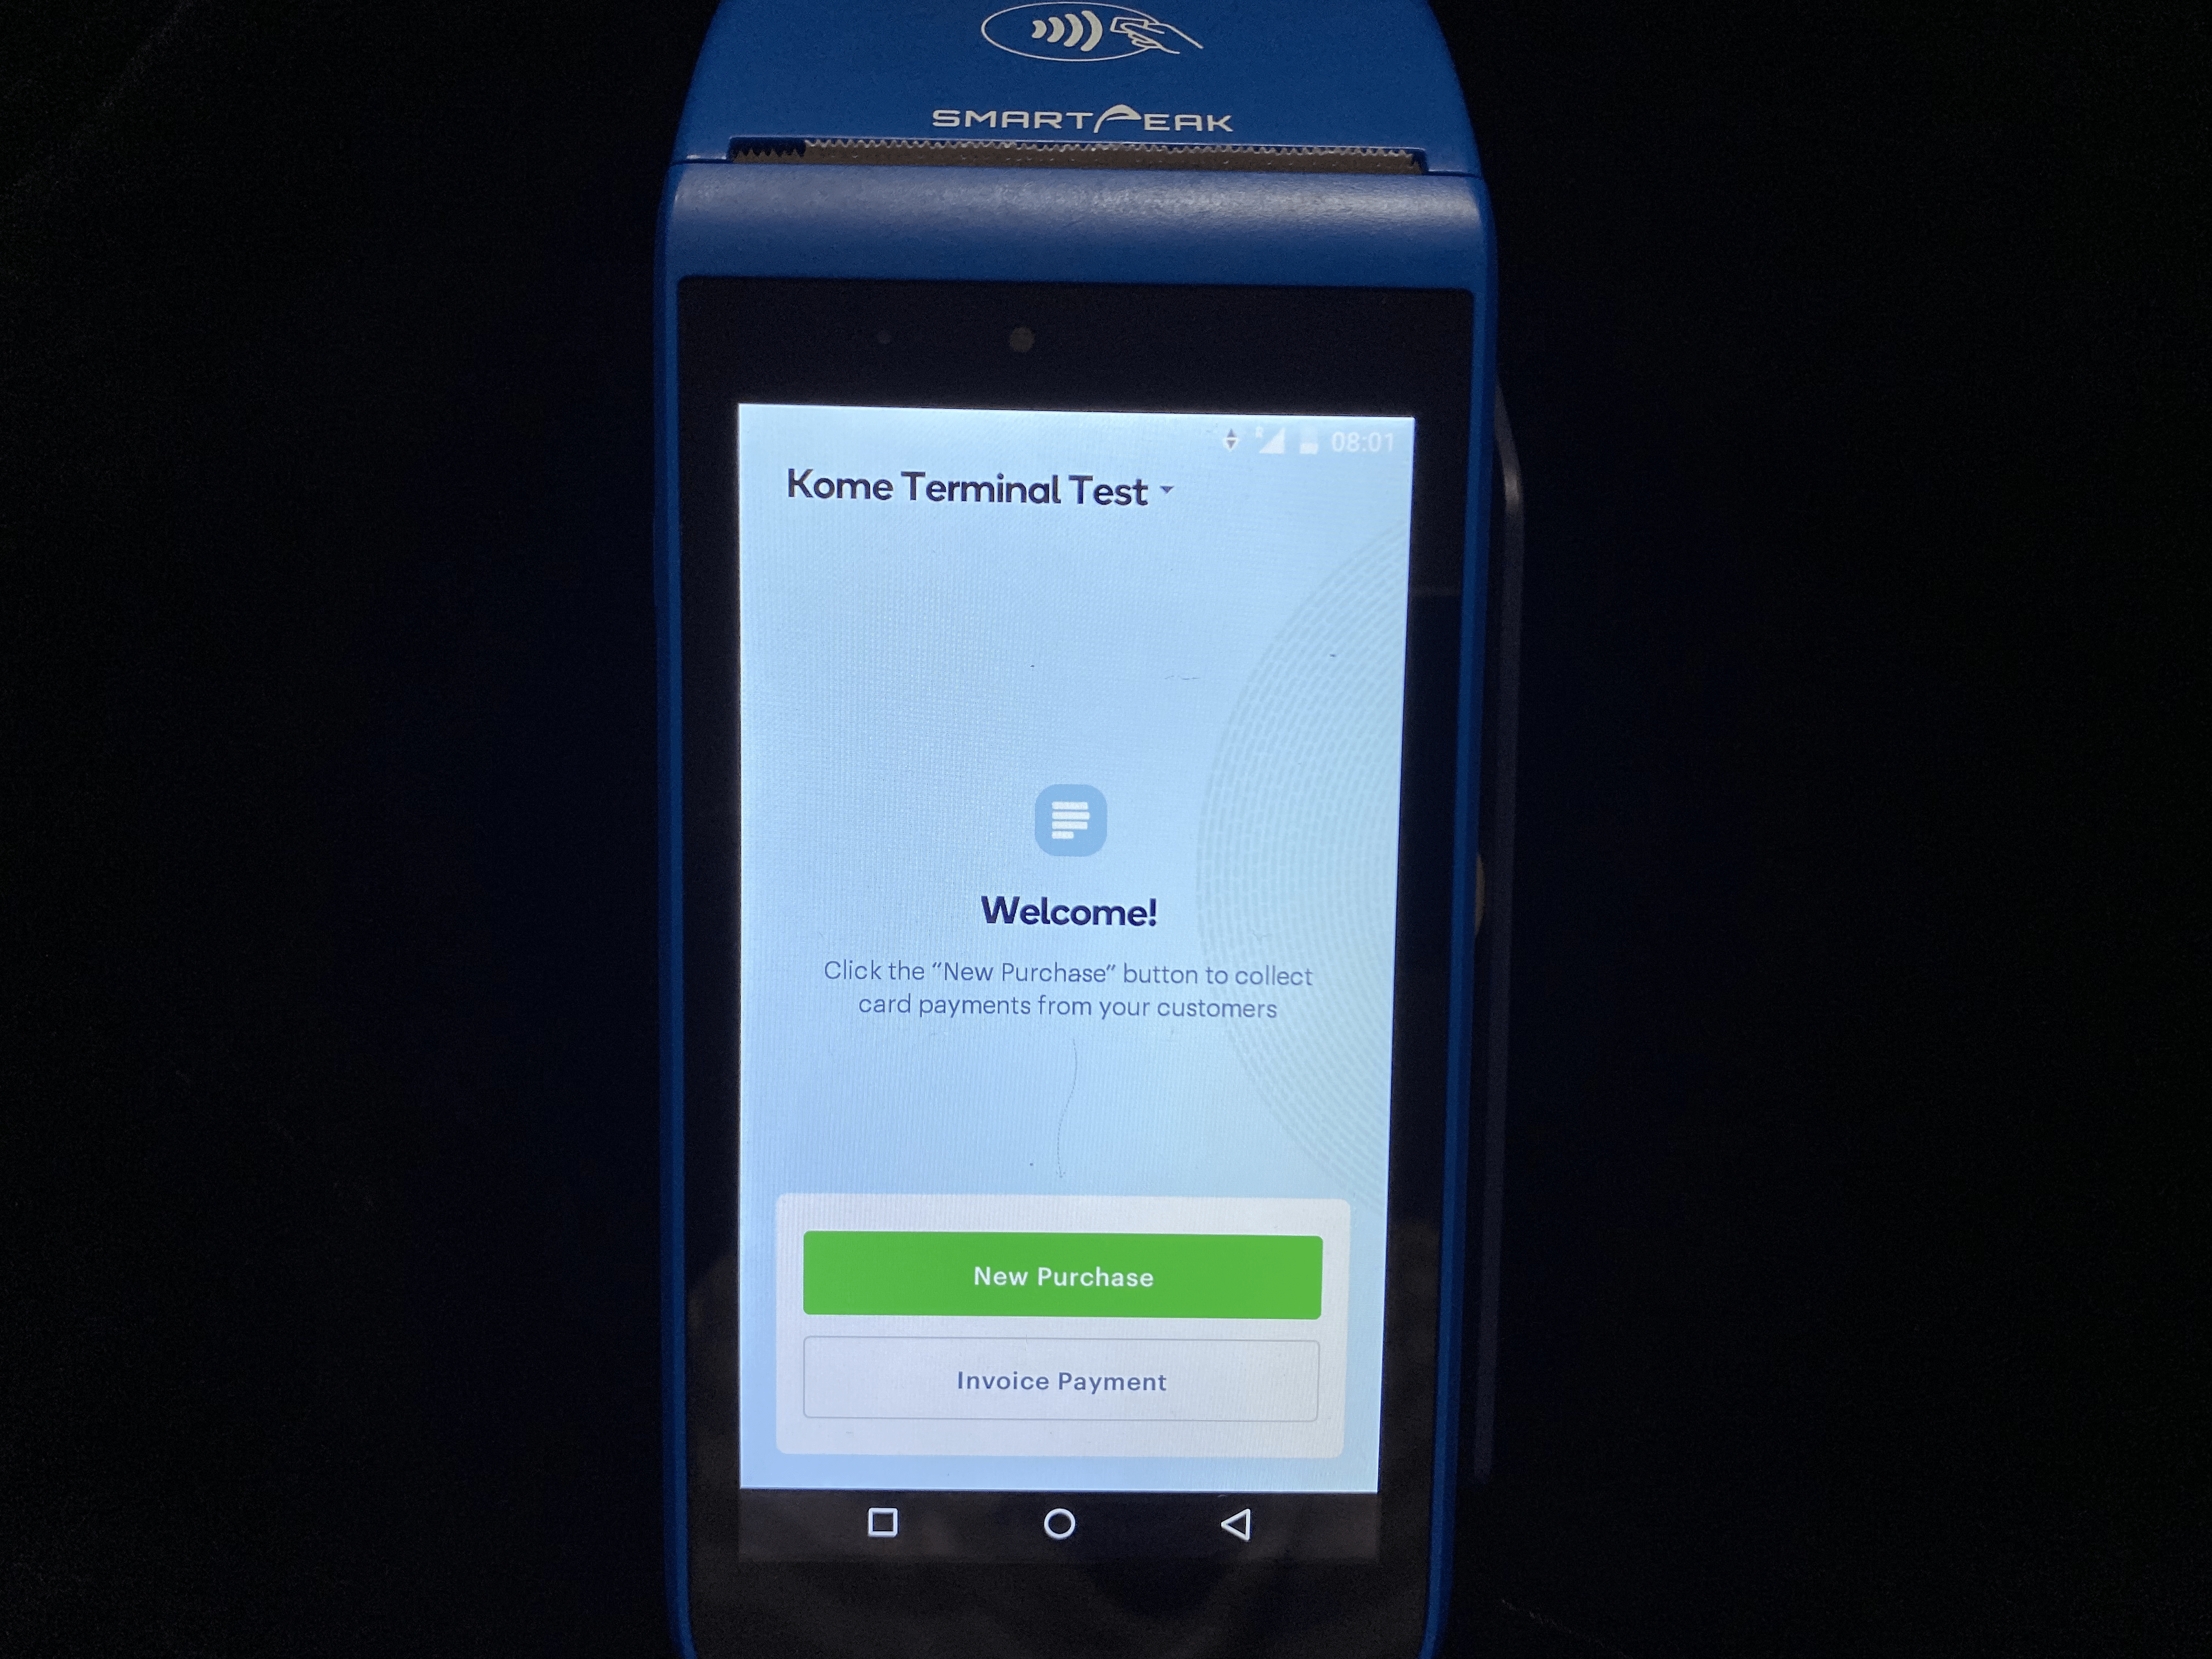
Your device comes with a built-in Terminal app. Once the device is turned on, the app should automatically open. If it doesn't, tap on the 'Paystack POS' icon on the home screen.
Managing your Physical Terminal
The Terminal page on your Dashboard
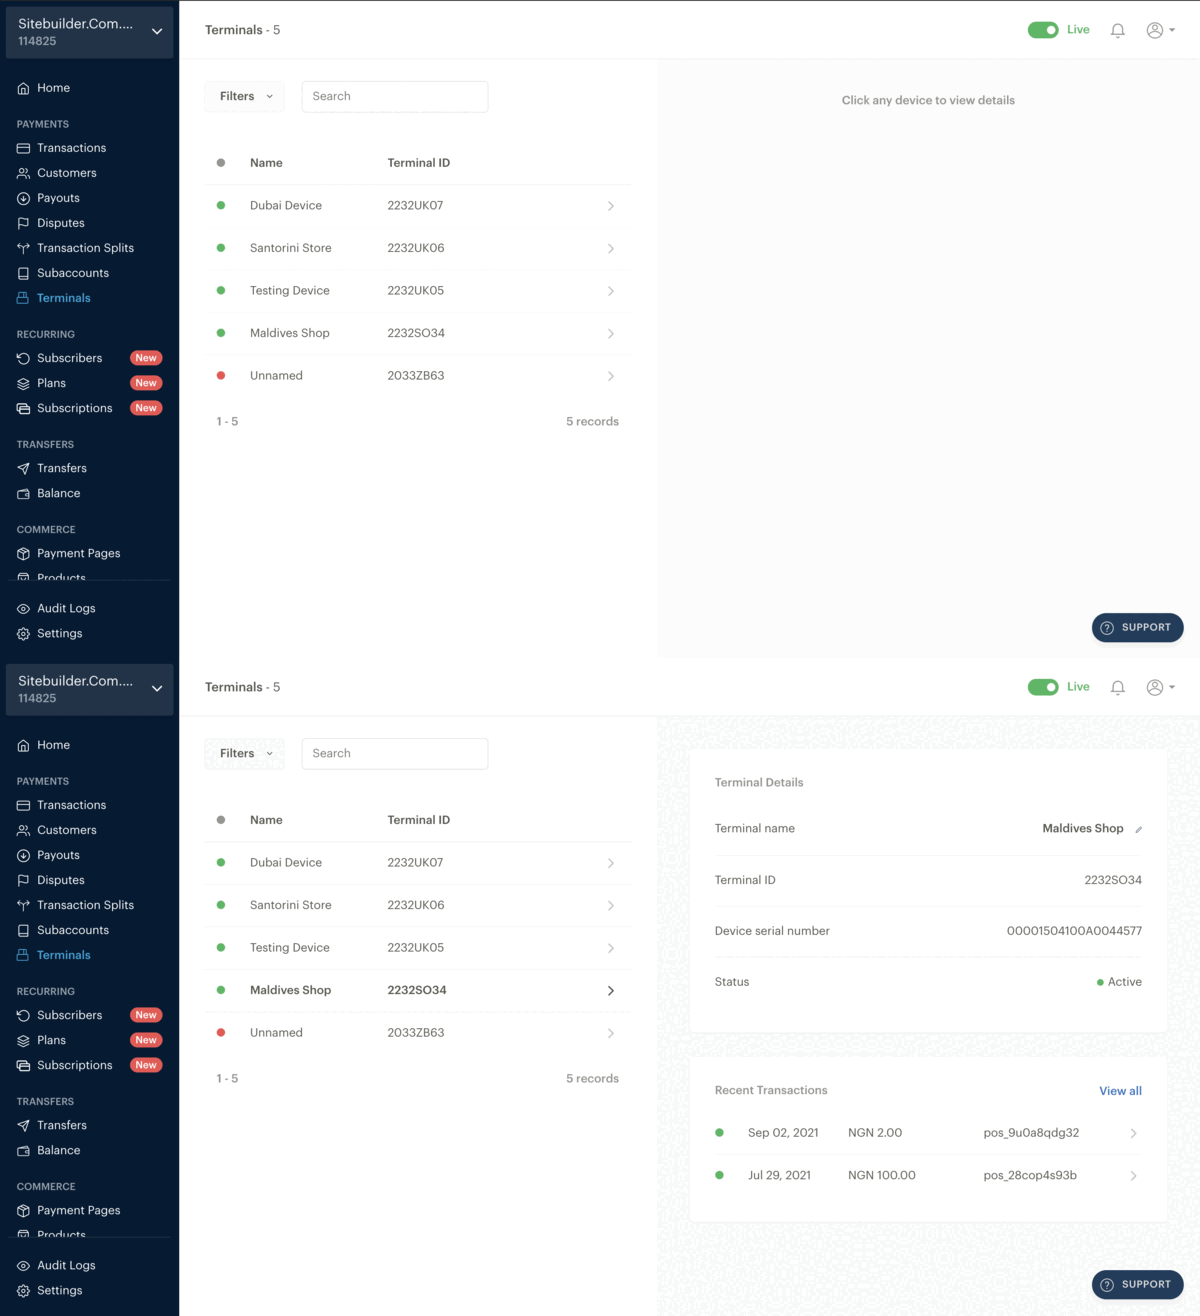
The Terminal page on the Dashboard helps you manage all the devices linked to your business. As a Paystack business with multiple Terminal devices, you can assign unique names to each device, which will show on the Terminal app.
The page shows you a list of the Terminal devices assigned to your business, and selecting a Terminal will show you the Terminal information. Some of these details include the assigned Terminal name, Terminal ID (TID), device serial number (DSN), and the status of the Terminal.
You can see the recent transactions per Terminal. This means that whenever you select a specific Terminal, you can see all transactions that were processed via that Terminal.
Setting a passcode for your Physical Terminal
To print an end-of-day report or the last transaction receipt on your terminal, you need a four-digit passcode. Follow the steps below to create a passcode for your terminal:
Select 'Settings' from the terminal home page.
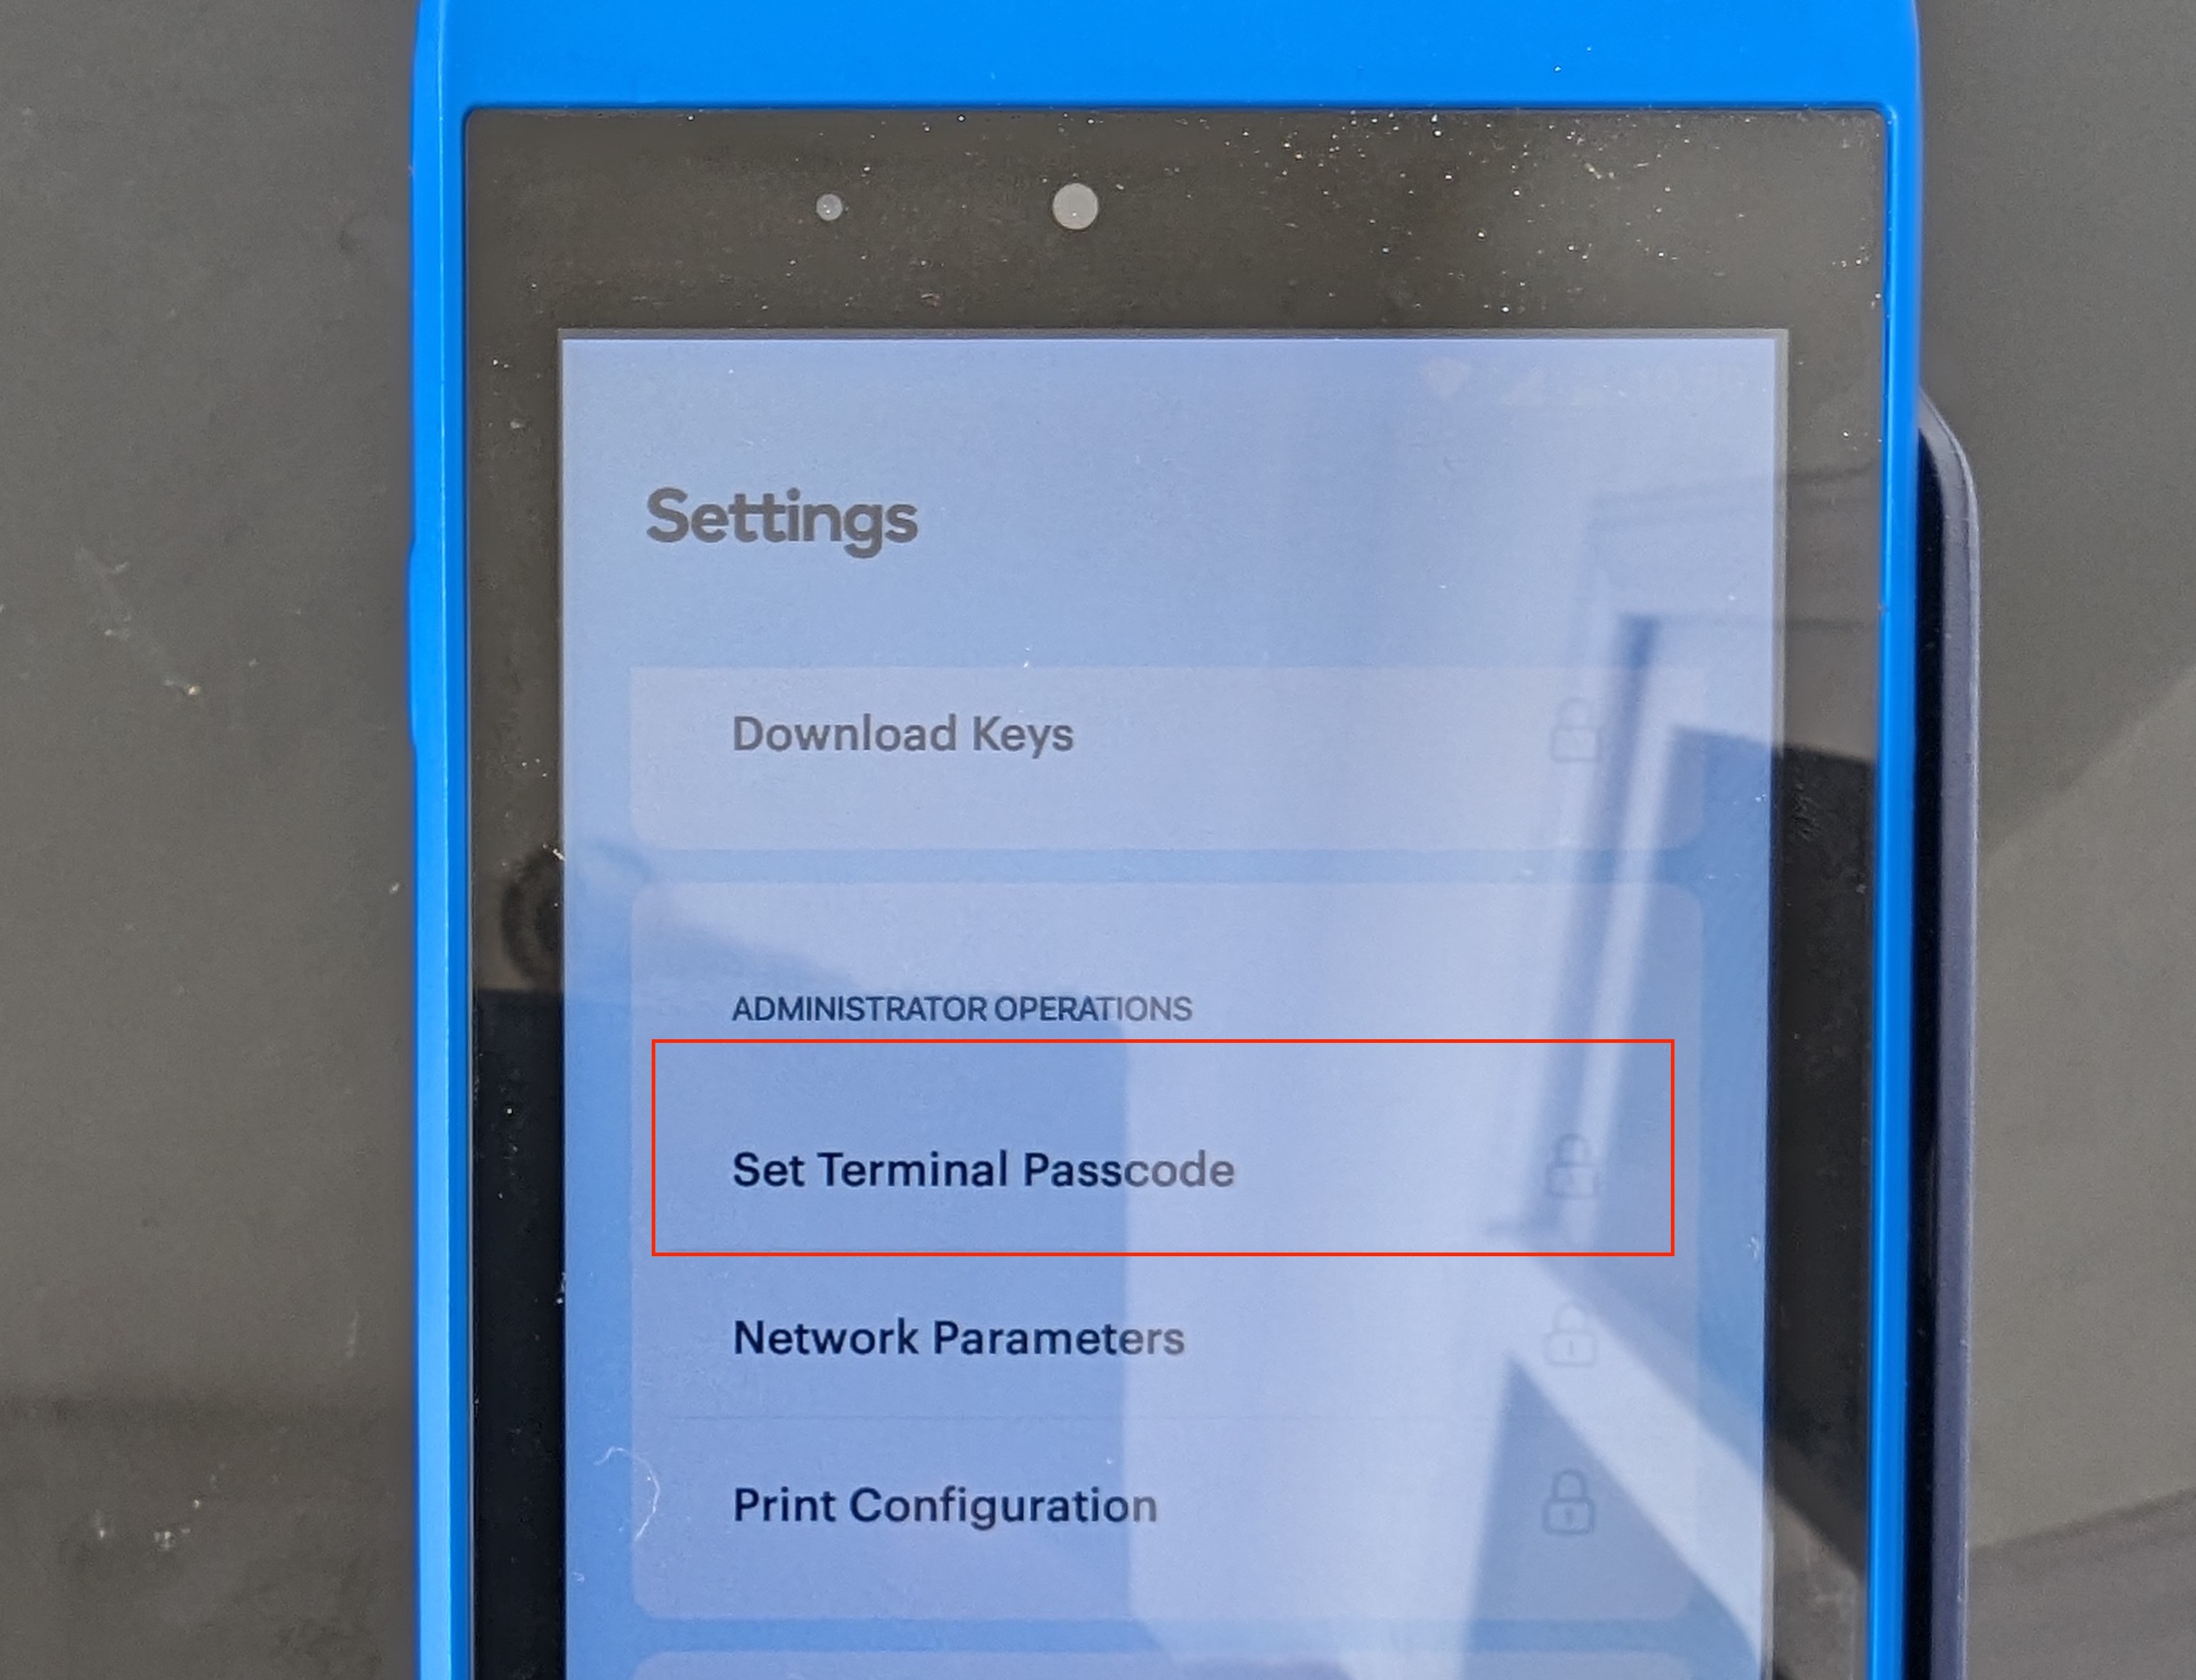
Scroll down to the 'Administrator Operations' section and select 'Set Terminal Passcode' as shown below:
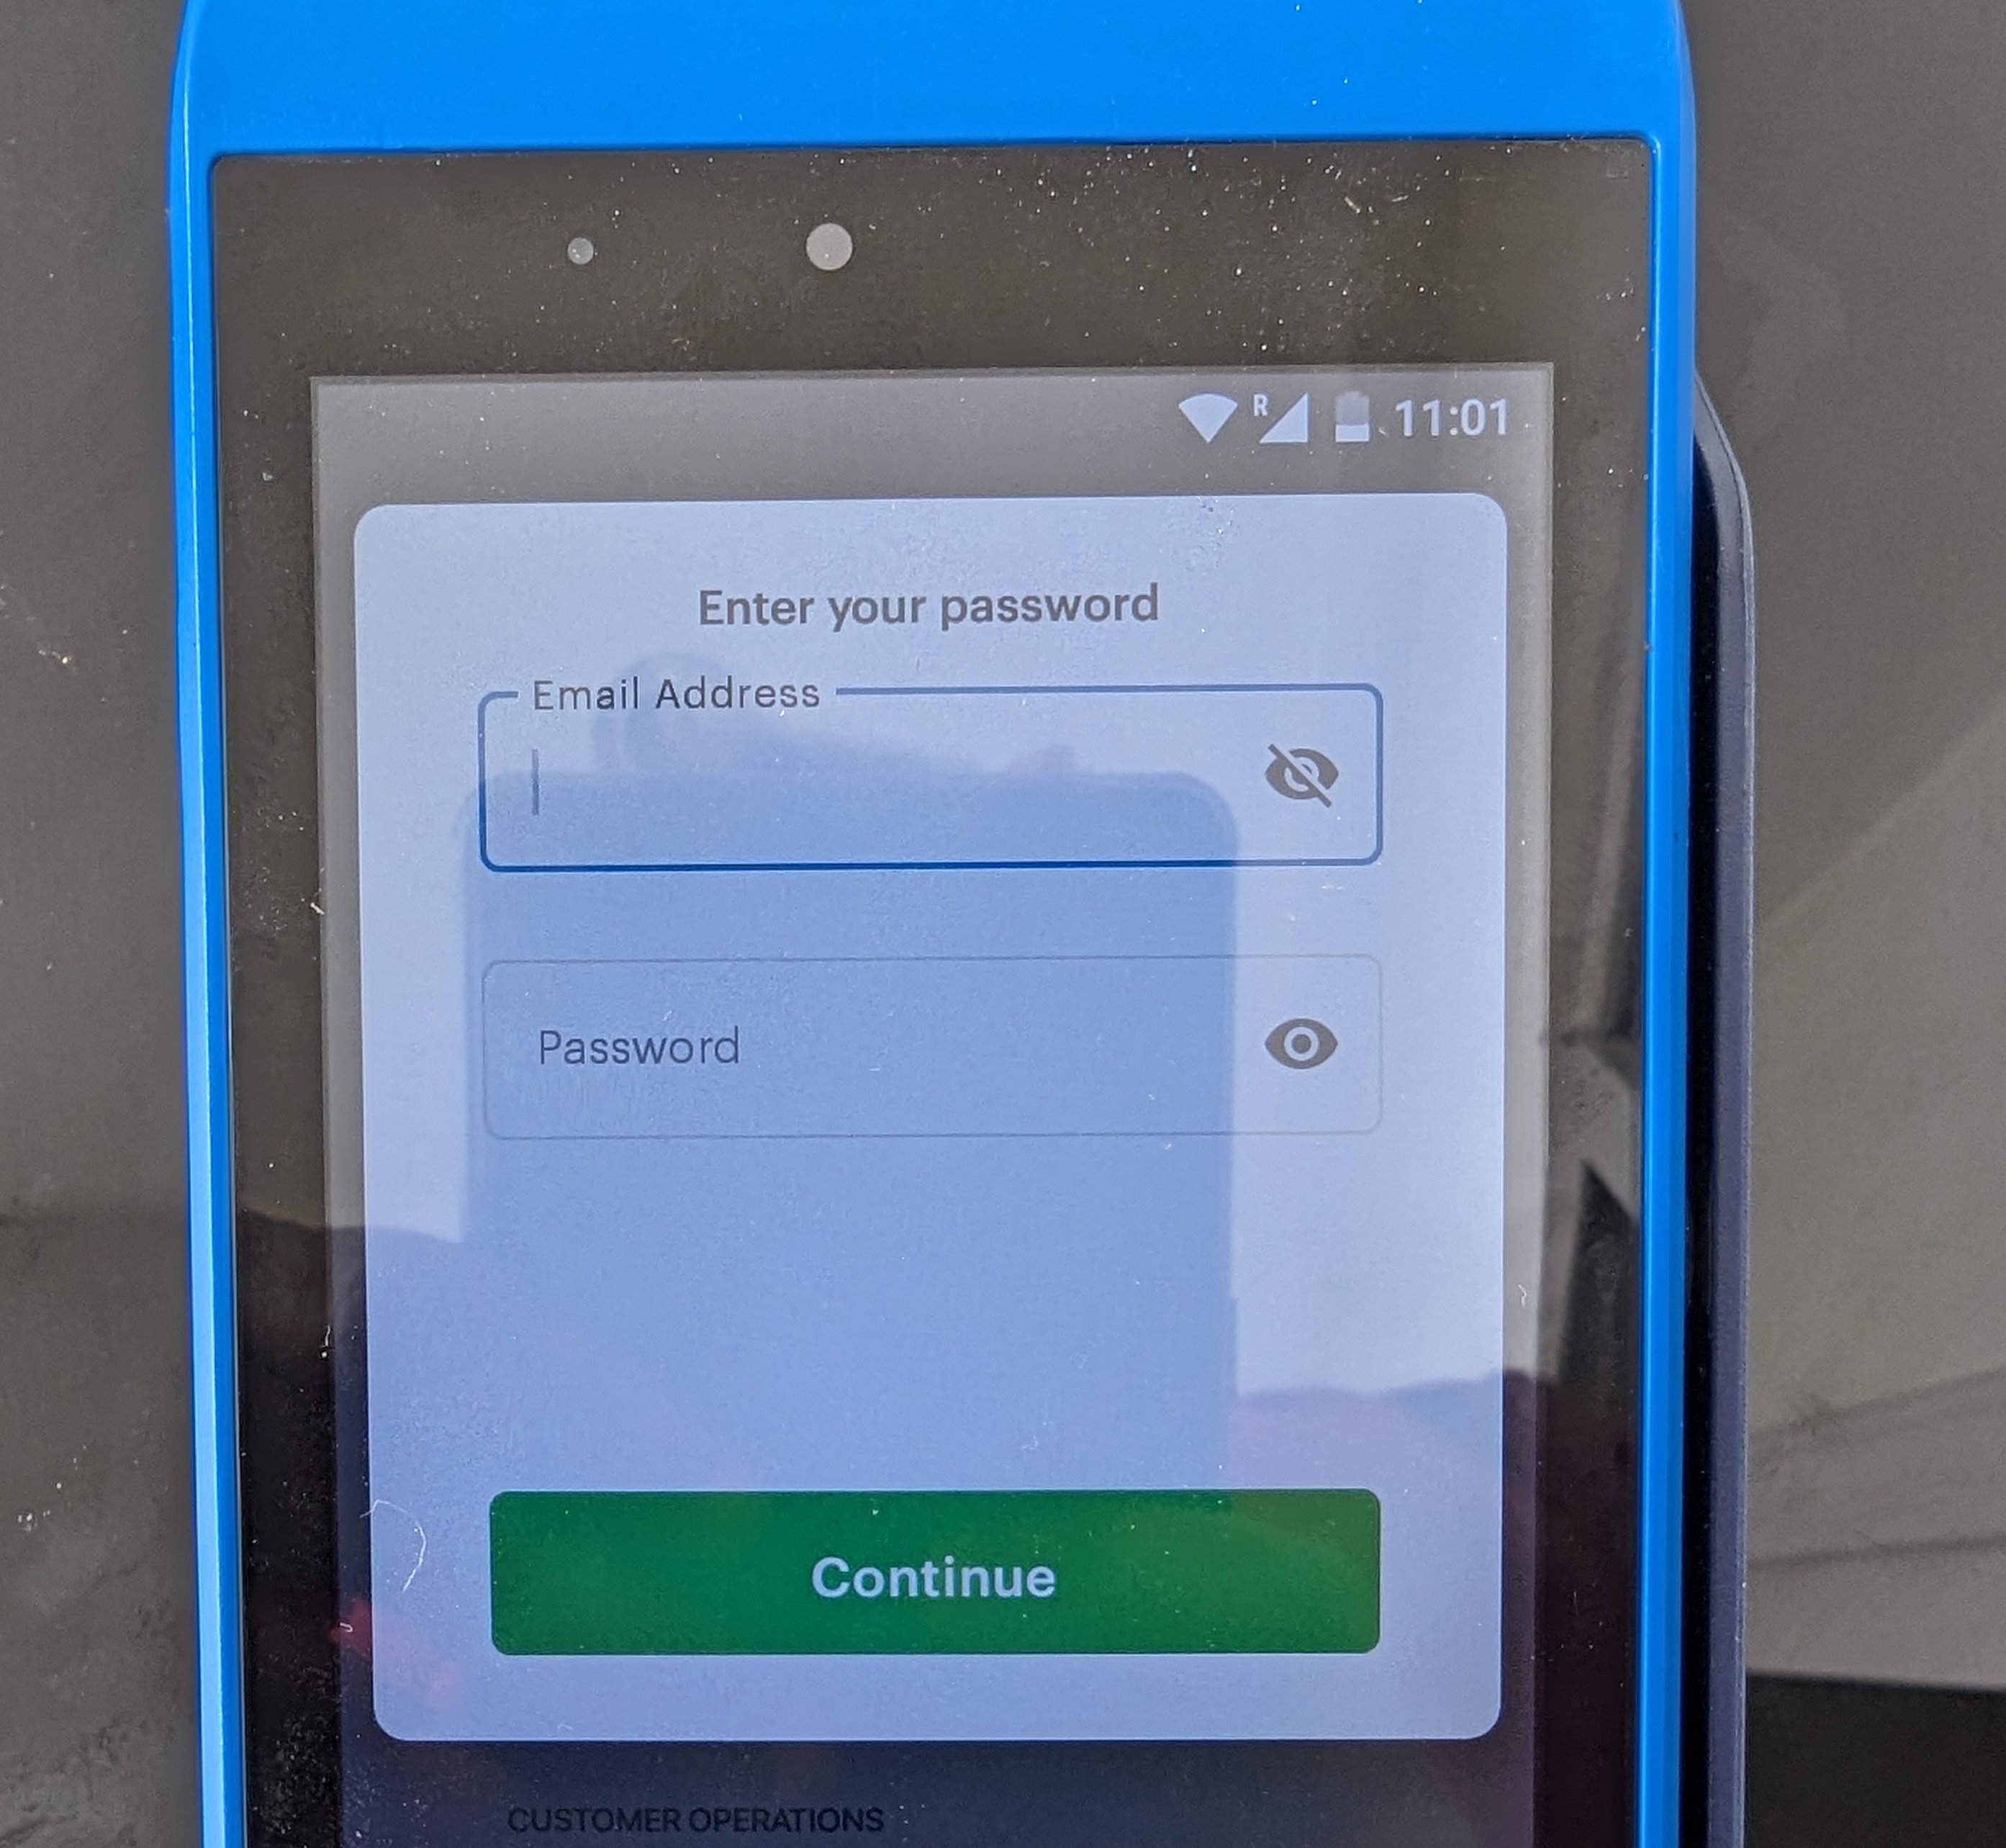
Type in your Paystack dashboard login details (email address and password) on the screen.
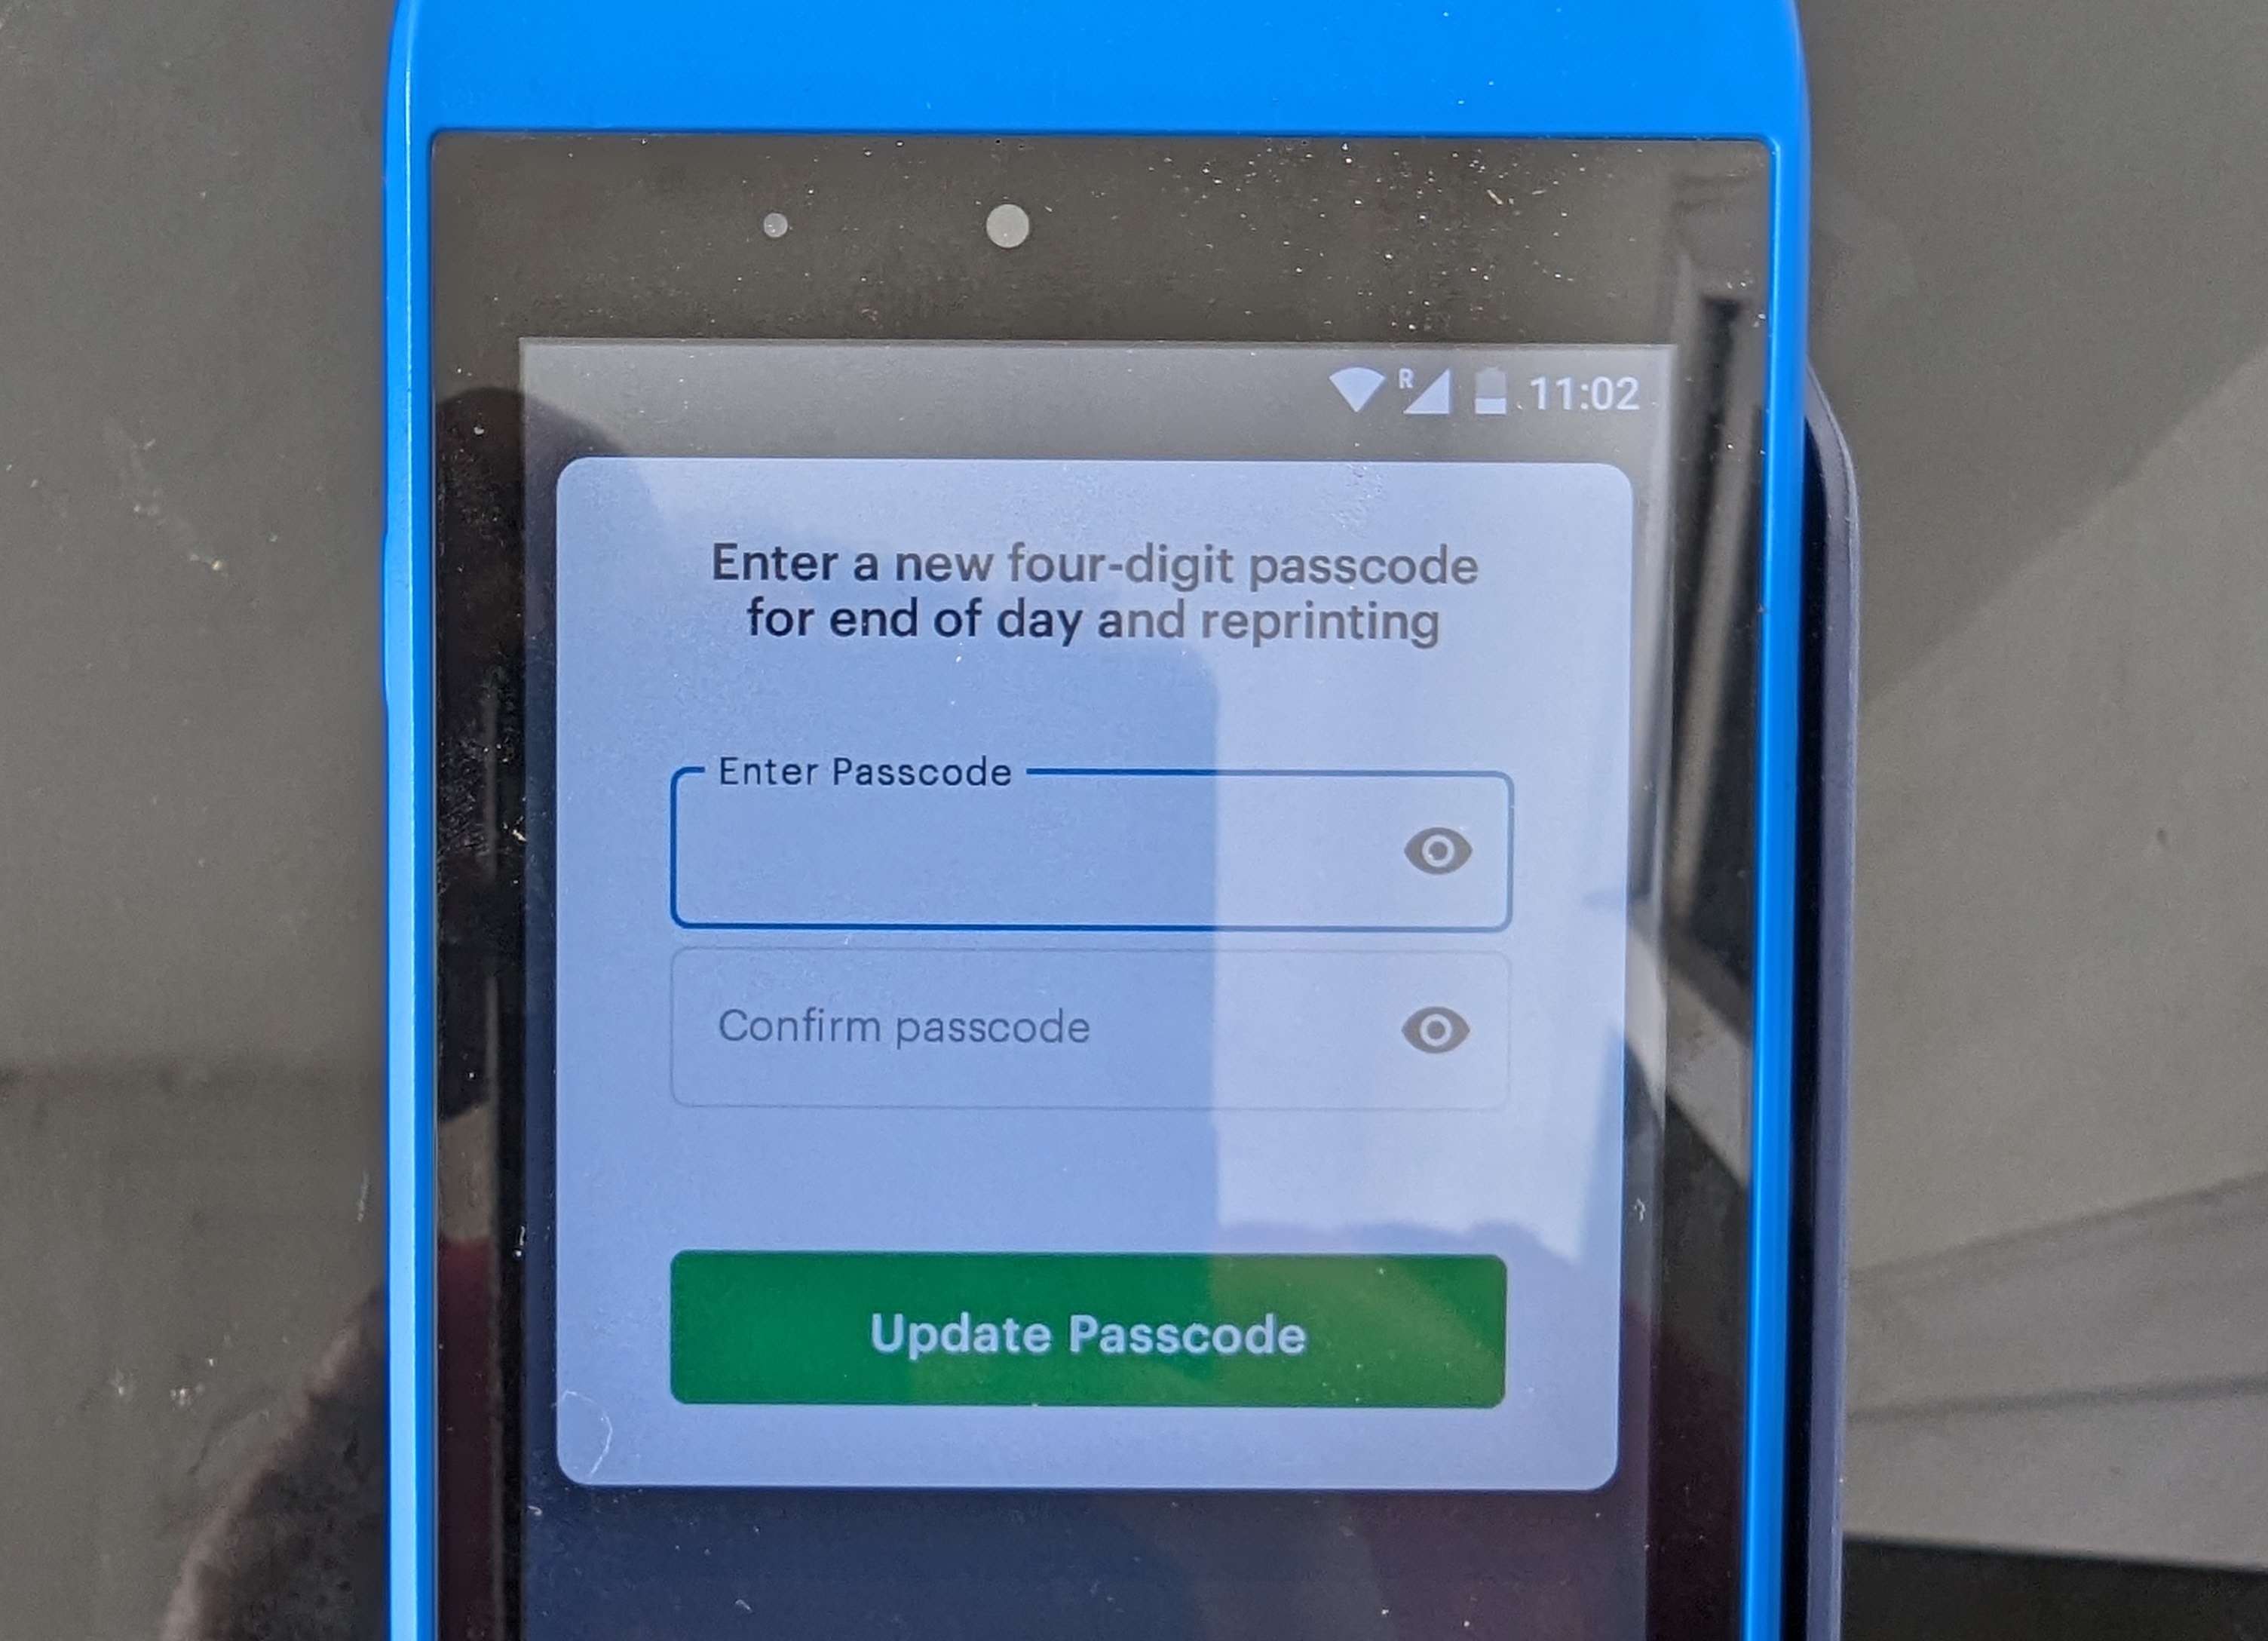
Set a four-digit Passcode of your choice and confirm it.
Once set, you'll be required to enter the passcode whenever you want to print the last transaction receipt or End-of-day reports.
Kindly note that if the wrong PIN is entered up to four times, you’ll be required to log in with your Paystack Dashboard email address and password to create a new PIN. You can also set a new pin anytime from the 'Administrator Operations' section on the settings page.
Setting up your SIM card
The SIM card that comes with your Physical Terminal needs specific settings to connect to the internet. One of those settings is the 'Access Point Name,' popularly known as APN.
The default APN for your SIM card is 'bicsapn', which must be configured before the SIM can connect to the internet.
You can set the APN for your SIM card at any time by following these steps:
On the home screen, go to the menu options and click the 'Settings' icon.
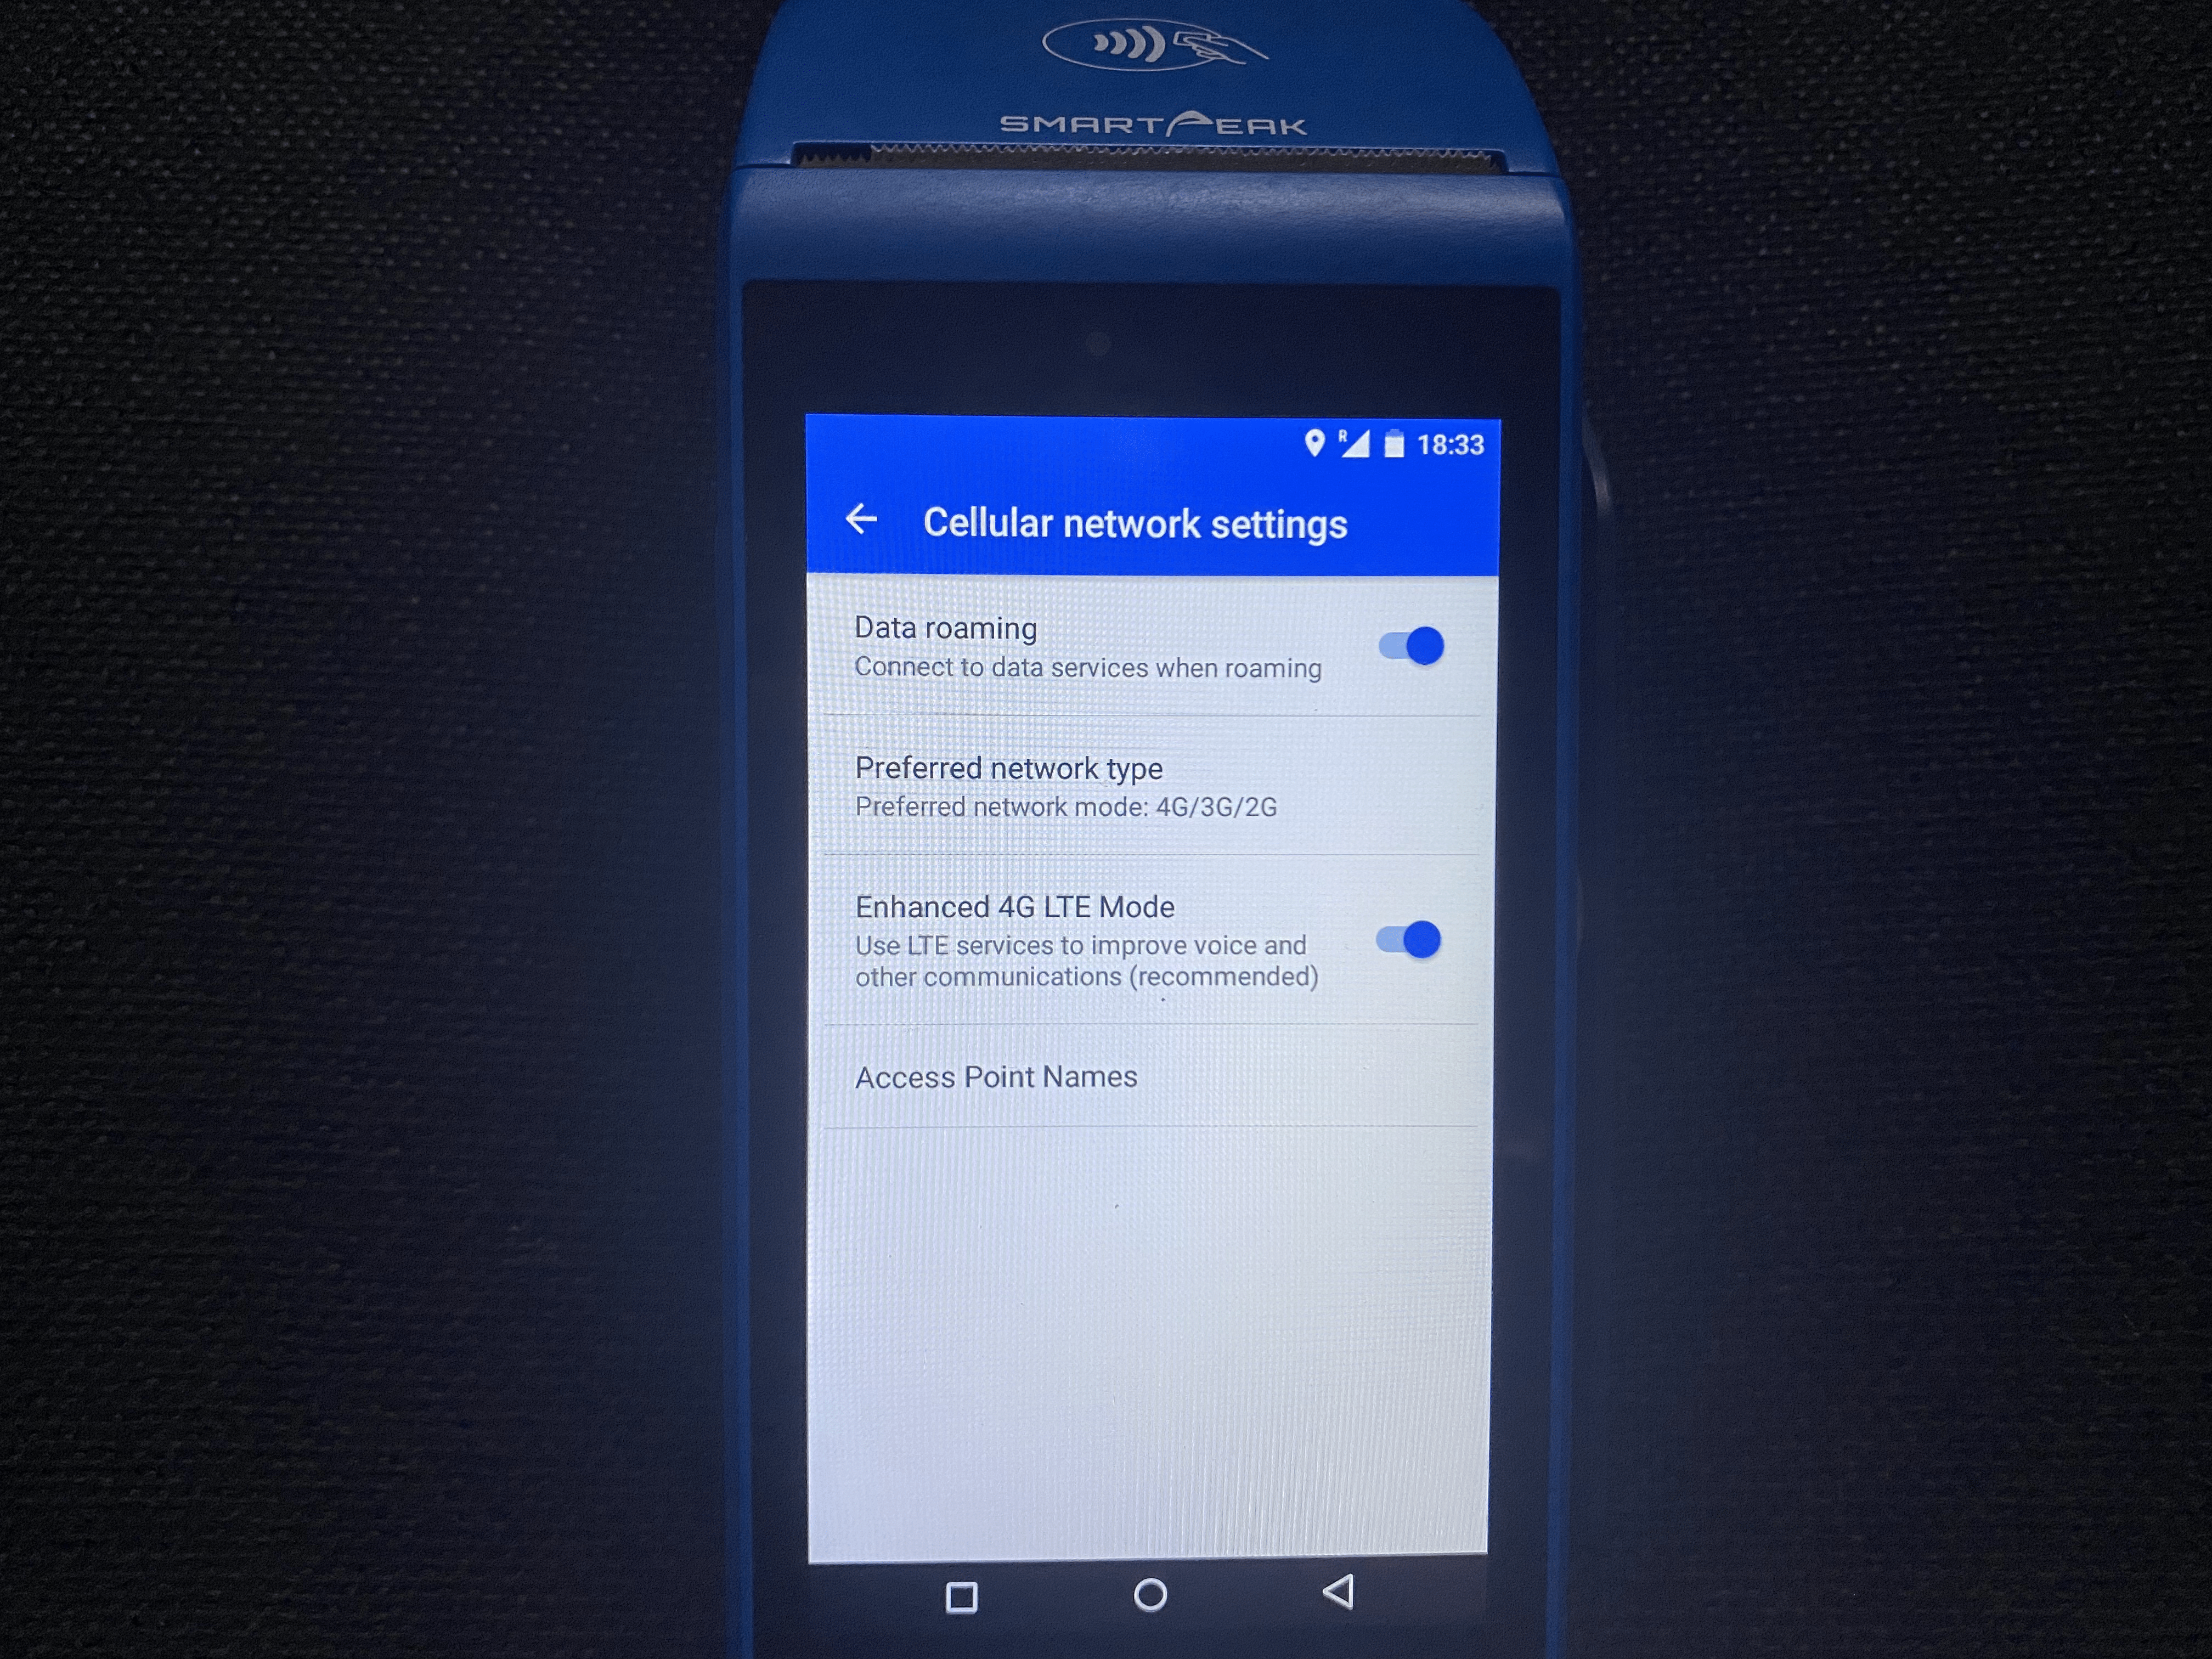
Select 'Cellular networks' or 'mobile network.'
Select 'Access Point Names.' See the image below.
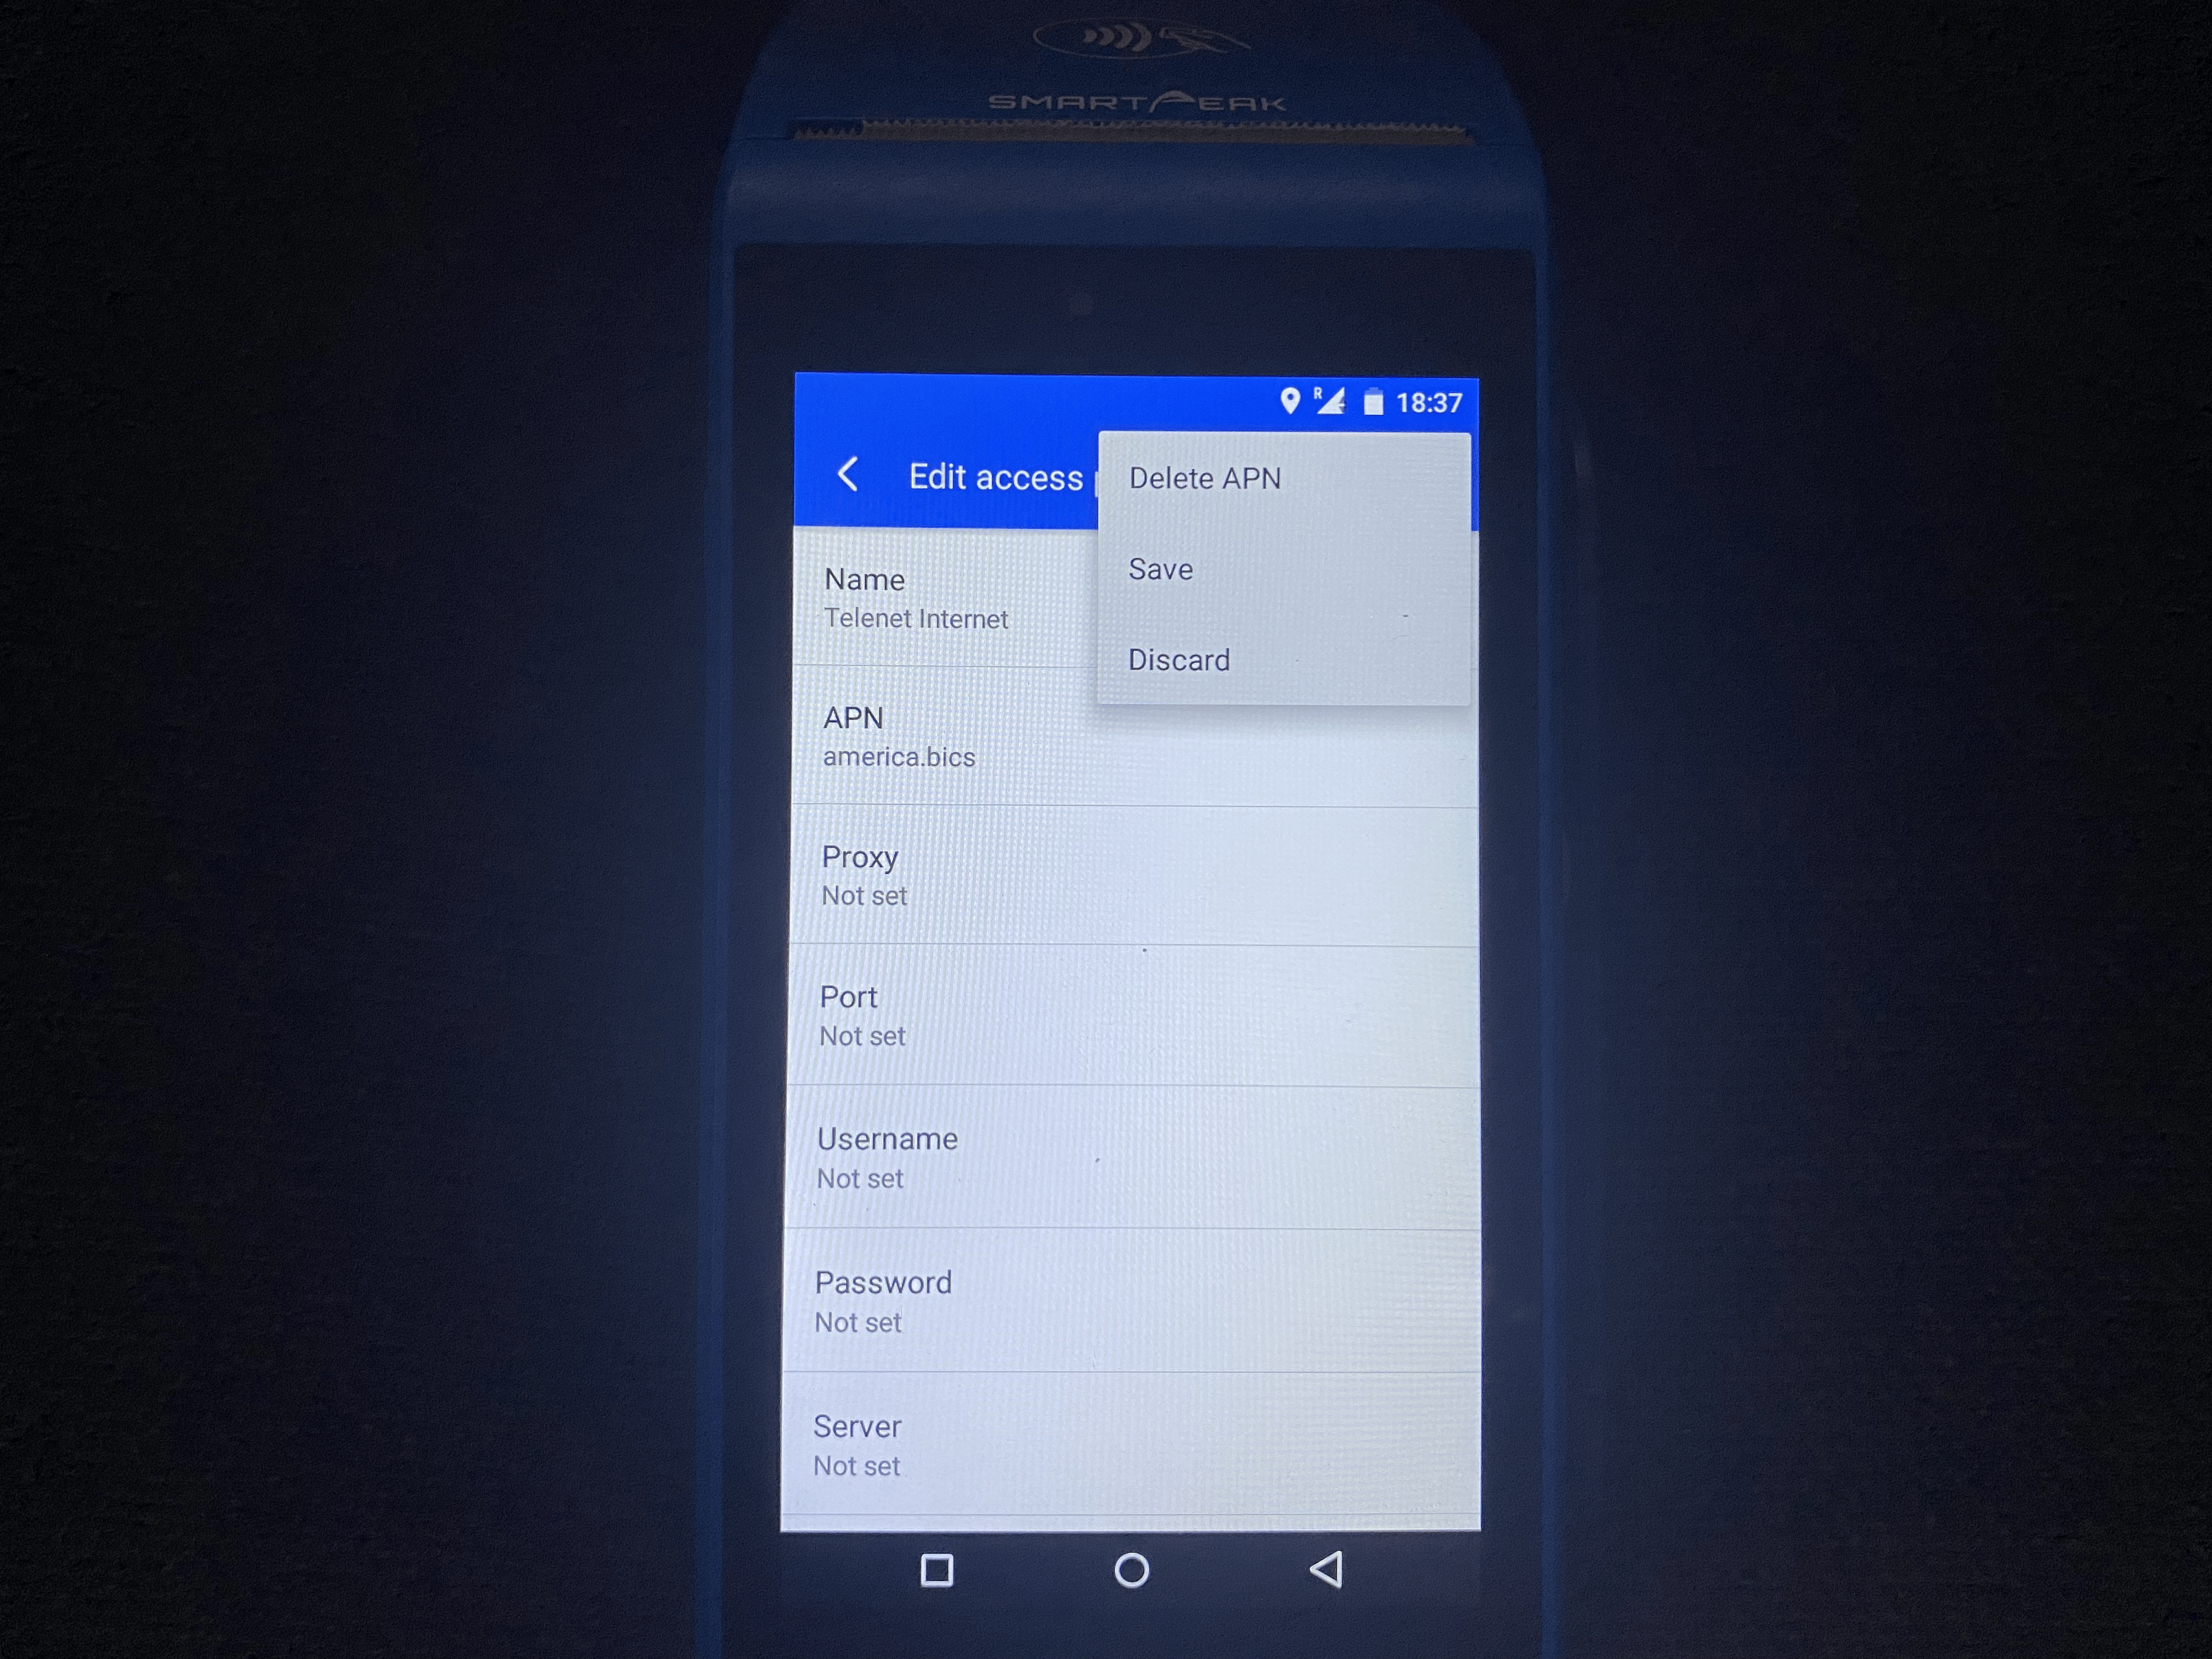
Click the plus (+) button or the vertical dots at the top right and enter the following details:
Name: iot.m2m.net
APN: iot.m2m.net
Click the vertical dots at the top right corner of the screen and select 'Save'.
Restart the terminal and wait a few minutes for the SIM card to connect to the internet.
Finding your Physical Terminal Device Serial Number (DSN)
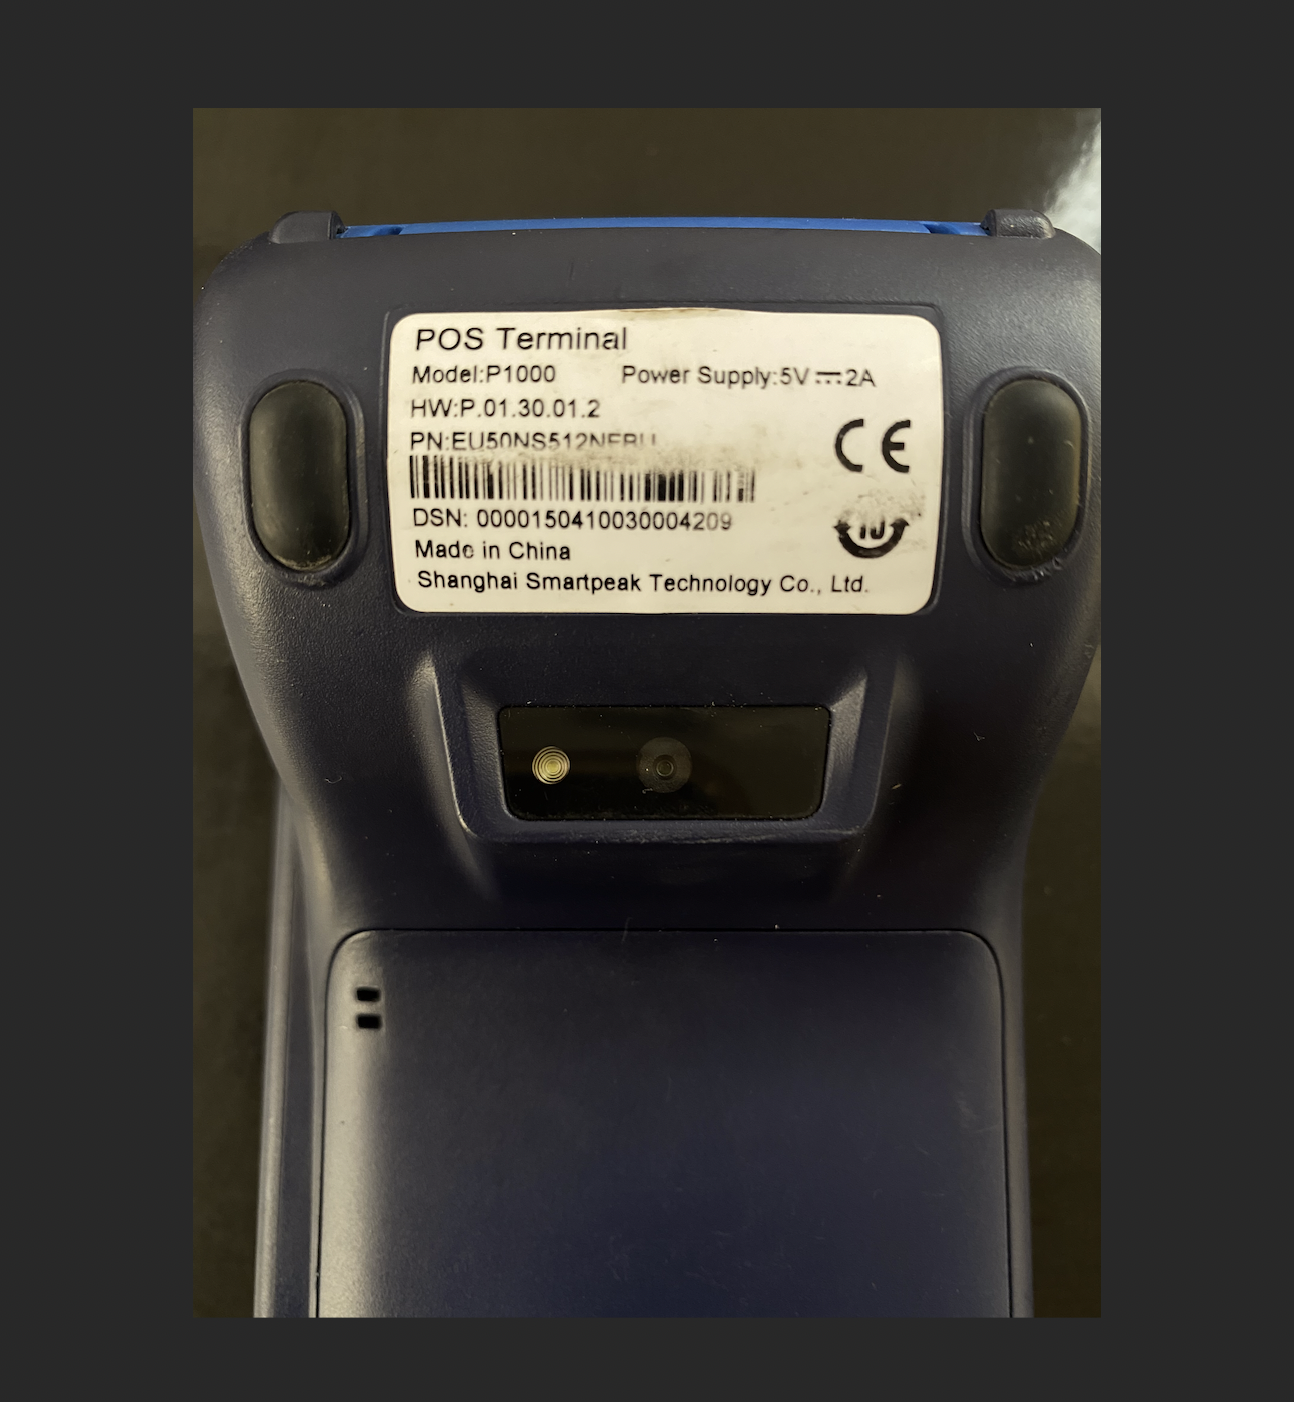
Your Paystack Terminal has a unique serial number called the Device Serial Number or DSN. It can be found in two ways:
On the manufacturer's details at the back of the device as shown below:
In the device settings
You can retrieve your DSN by following these steps:
Click the Menu button on the Home screen.
Select 'Settings'.
Scroll through the page and select 'About Device' or 'Information'.
Select 'Status' and scroll down the page. You will find the Device Serial Number close to the bottom of the page.
Reprinting the last transaction receipt on your Physical Terminal
To reprint a receipt for the last transaction done on your Paystack Terminal, please follow the steps outlined below:
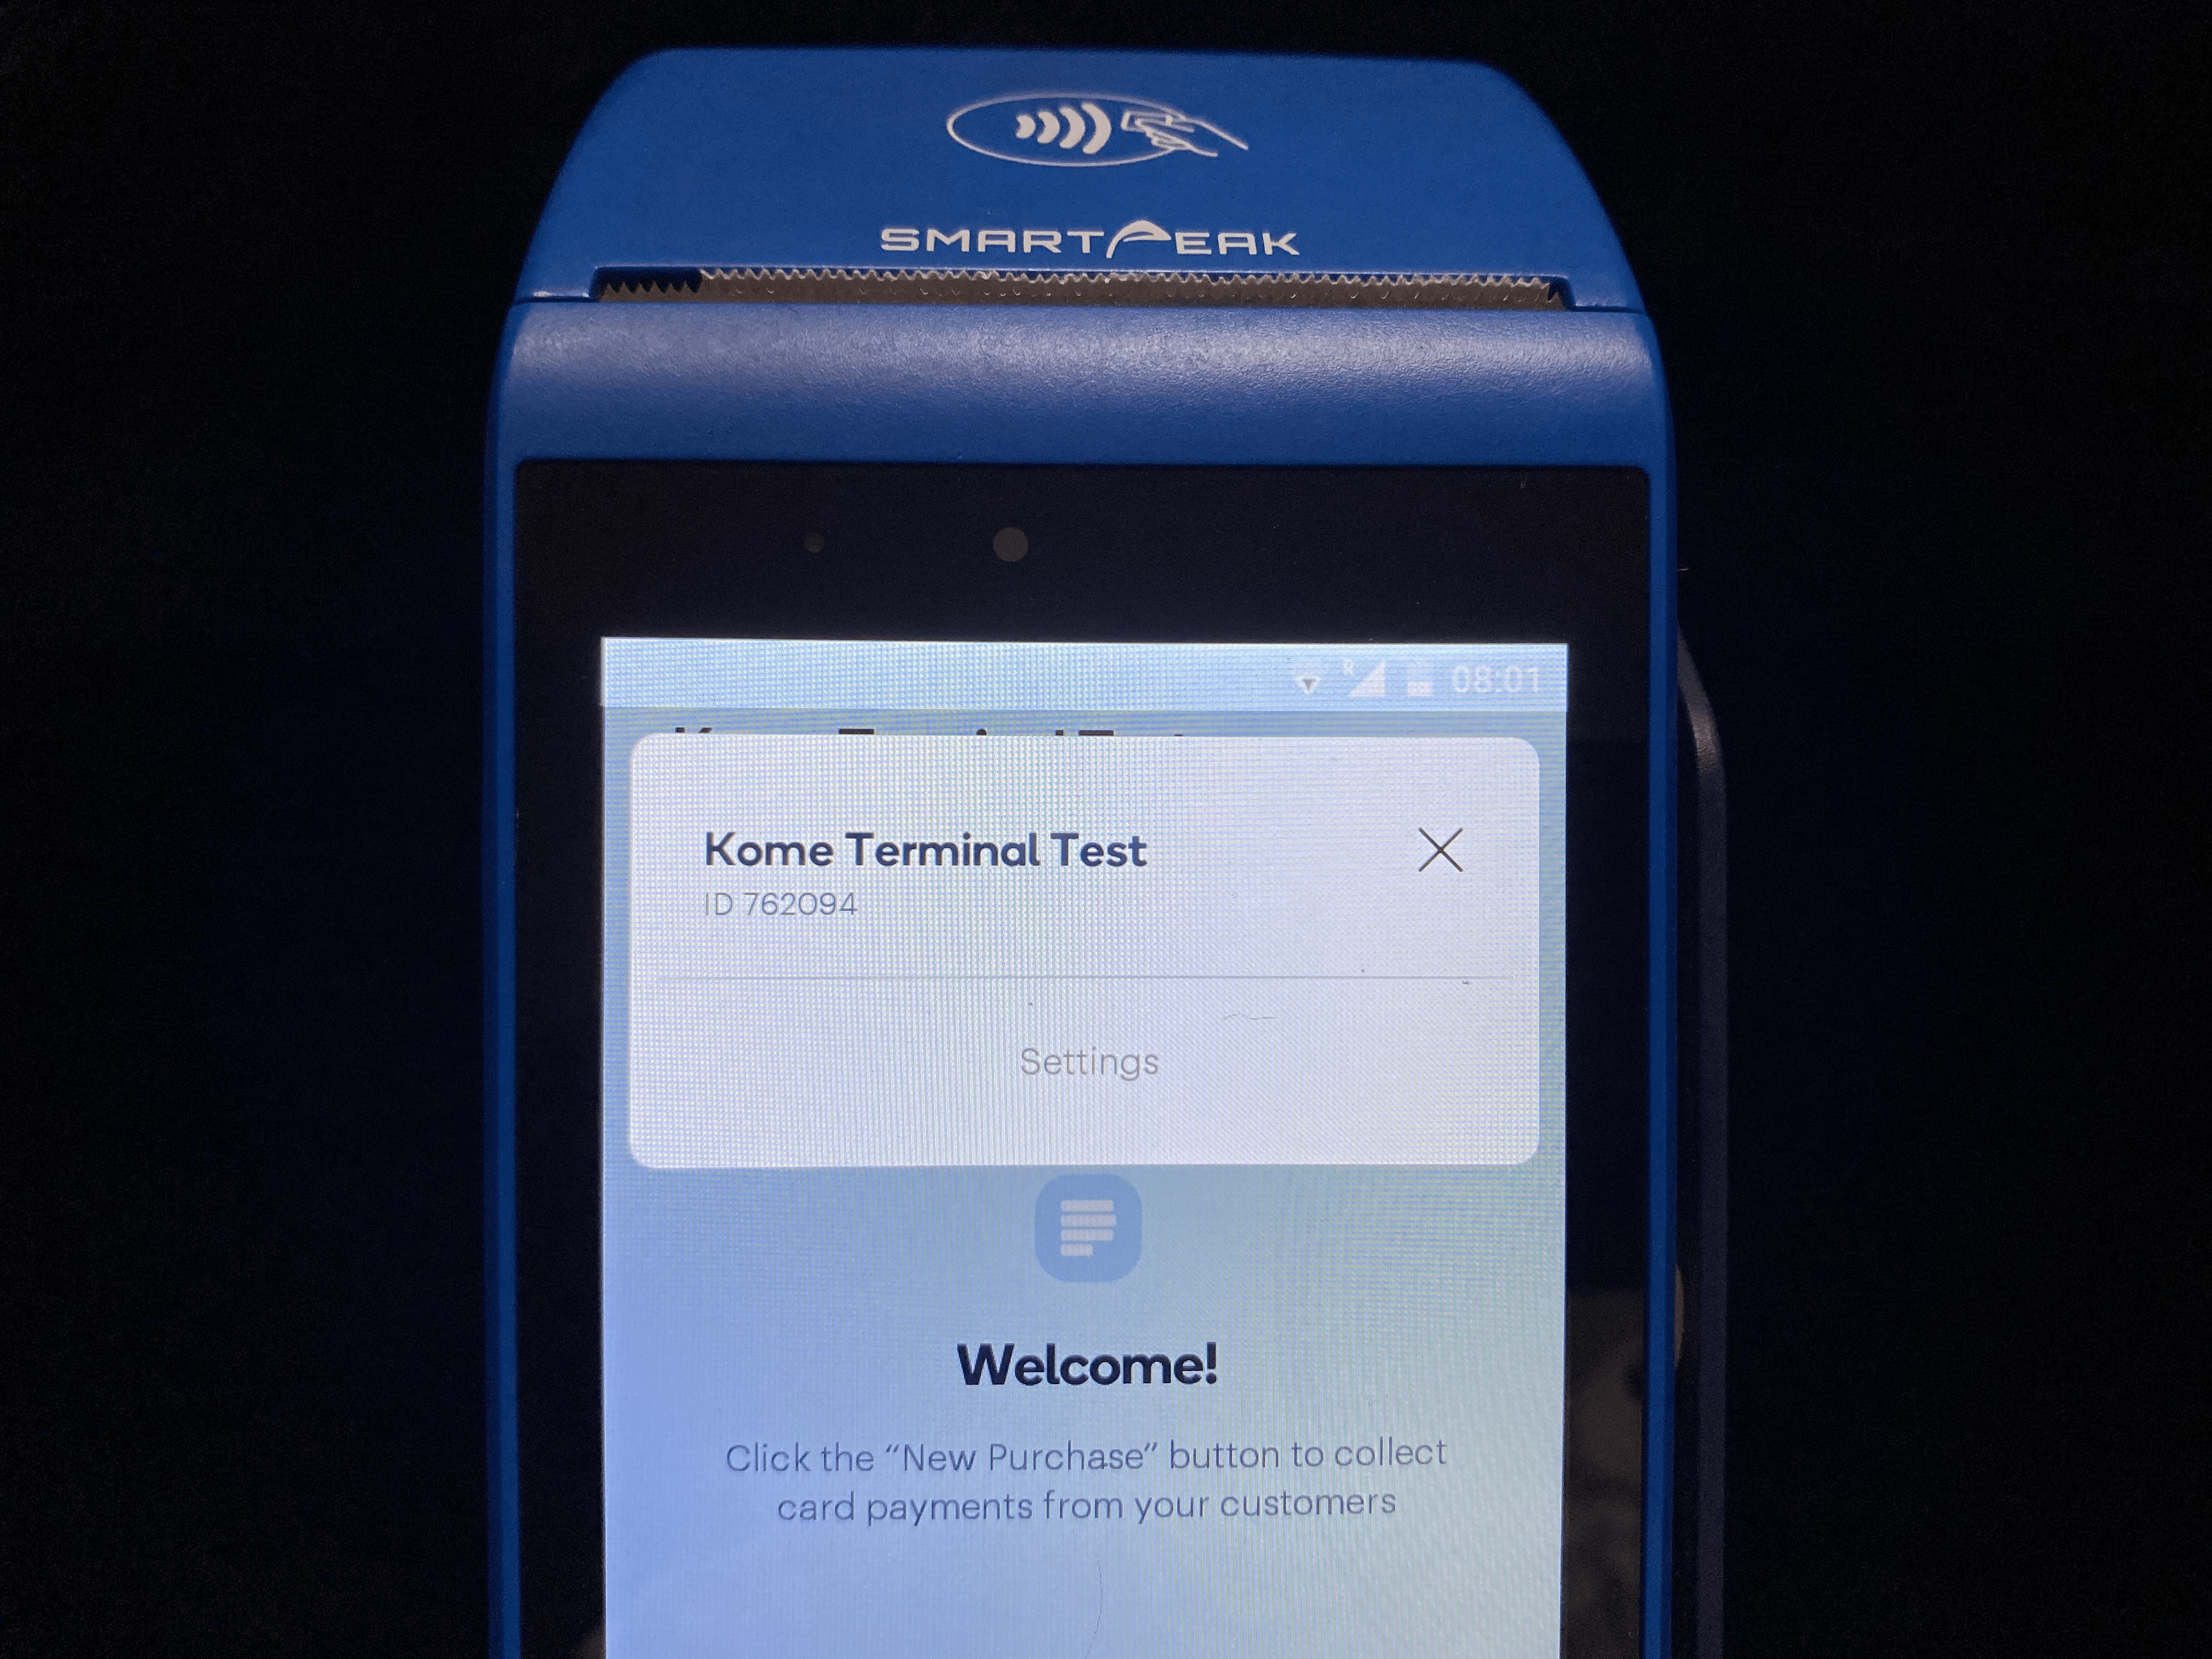
Open the Paystack app on your device and select 'Settings' under your Paystack business name, as shown below:
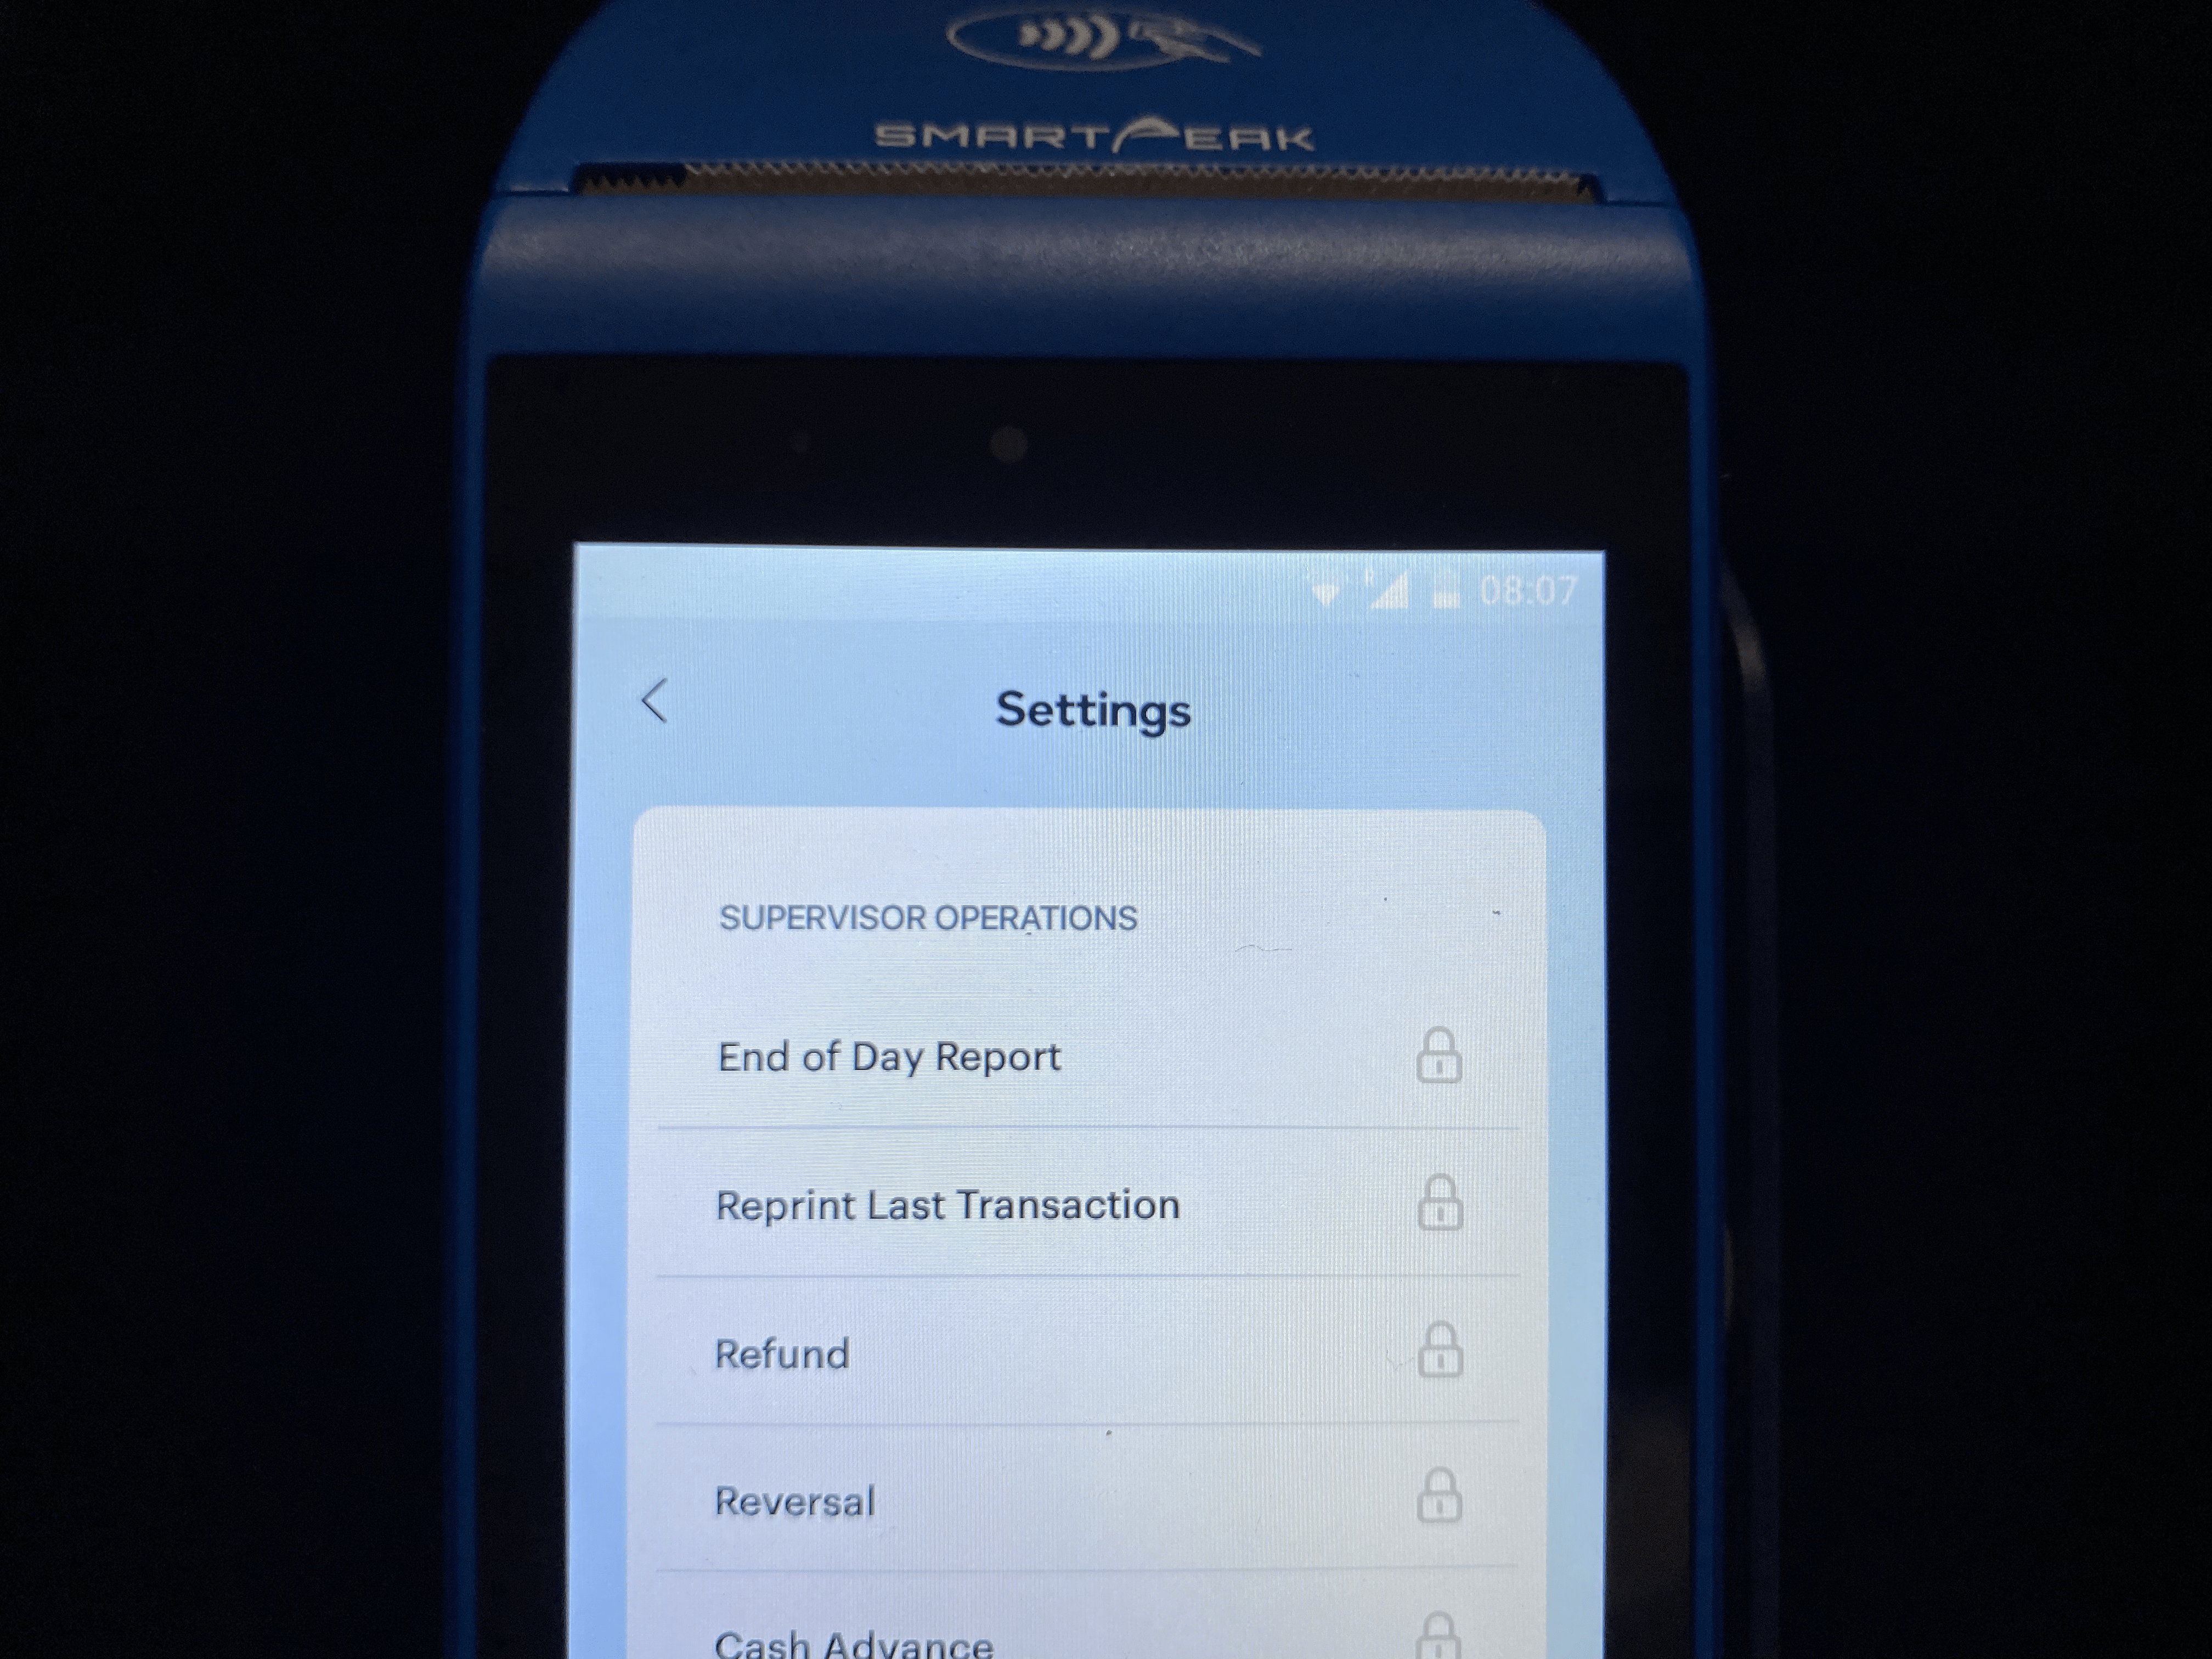
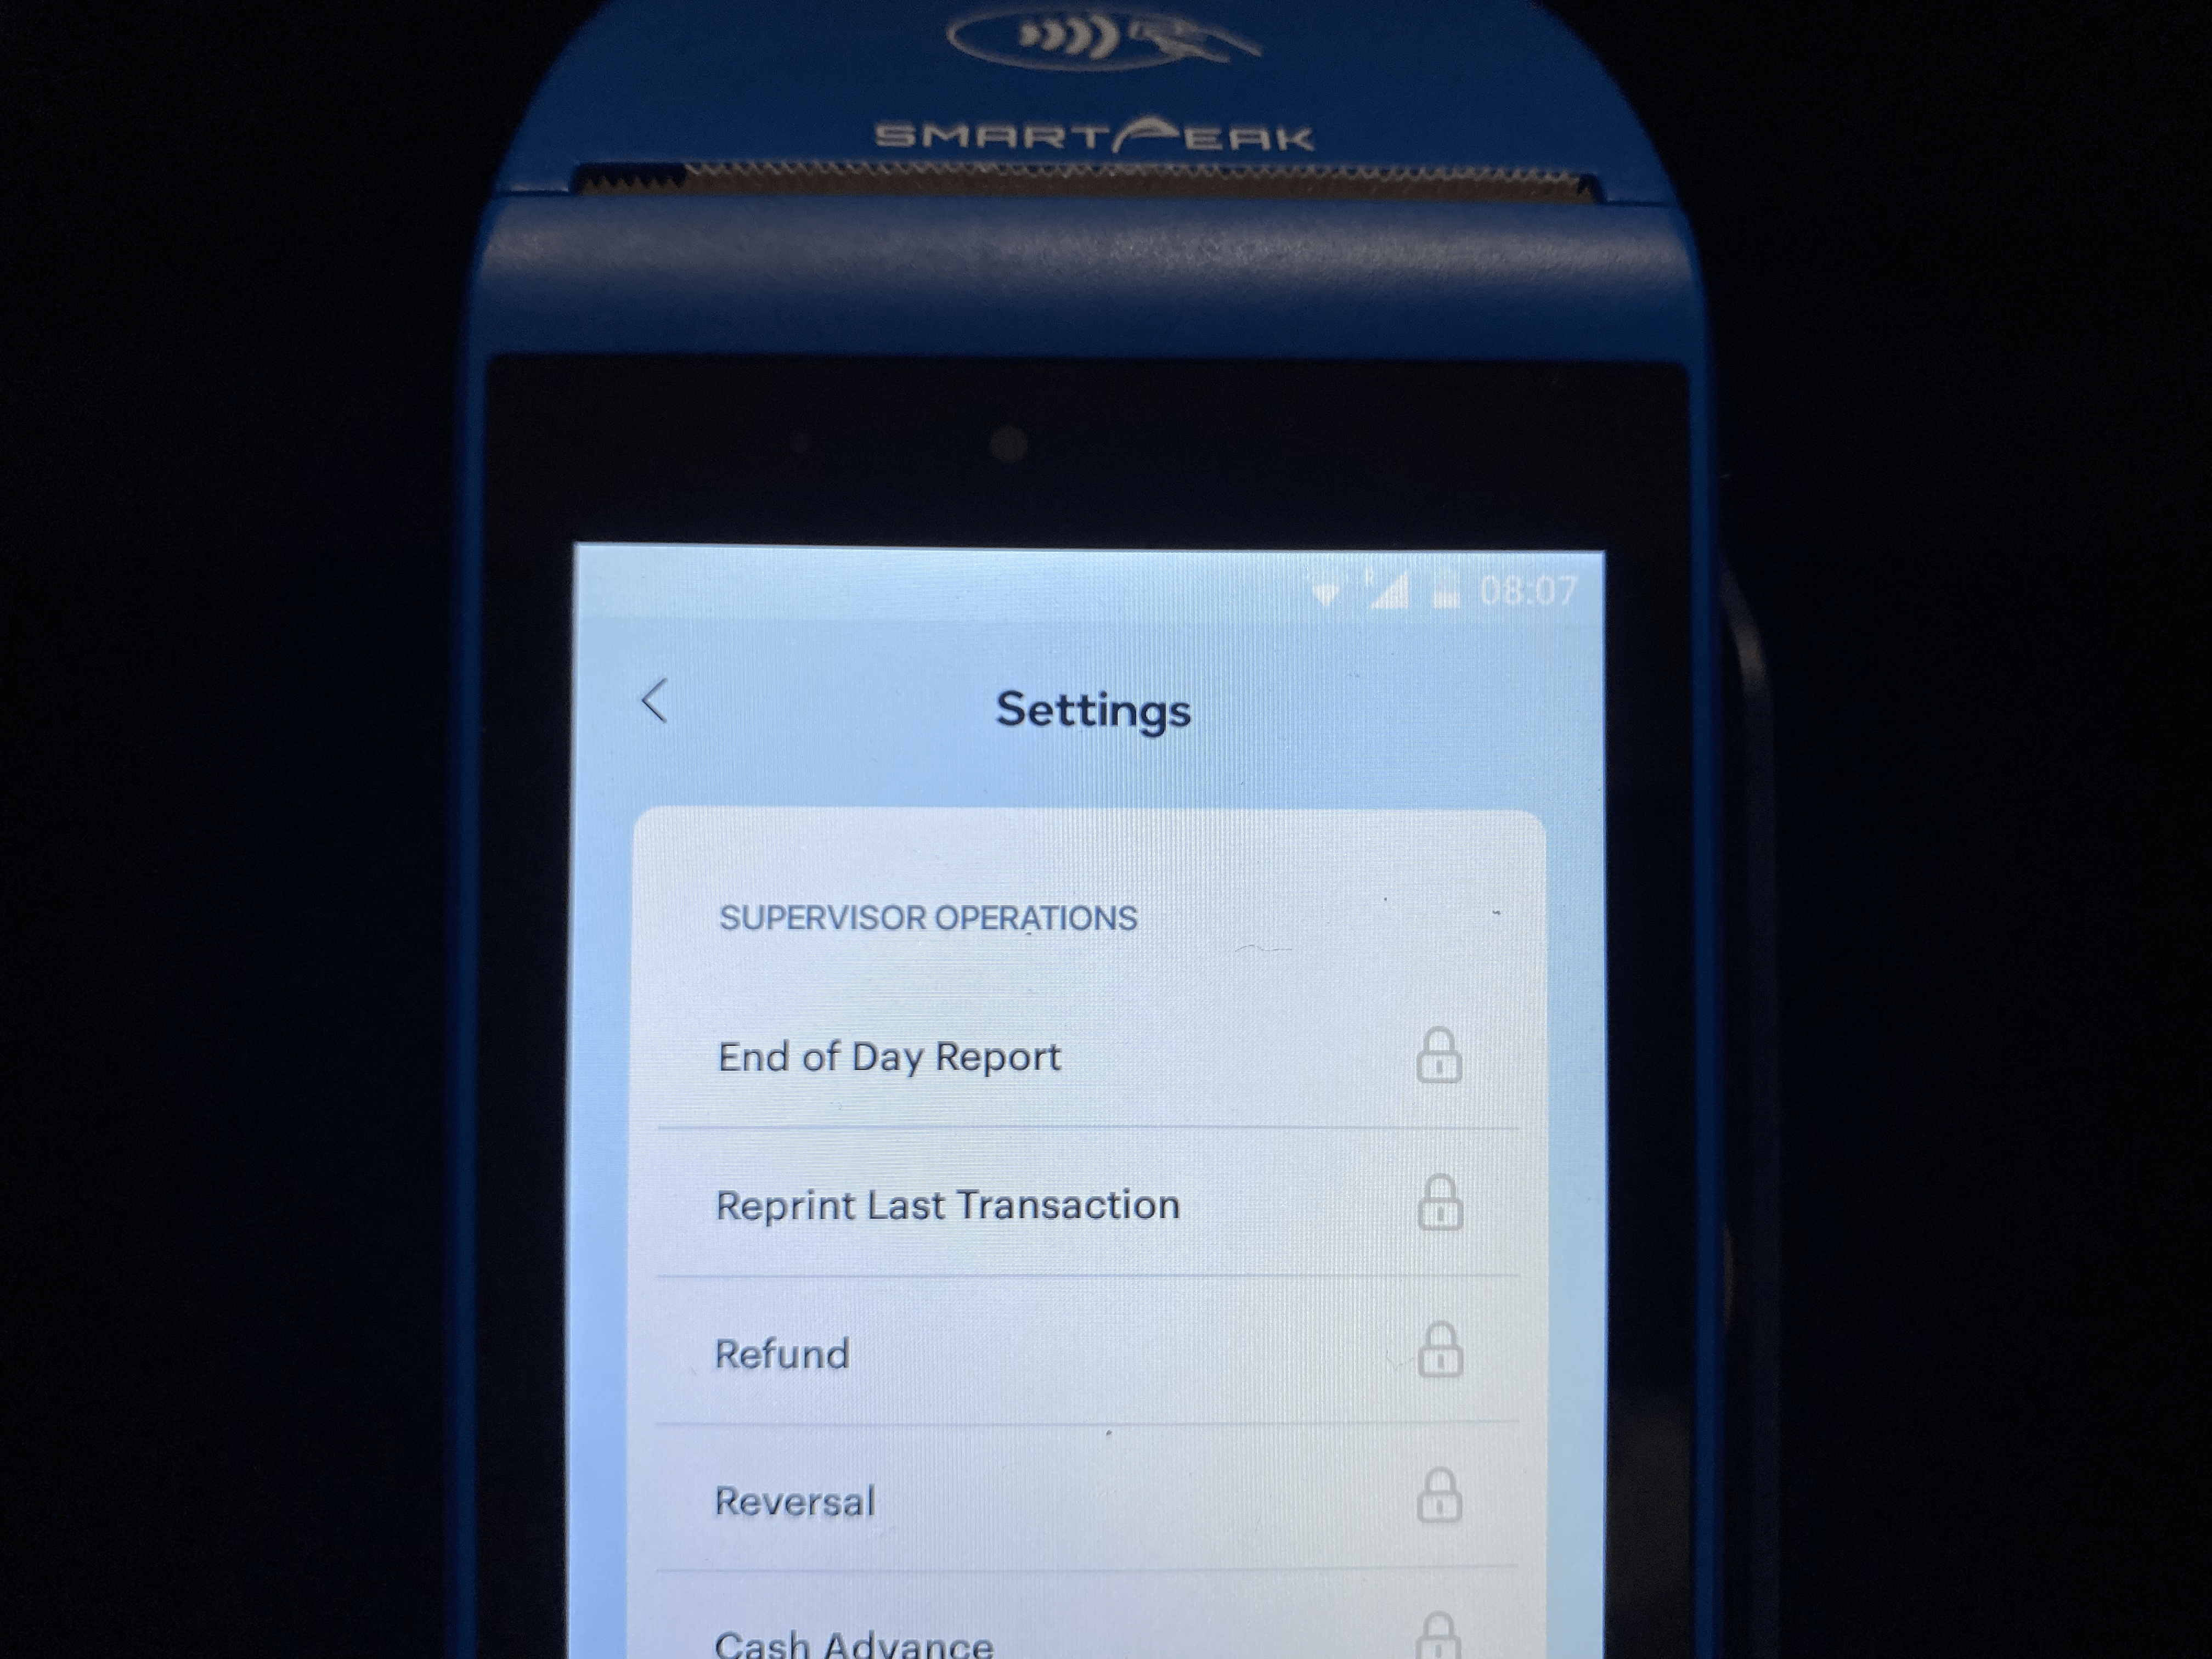
Select 'Reprint Last Transaction' from the list as shown below:
Log in with your Paystack business email and password or insert your four-digit passcode. You may also create a separate user account for terminal operations by inviting a user (email address) to your Paystack Dashboard and giving them the default customer support role.
A receipt will be printed as soon as you log in successfully, provided that the last transaction on the terminal is successful. For payments done via 'bank transfer' on the terminal, you can reprint the customer receipt at any time from the 'Transfers' page on the terminal without needing a password.
Printing an end-of-day report on your Physical Terminal
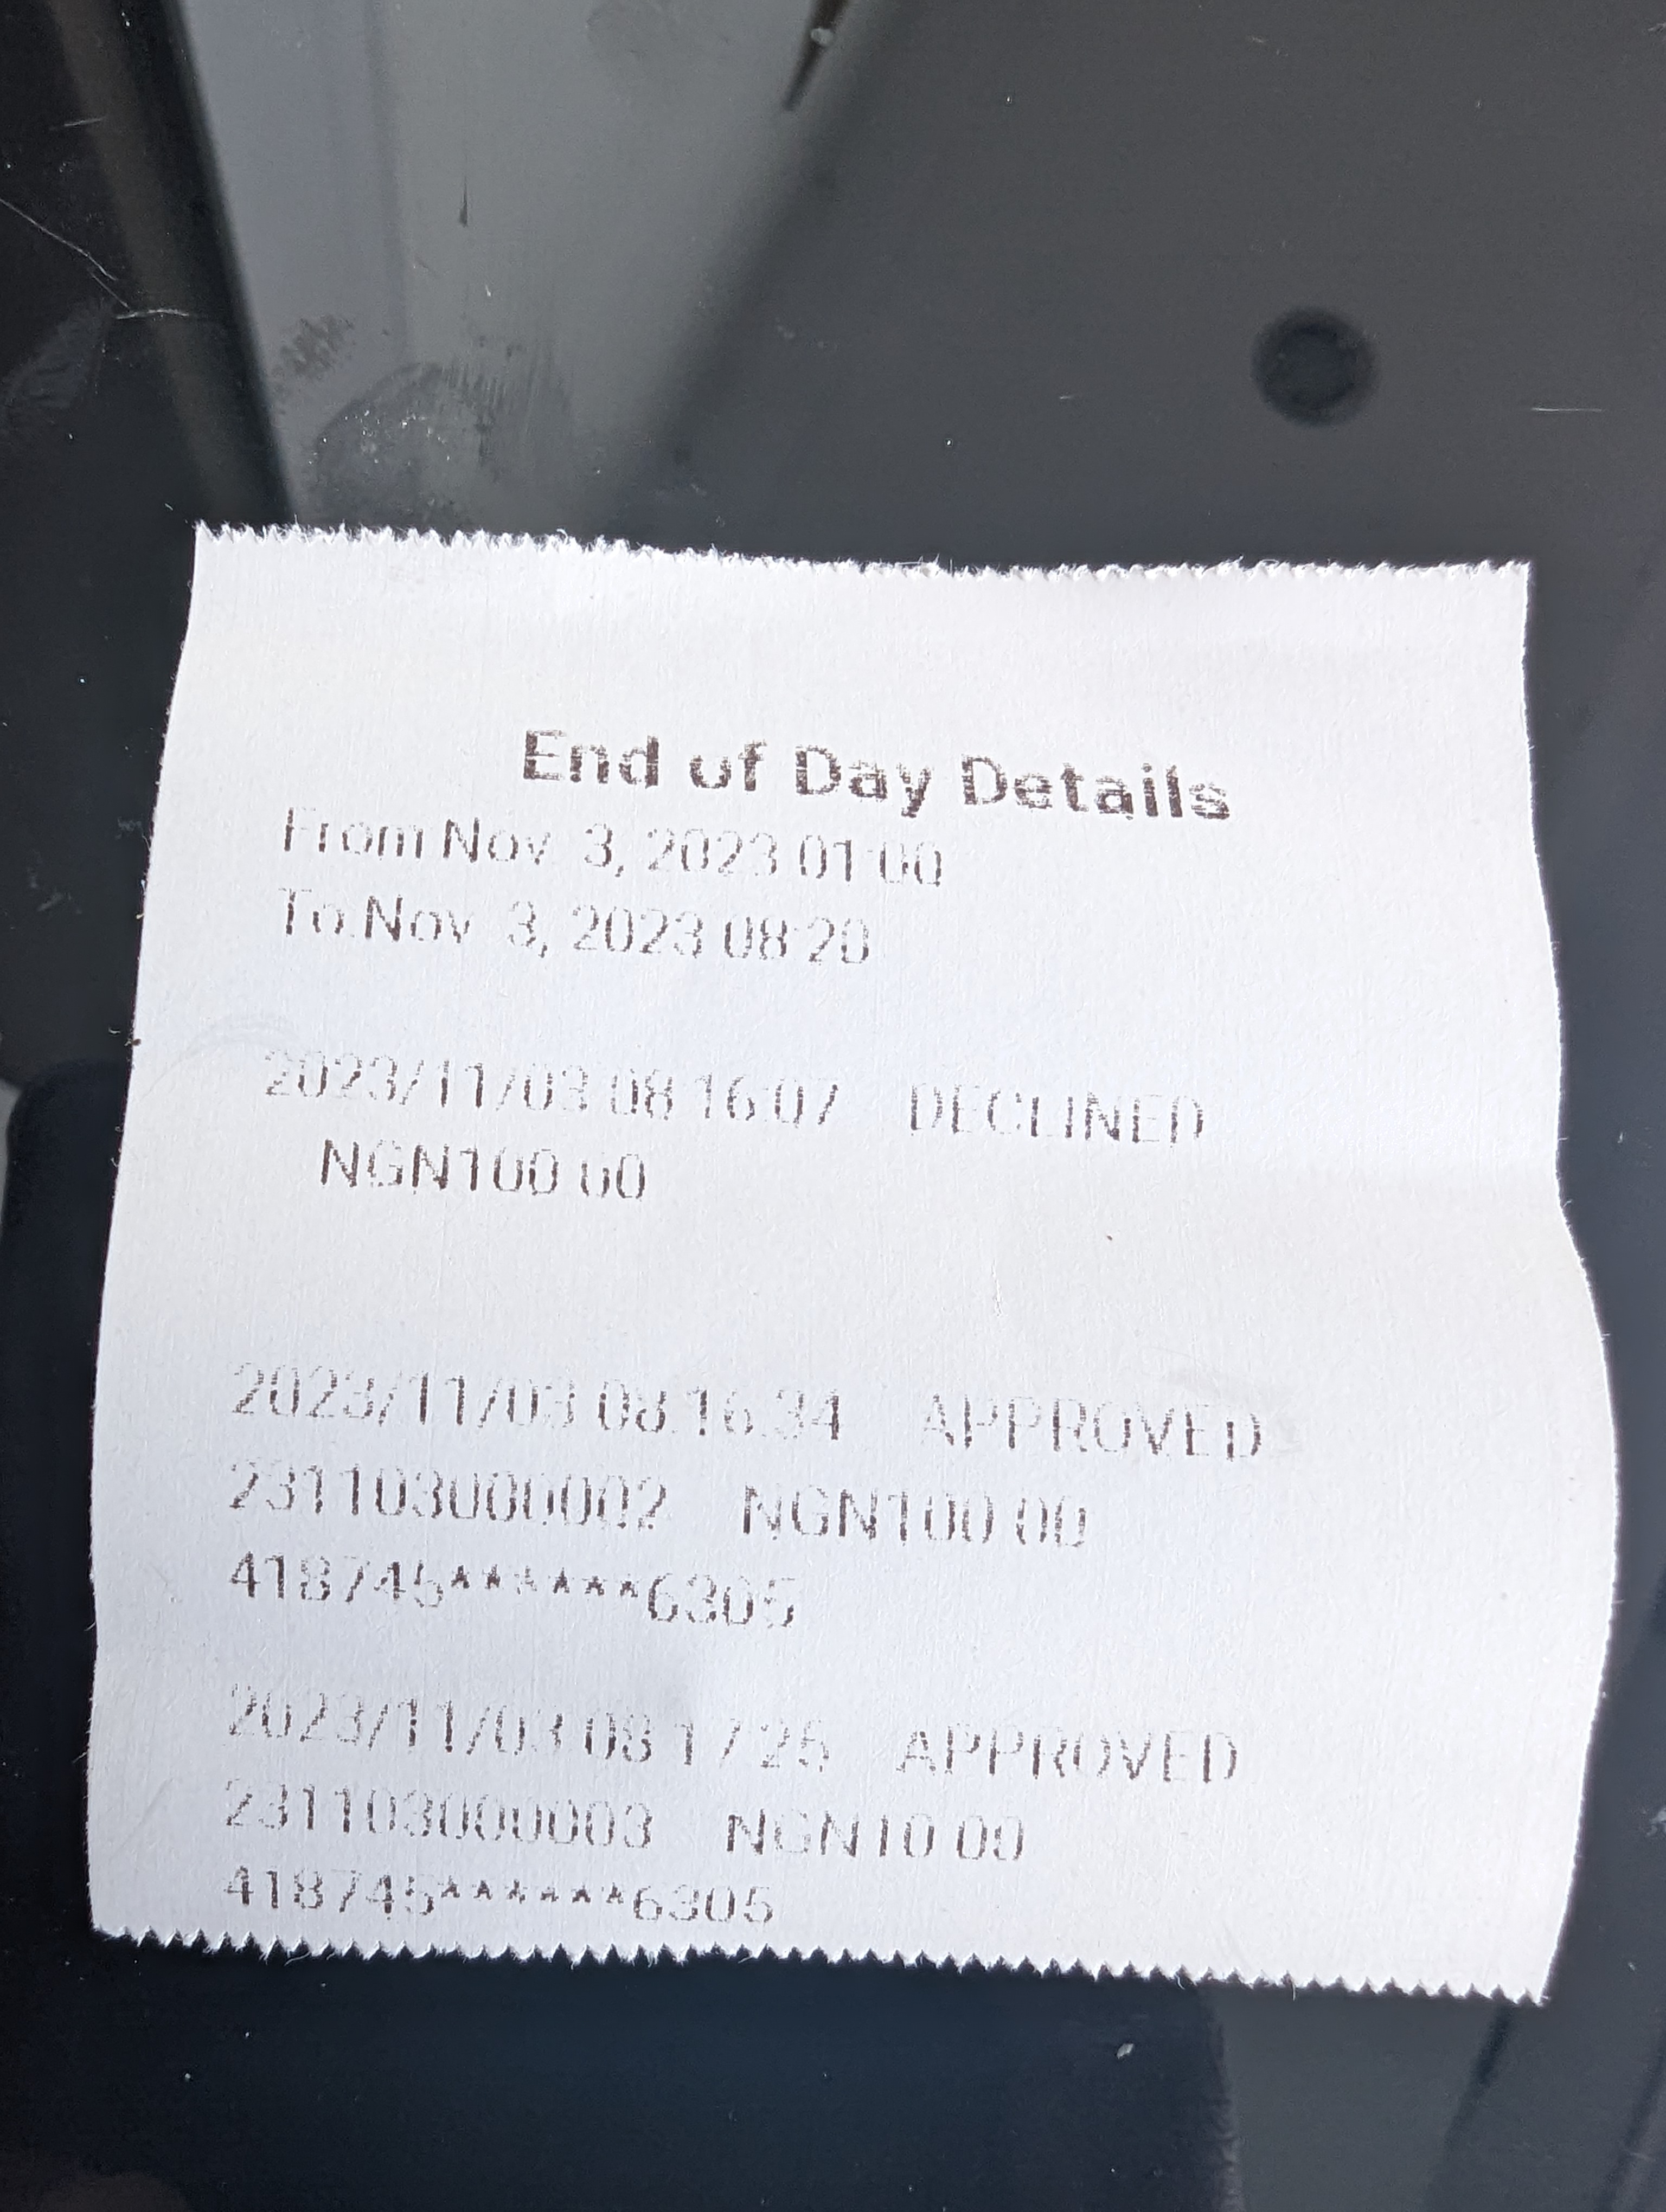
An end-of-day report shows all the transactions and the total amount processed on a Physical Terminal on a given day.
There are two types of end-of-day reports:
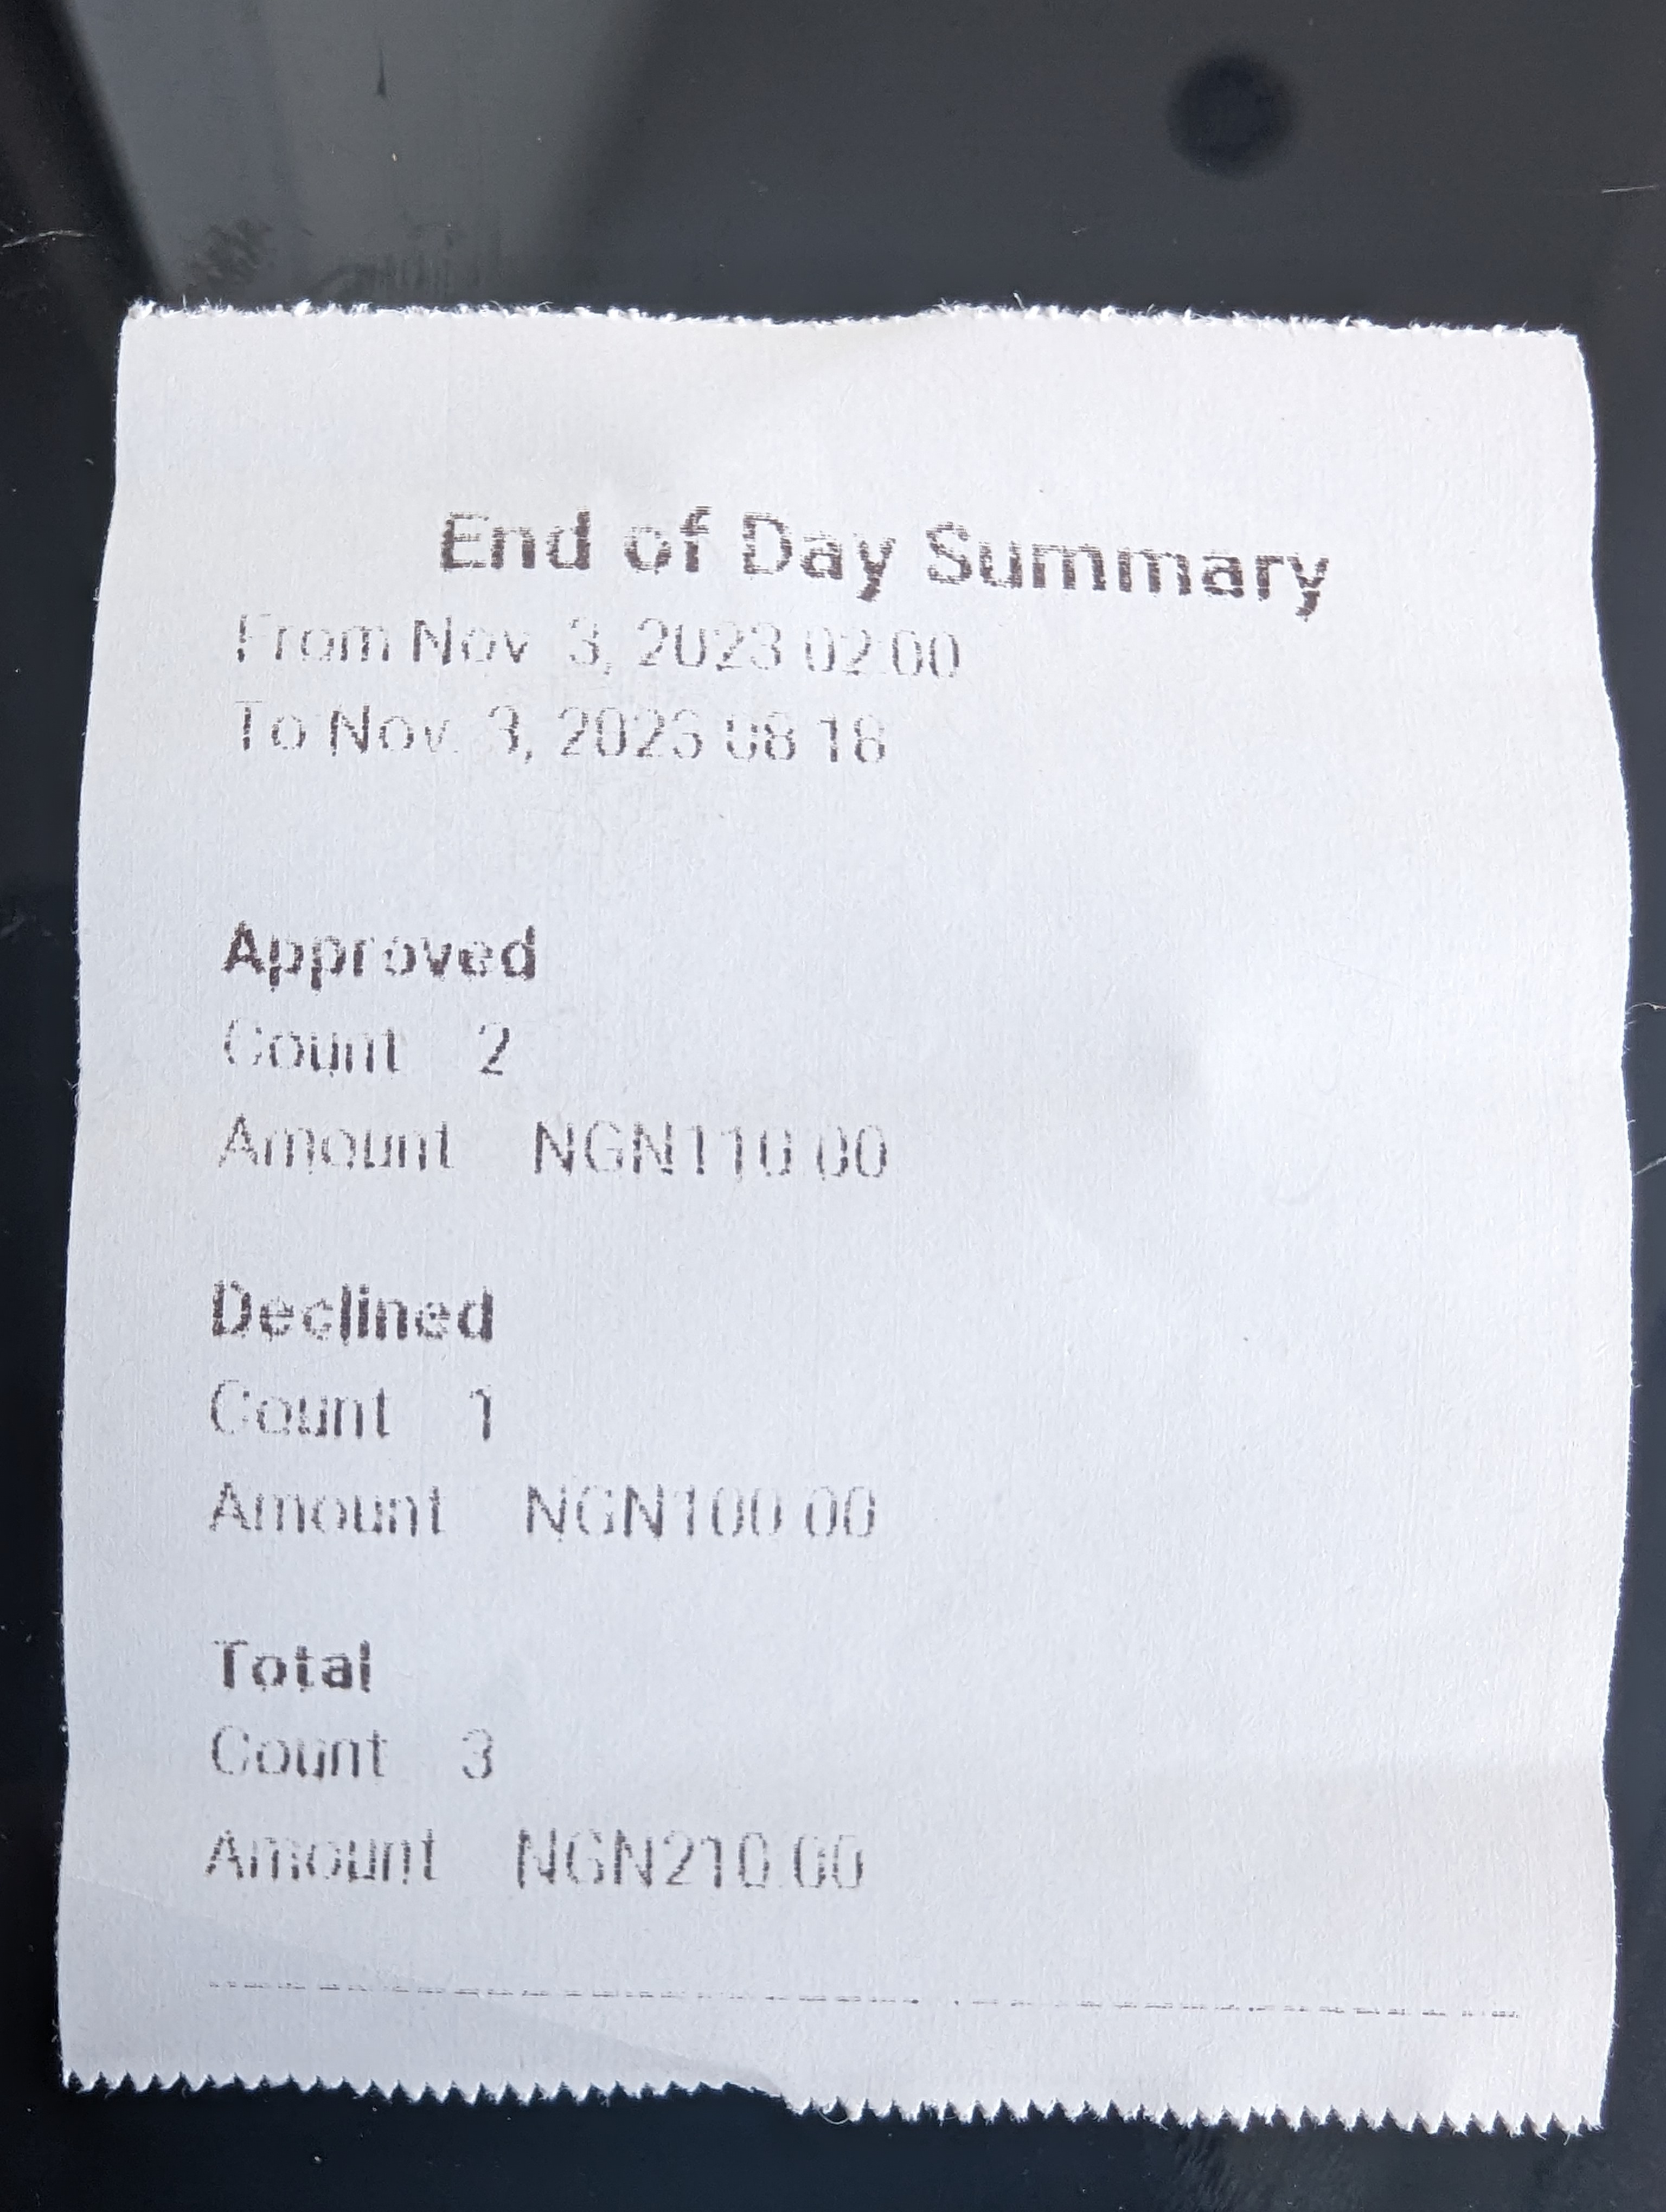
Summary Report: This summarises the total number of transactions processed on a Physical Terminal on a given day and the total amount.
Full Report: This shows a more detailed report about the transactions processed. The full report contains the amount, date, time, payment channel, and transaction status. It also includes the total number of transactions and total amount, like the summary report.
Here are two images showing what both types of end-of-day reports look like:
At the moment, you can only print an end-of-day report on your Terminal for the last 30 days at any given time if your app version is lower than 2.6.3. This means that you will not be able to generate a report from your Physical Terminal for any day that is more than 30 days from the current date.
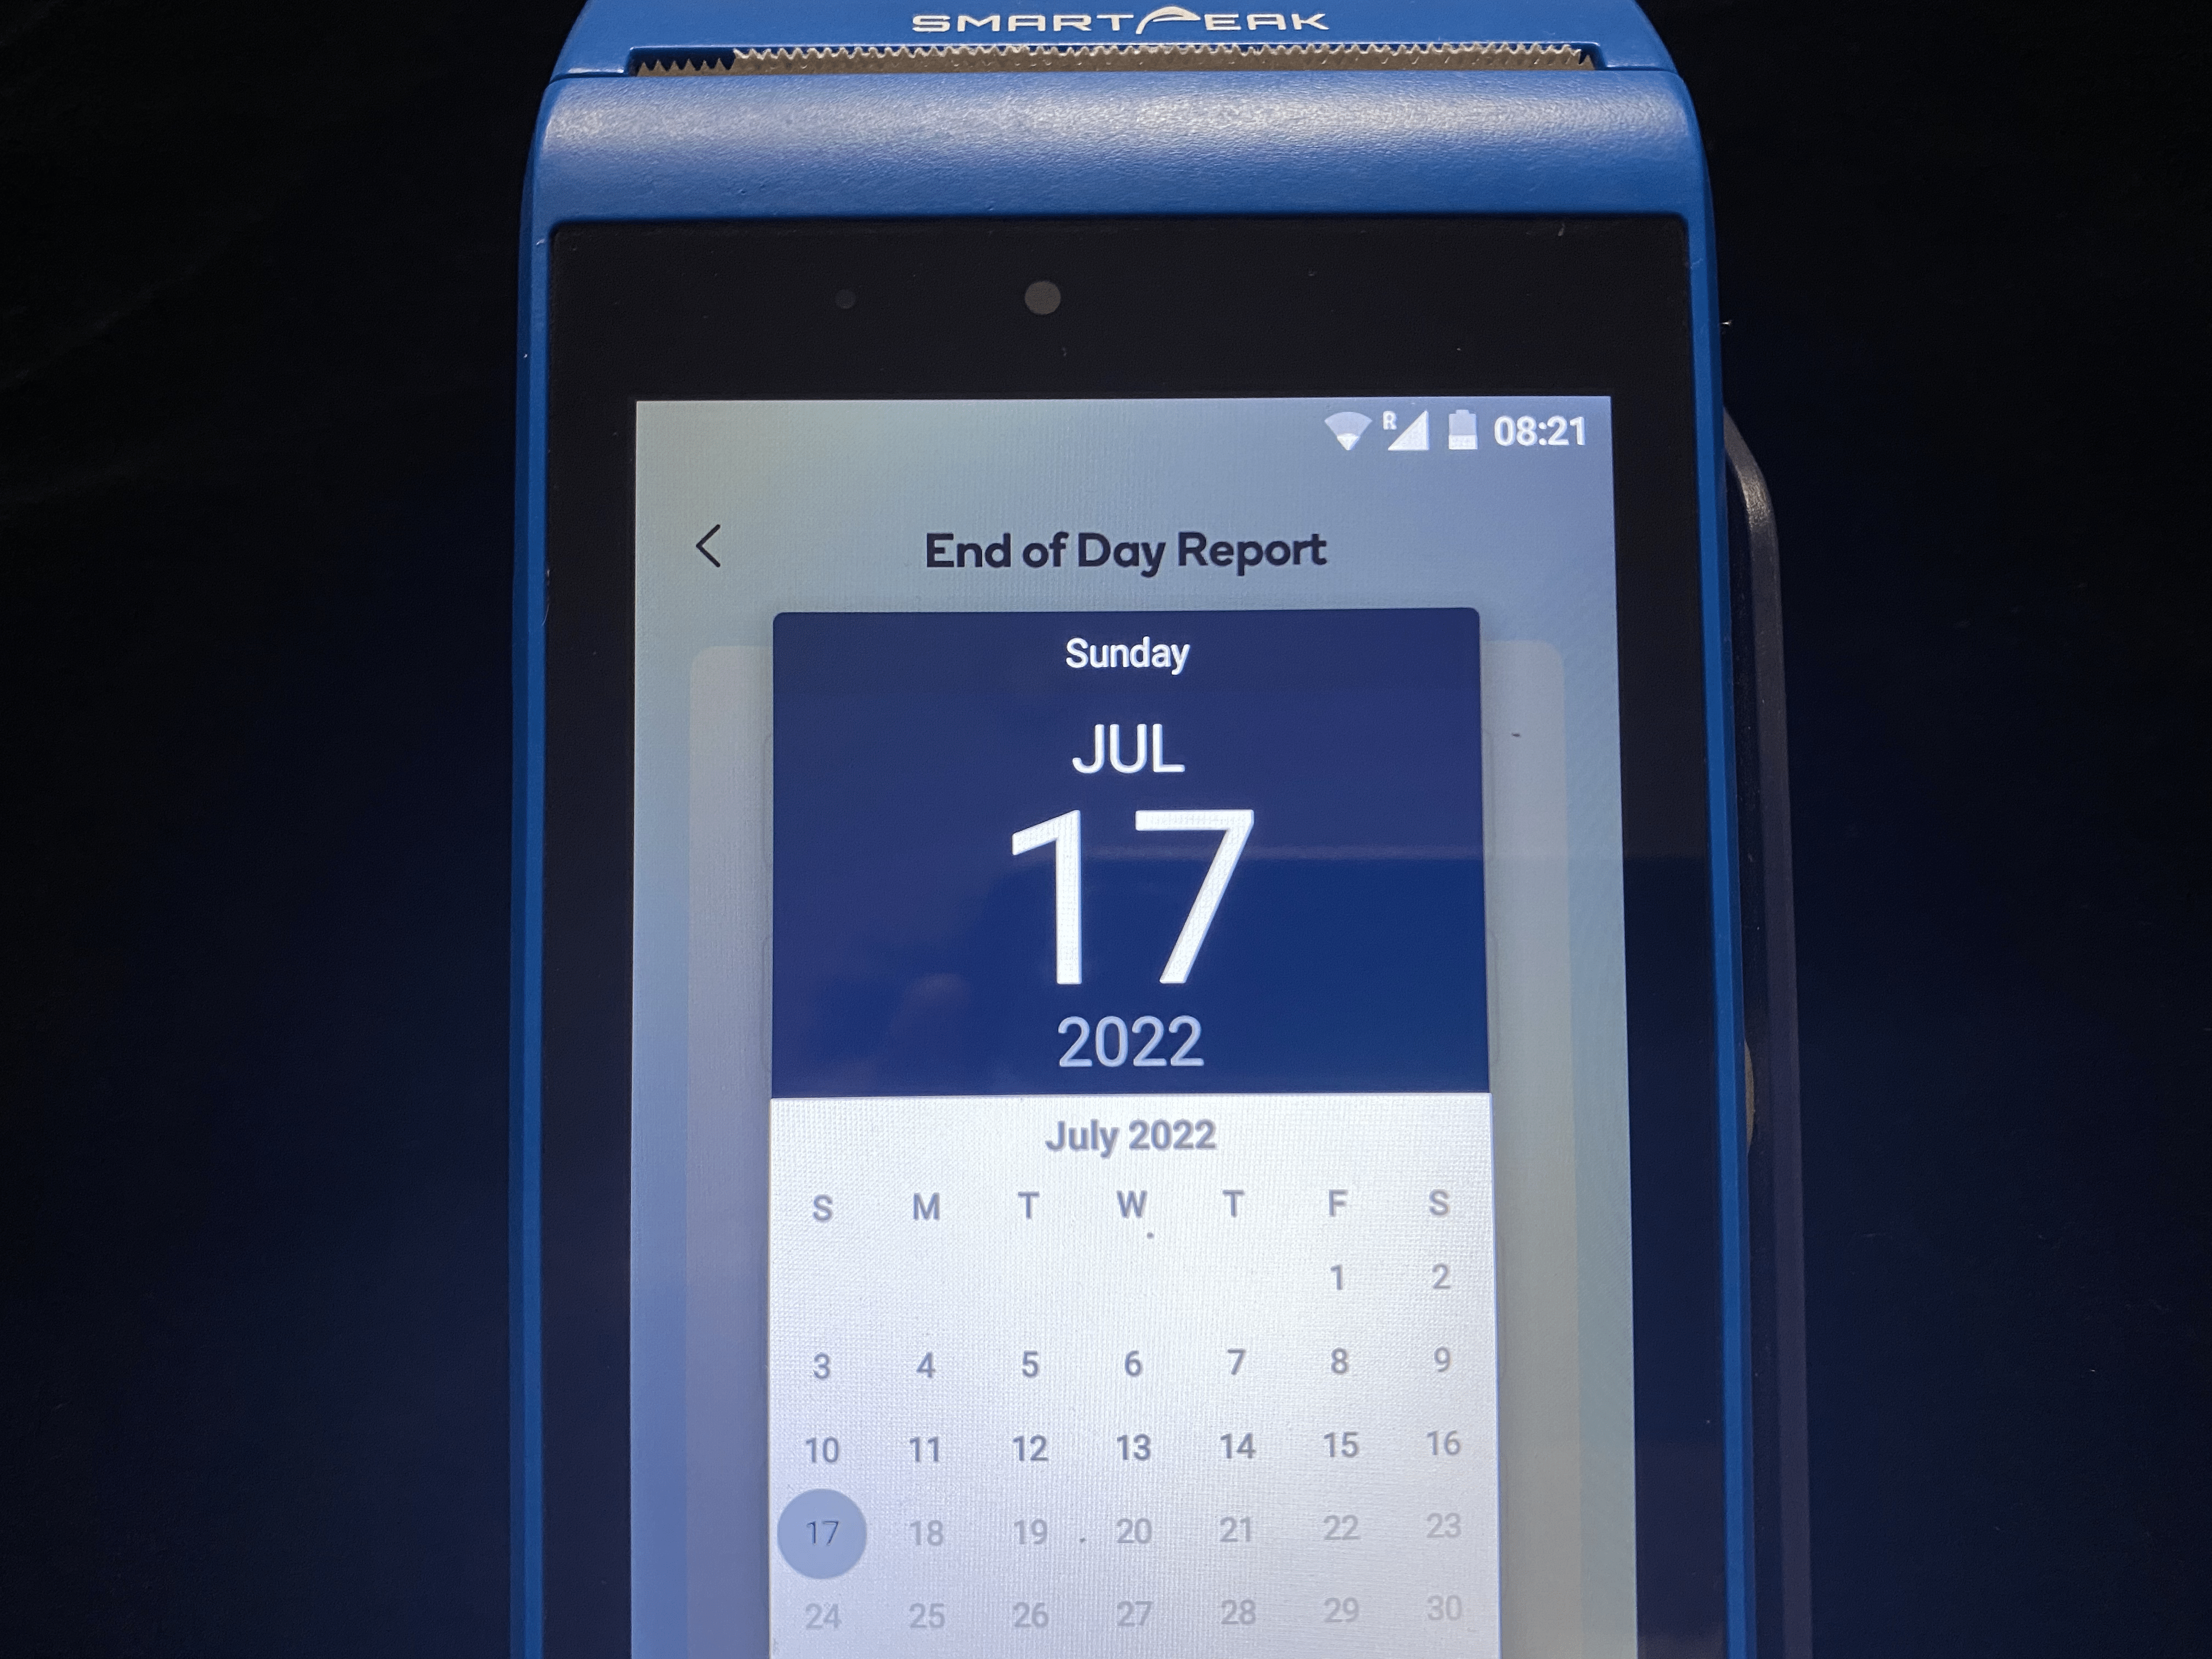
For terminals on version 2.6.3 and above, you can only print up to 3 days (72 hours) of reports. You'll also be able to set a time period for the print on this app version.
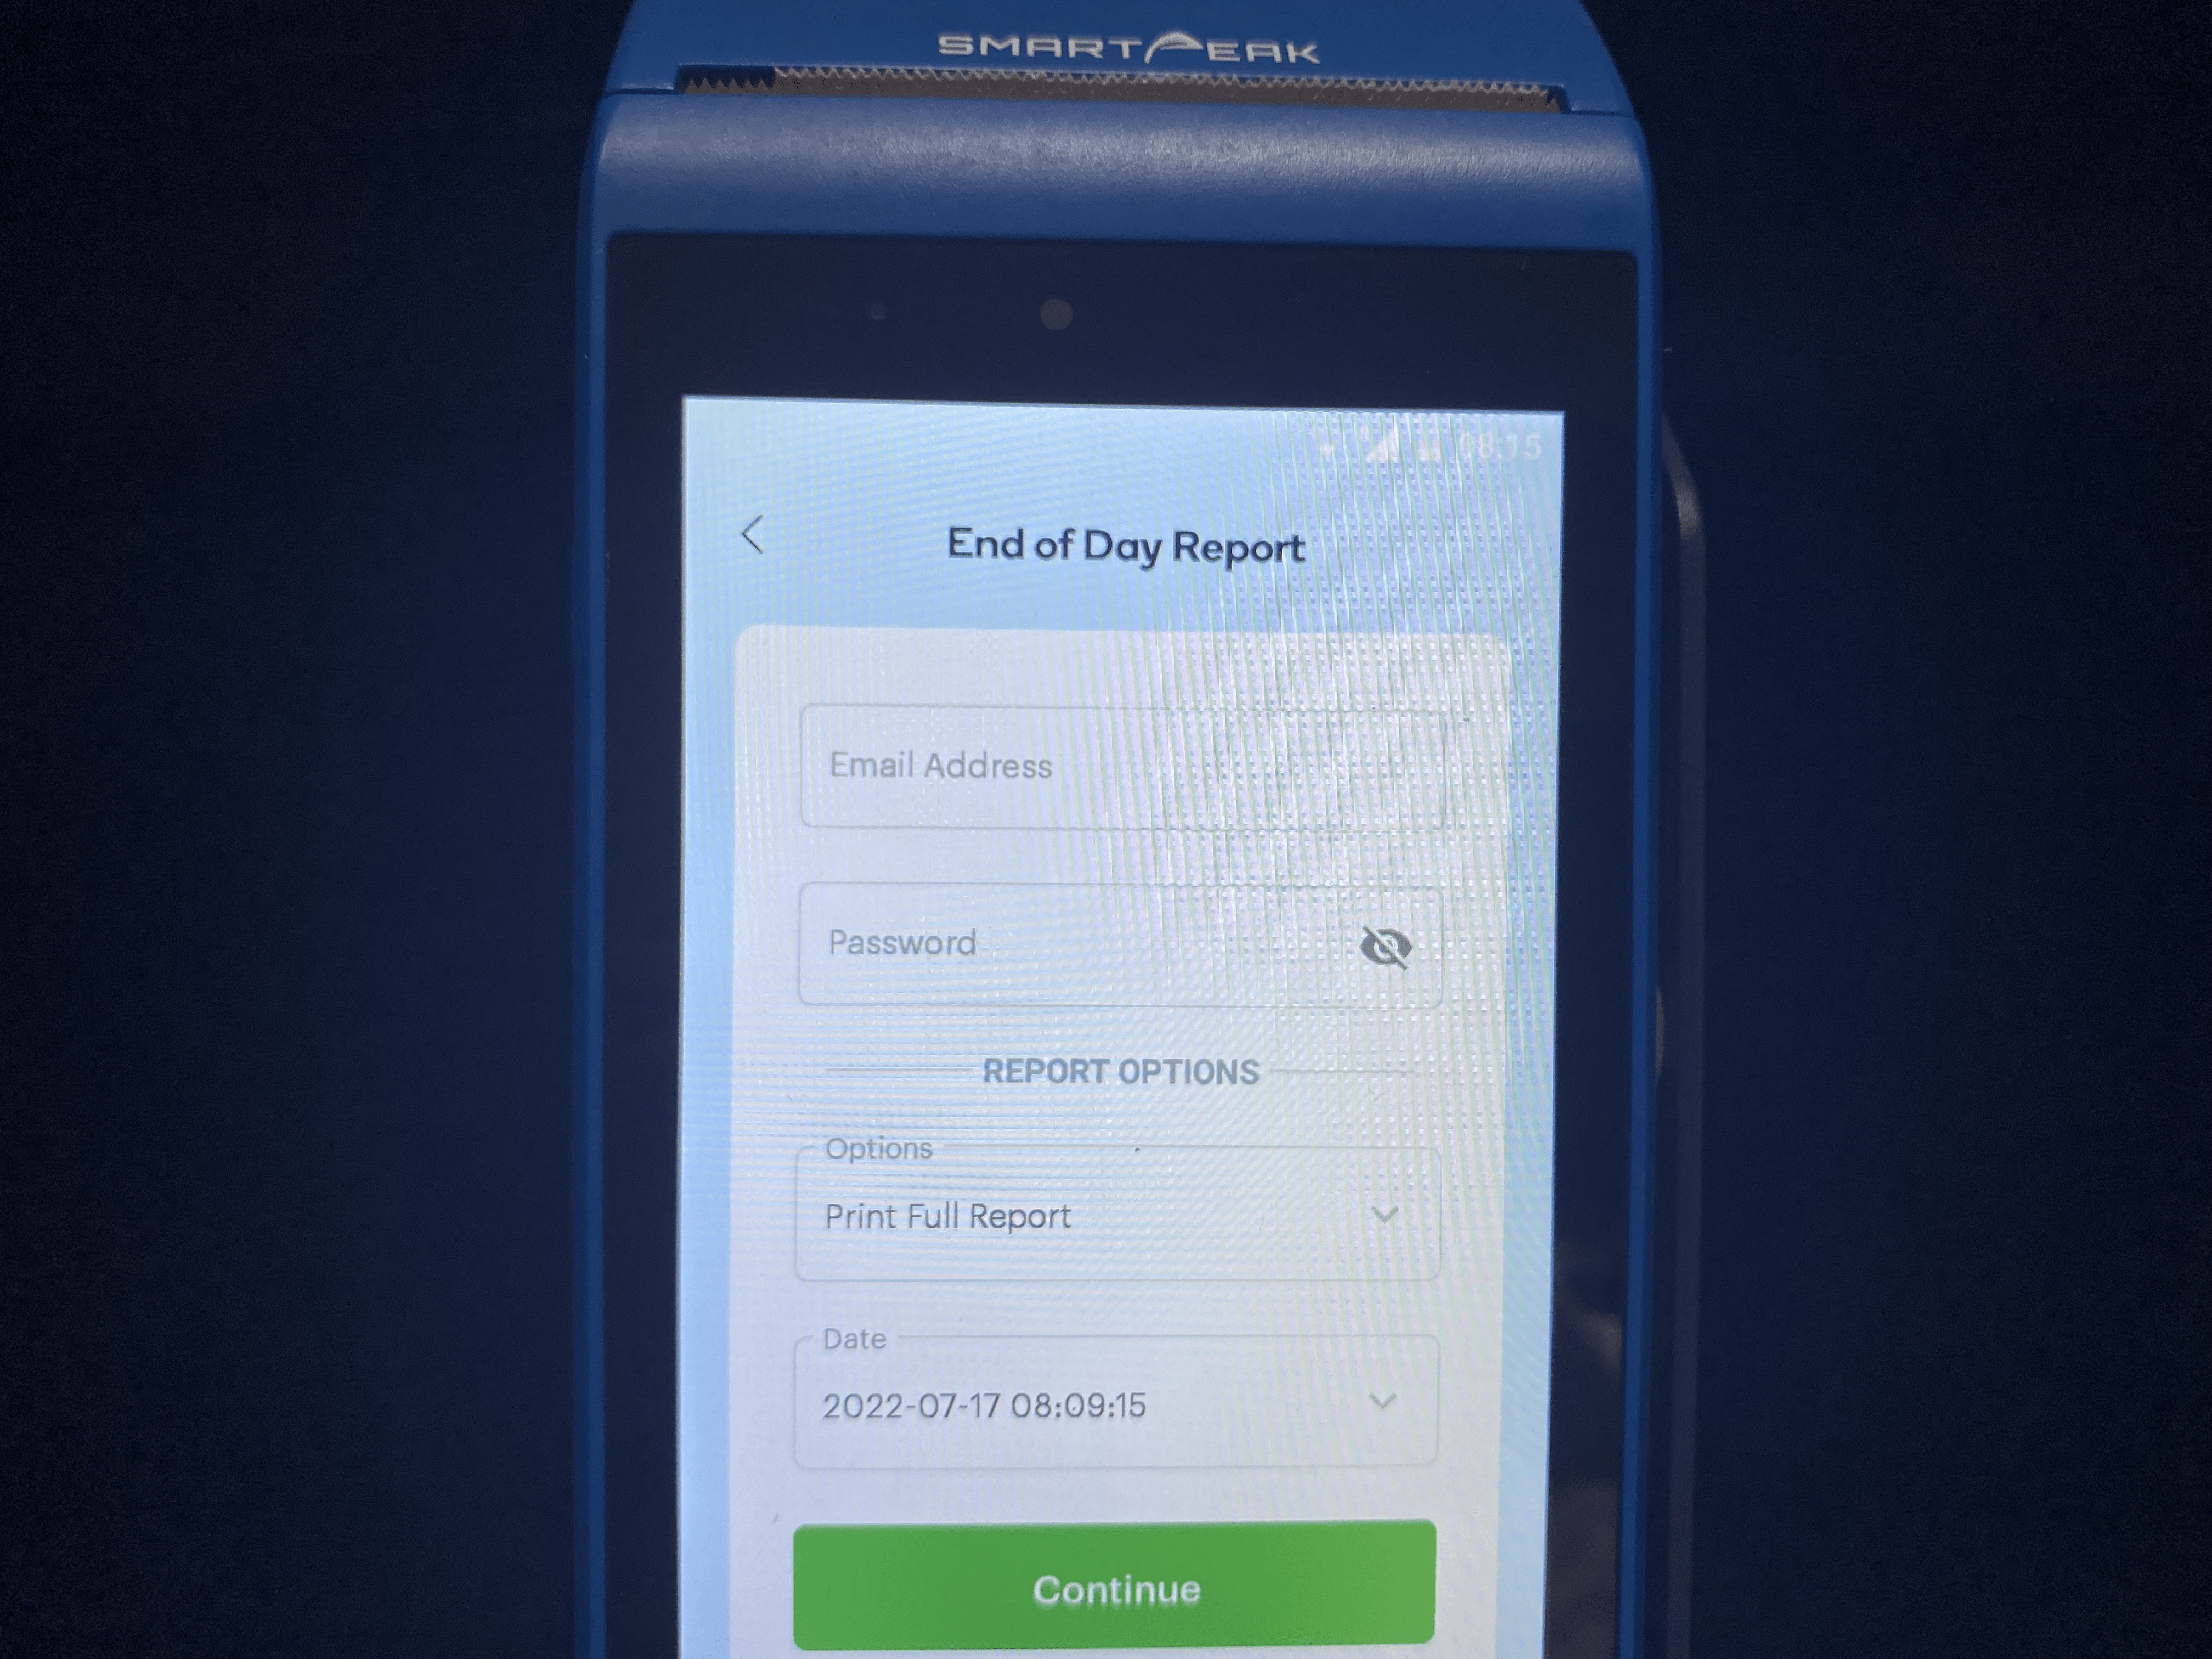
Kindly follow these steps to print an end-of-day report on your Physical Terminal:
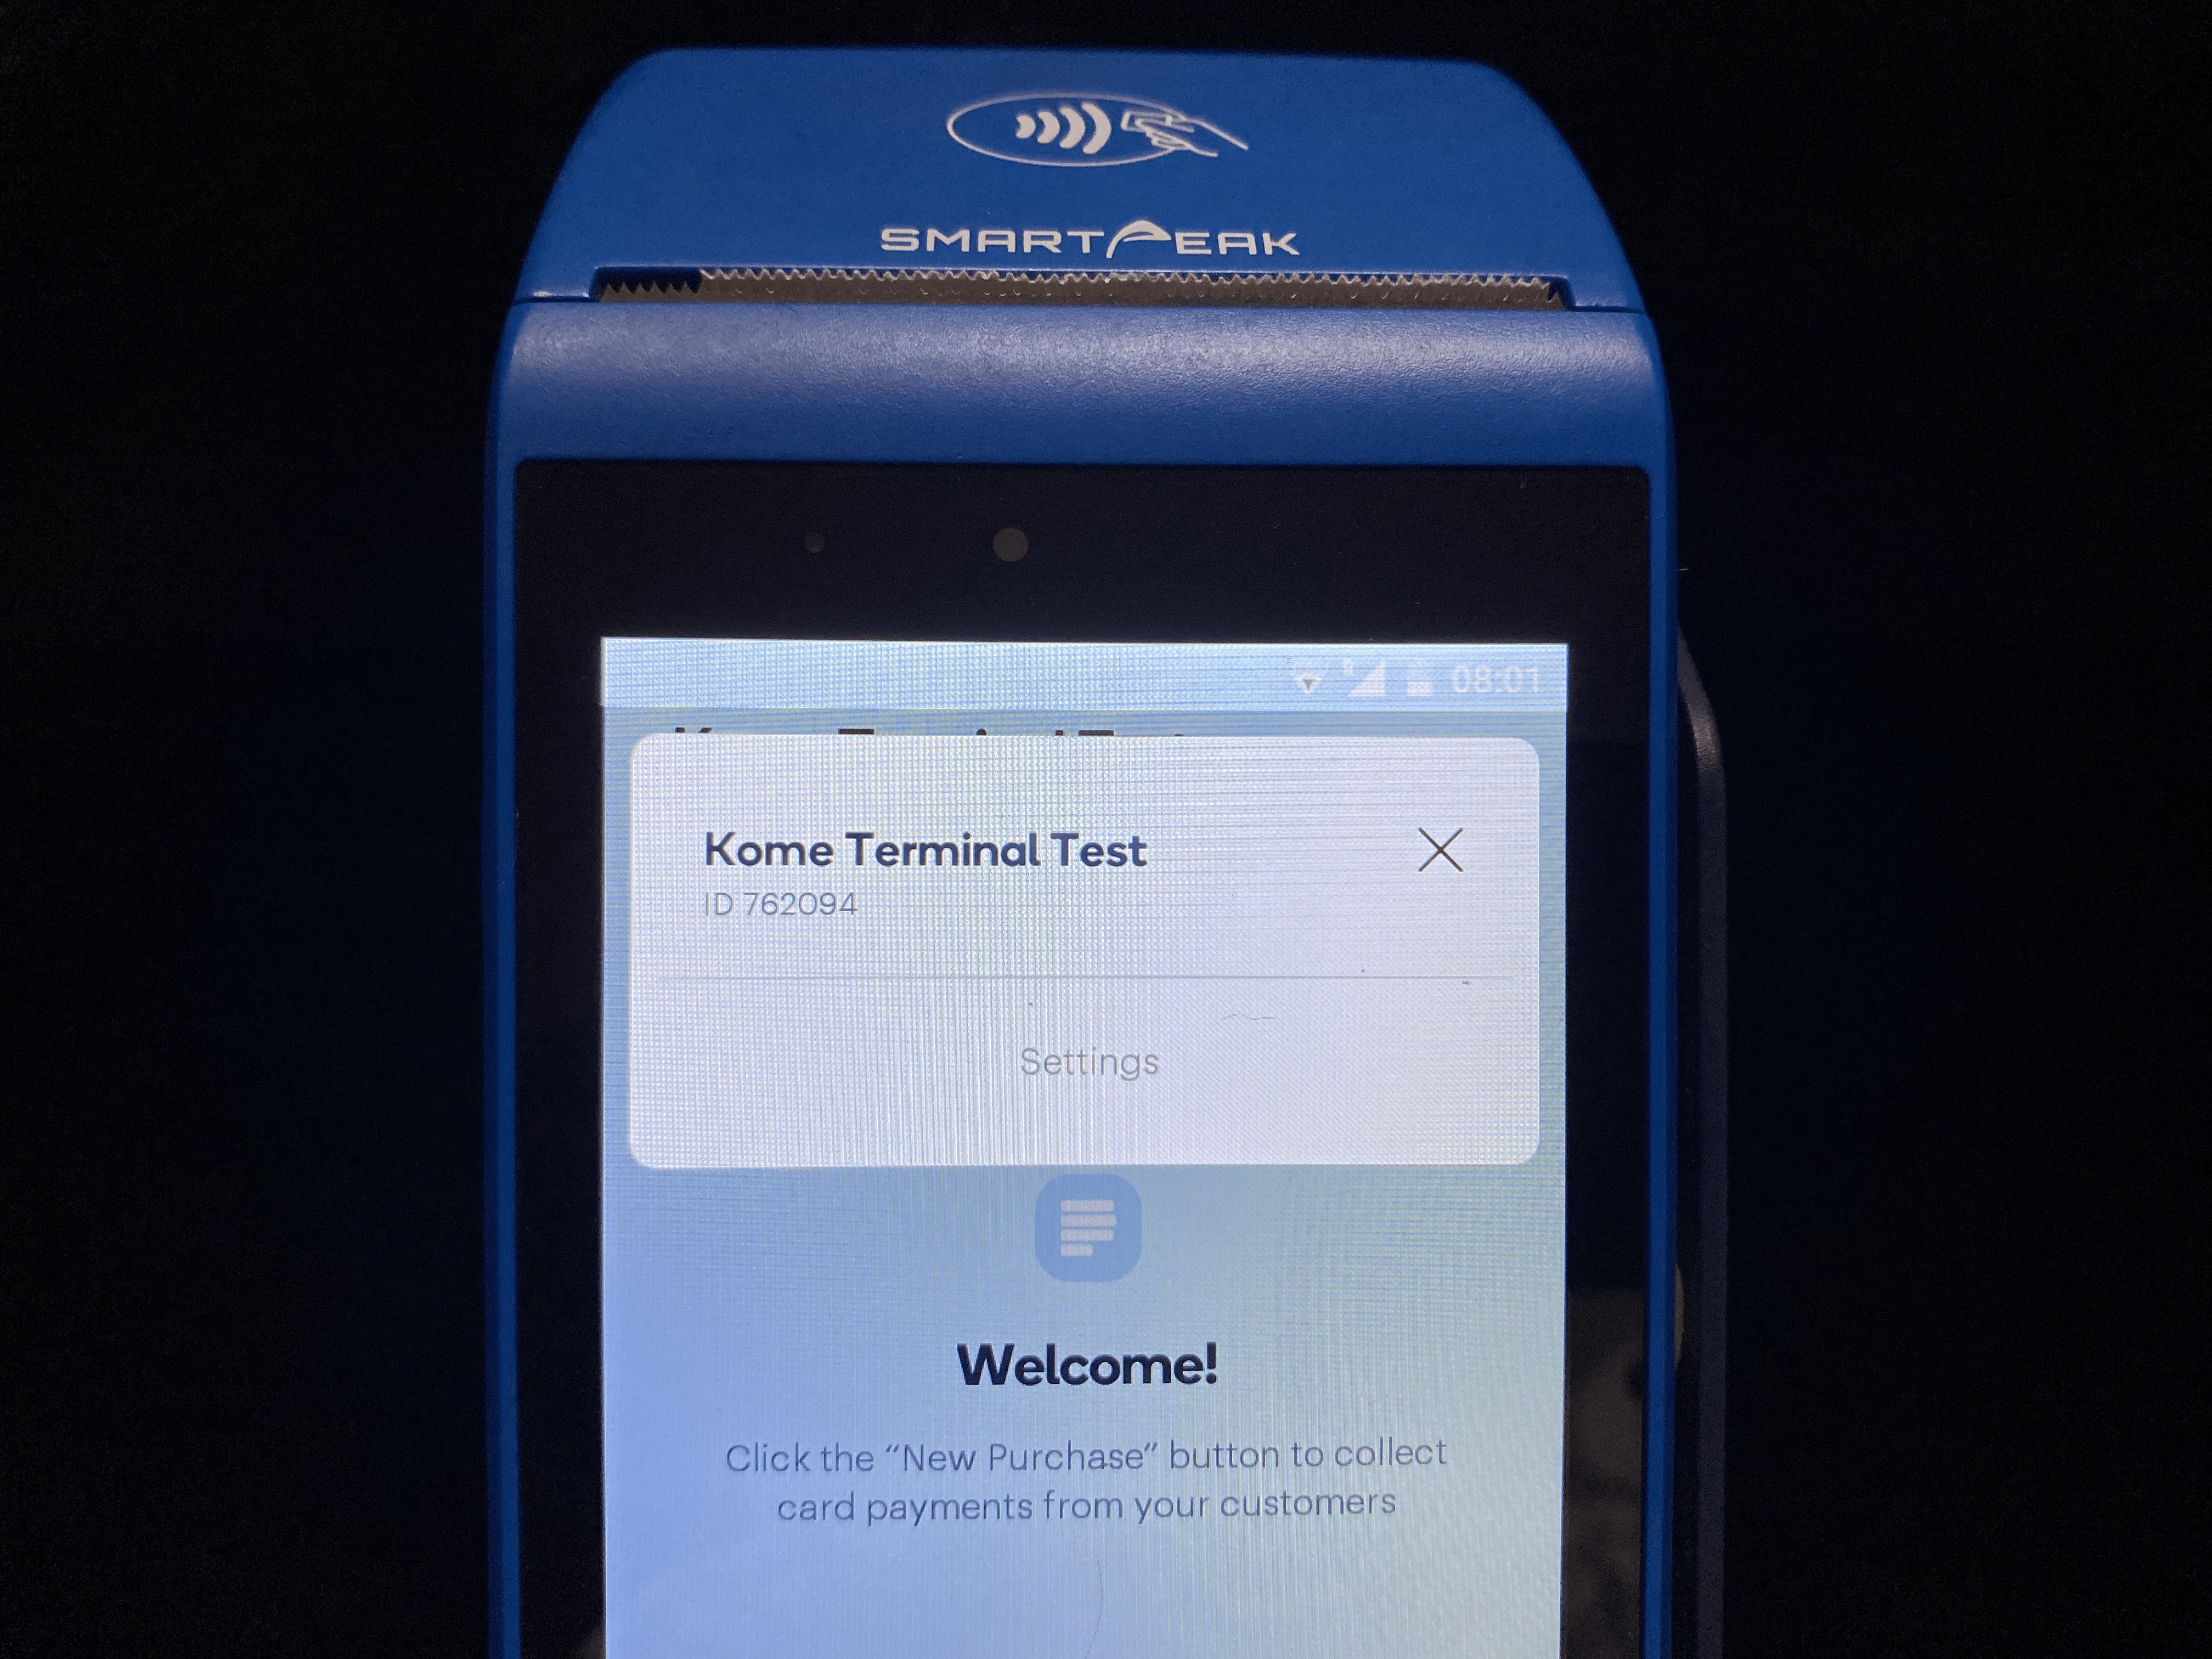
Open the Paystack app on your Terminal and click on your business name at the top and go to Settings as shown below:
Select 'End of Day Report' from the list.
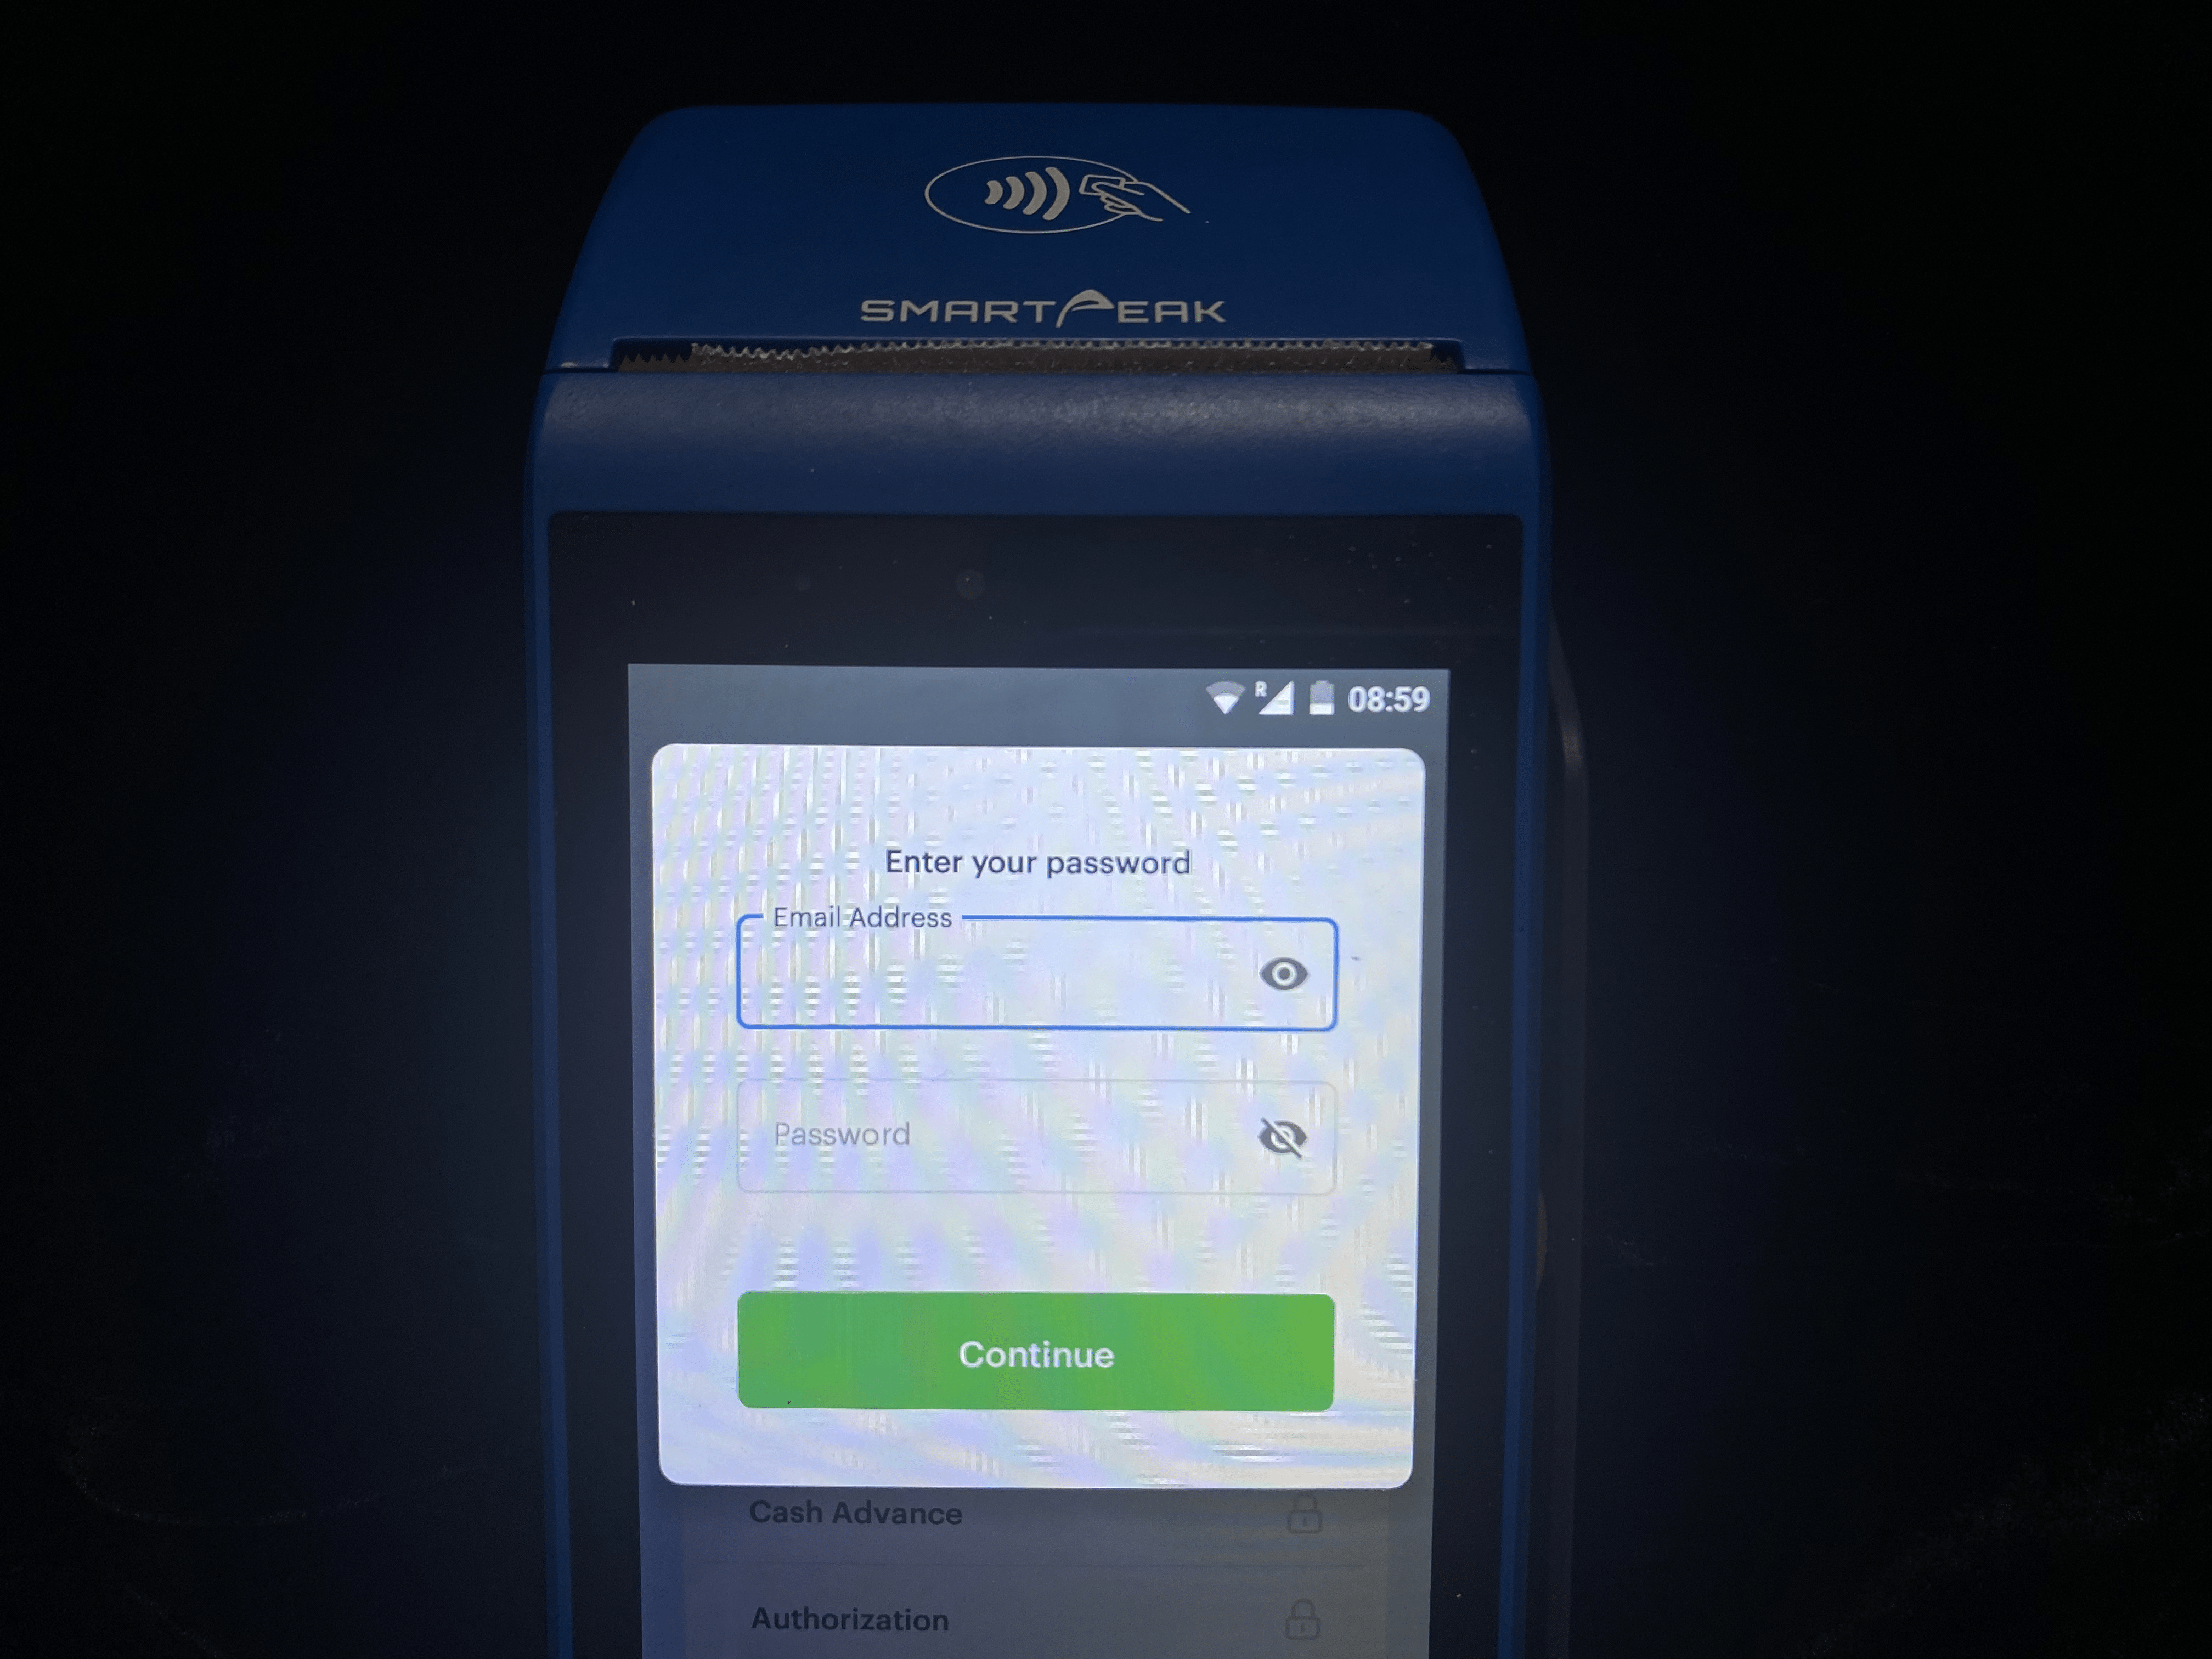
Enter your four-digit passcode or sign in with your Paystack Dashboard login details. If you're on app version 2.6.3 and above, you'll be required to create a passcode if you've not already done so.
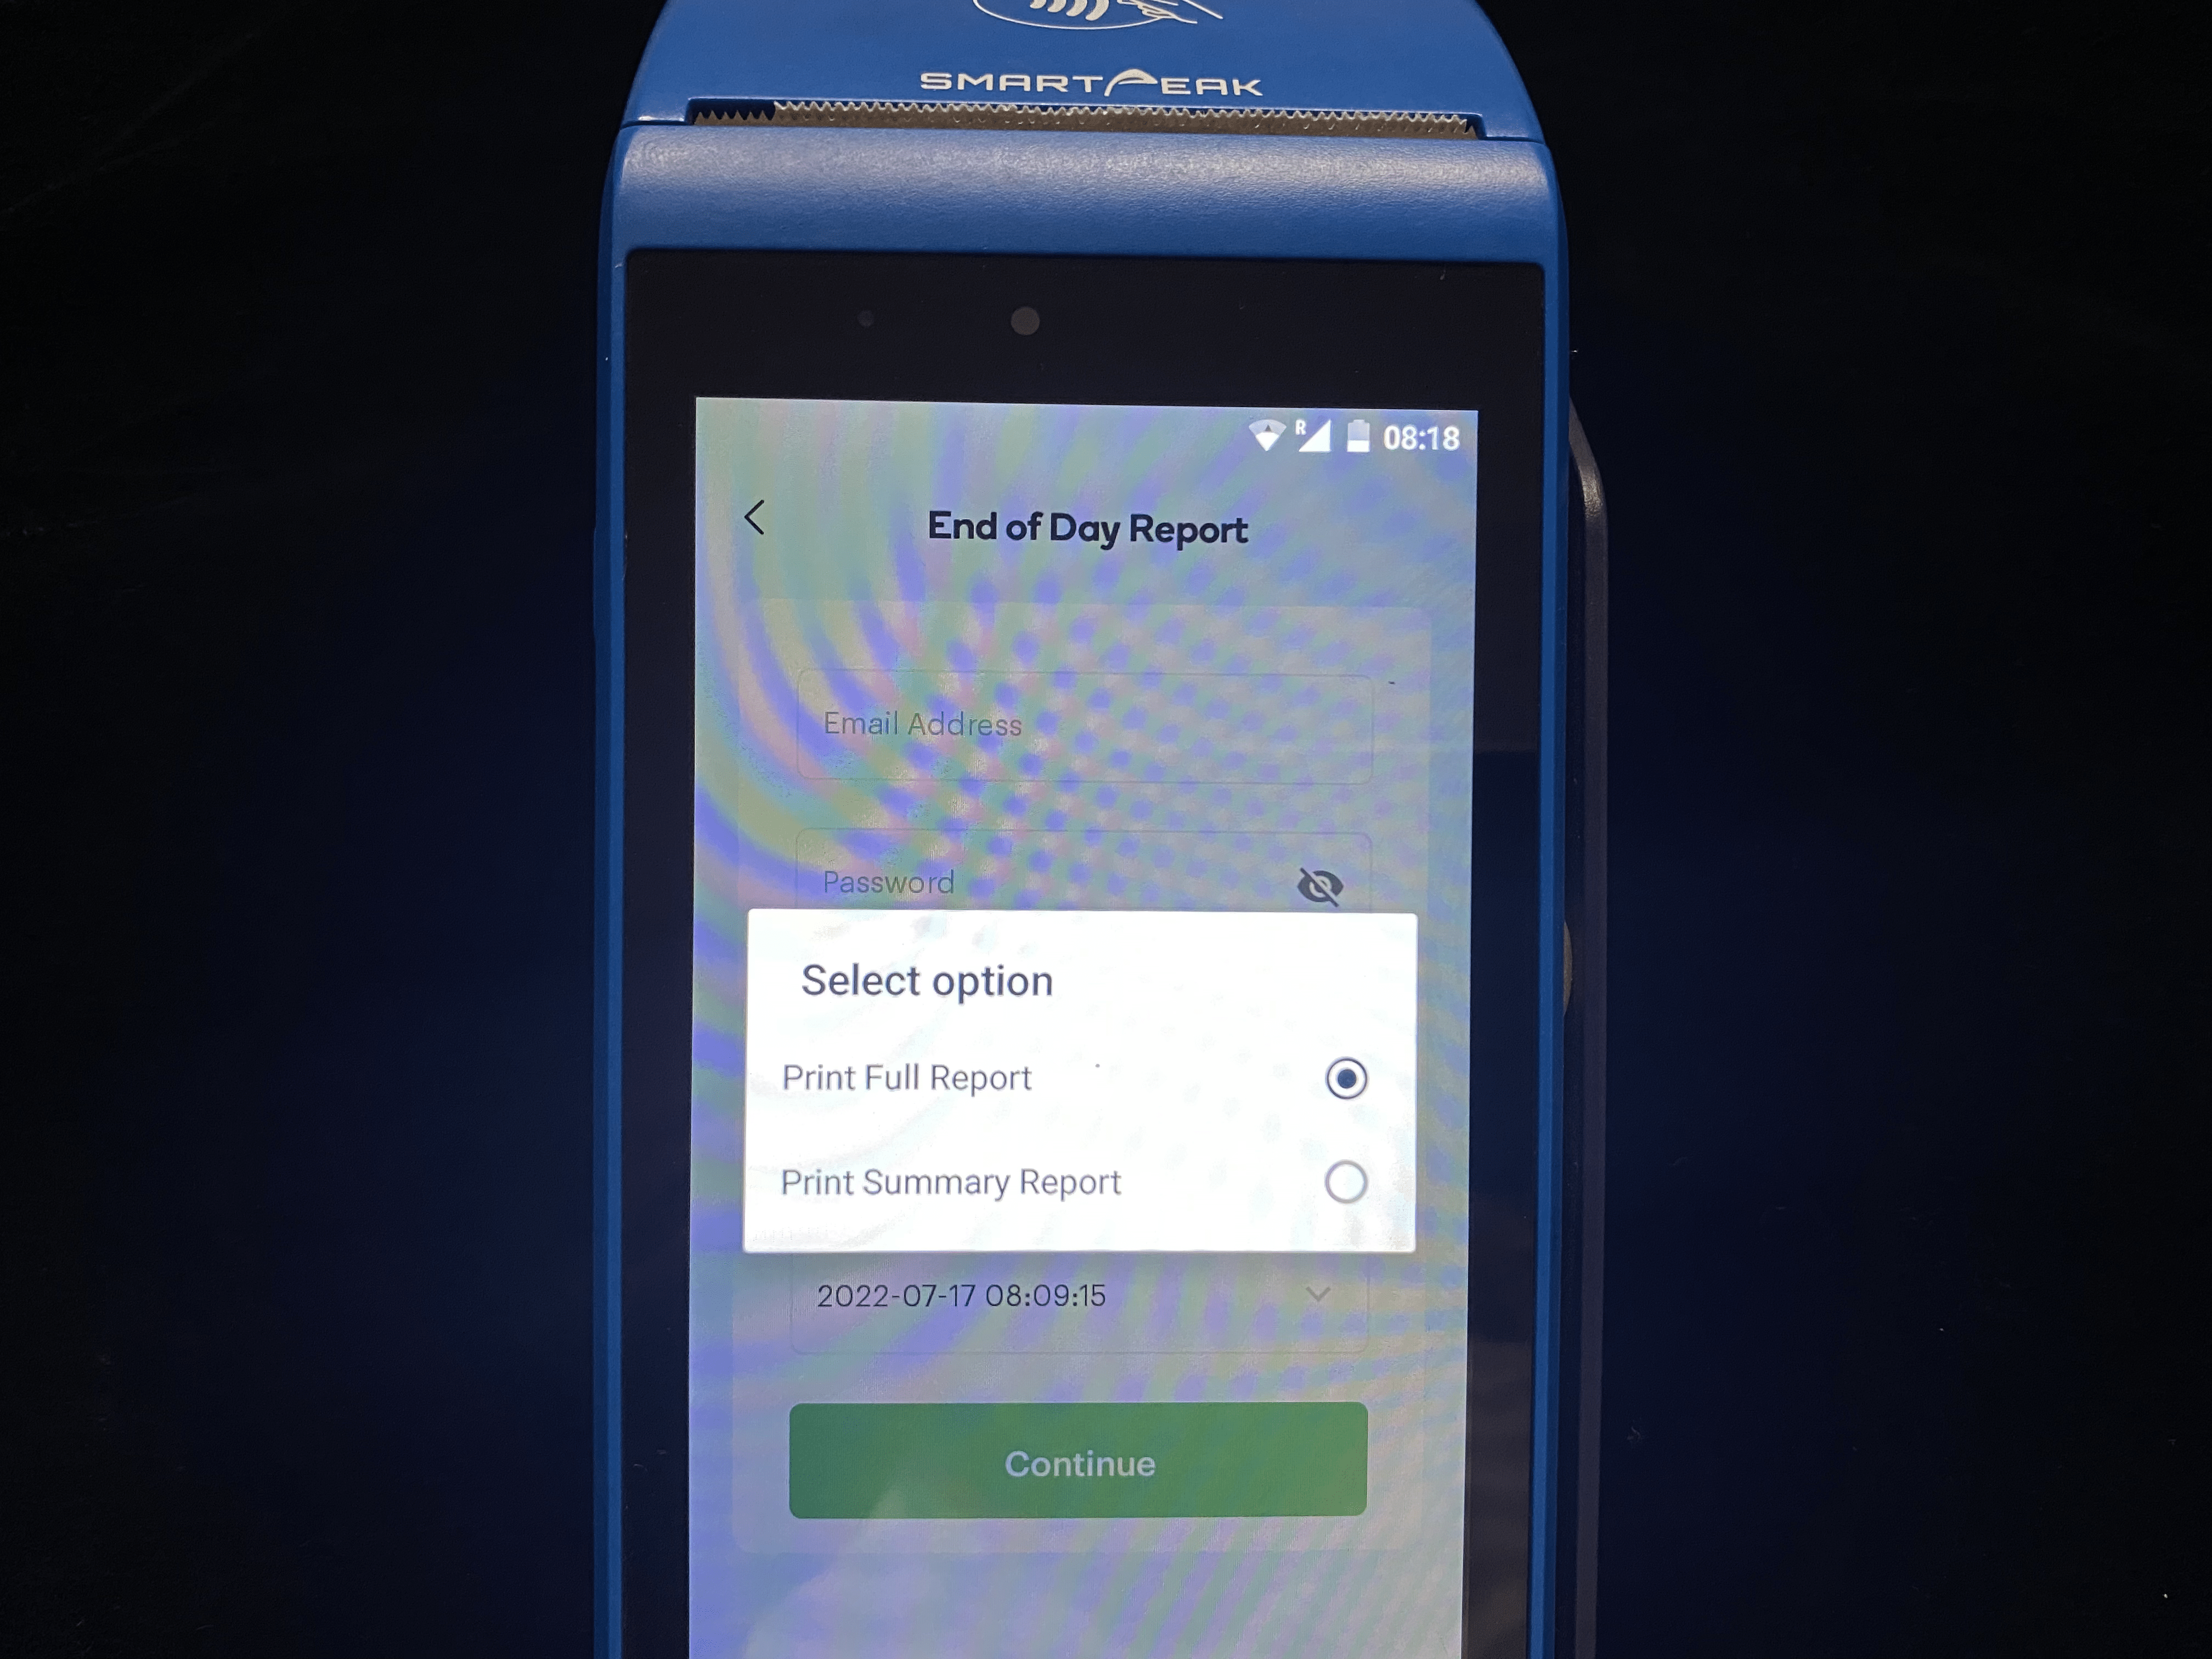
Choose the type of report you would like to print under 'Options'. You can choose to print either a Full Report or a Summary Report, as shown in the image below:
Select the report start and end date and time and click 'Continue'.
As soon as this is done, depending on the type you choose, a full or summary end-of-day report will be printed out.
Updating your Physical Terminal
Your Terminal device runs on Android software, and it comes with a built-in Paystack Terminal app. We're constantly making enhancements and adding new features to our Terminal software. When we do, we'll notify you so you can update the app. Updating your apps to the latest version gives you access to the latest features and improves app security and stability.
Kindly follow these steps to update your terminal app:
Go to the home screen of your terminal.
Tap on the App Store app.
Once it launches, tap the 'Update' button next to the Paystack app.
Wait for the update to be completed.
Once the update is done, tap on the 'Open' button to start using the app.
Splitting payments on your Physical Terminal
The Transaction Splits feature on Paystack allows you to split money received from a transaction between multiple bank accounts. To split payments on your Terminal, you need to create subaccounts and a transaction split. This article explains how to create a subaccount and Transaction Splits.
Kindly follow these steps to assign a transaction split to your Physical Terminal:
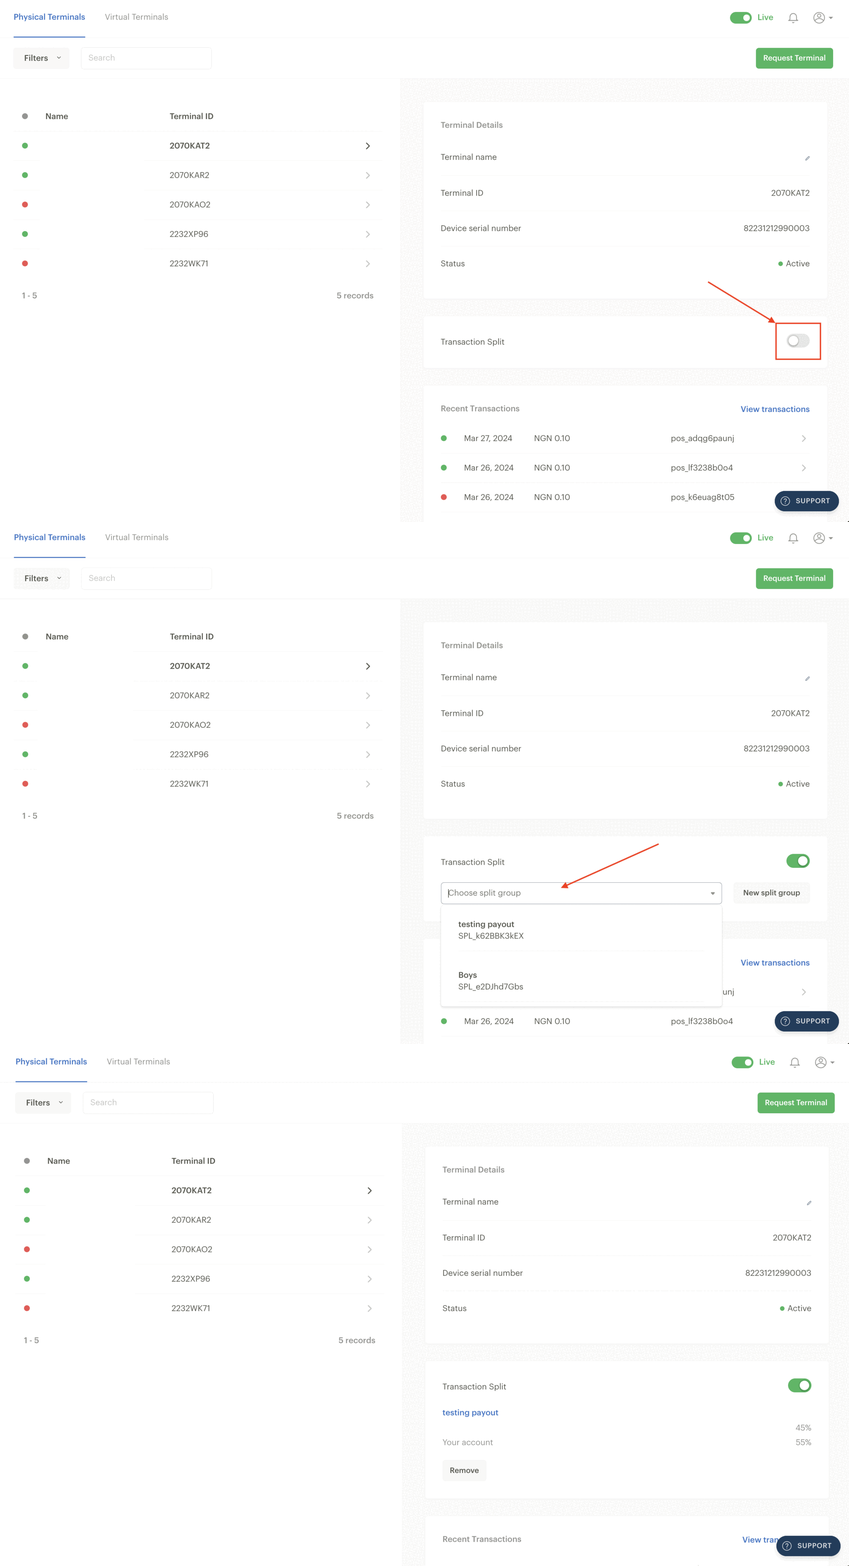
Go to the Terminals page on your Dashboard and click on the Physical Terminal tab.
Select the Terminal you want to split payments on from the list of your Terminals.
Toggle the 'Transaction Split' button on the right side of the page and select the split you want to add to the Terminal from the drop-down list. The button on the right also allows you to create a new split group.
If the transaction split is set up successfully, the toggle will remain green and the split you selected will show in the Transaction Split panel.
Paying for invoices on Physical Terminal
To help customers complete payments in person at physical stores, we integrated the Physical Terminal with Paystack invoices.
A Paystack Invoice payment can be completed via Physical Terminal with the following steps:
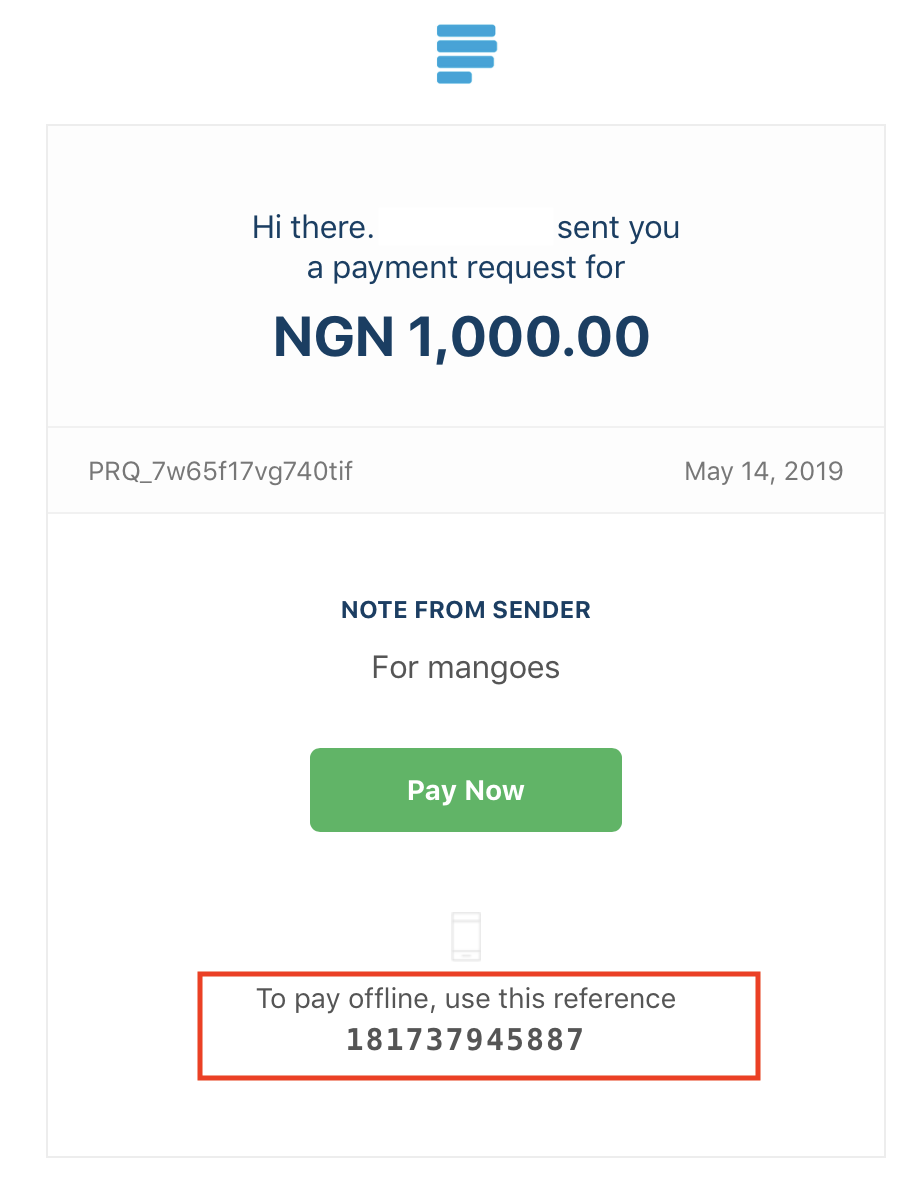
Create and send an invoice to your customer. You can learn more about invoices and how to create one here. When an invoice is sent to a customer, they will receive an email notification that looks like the image below:
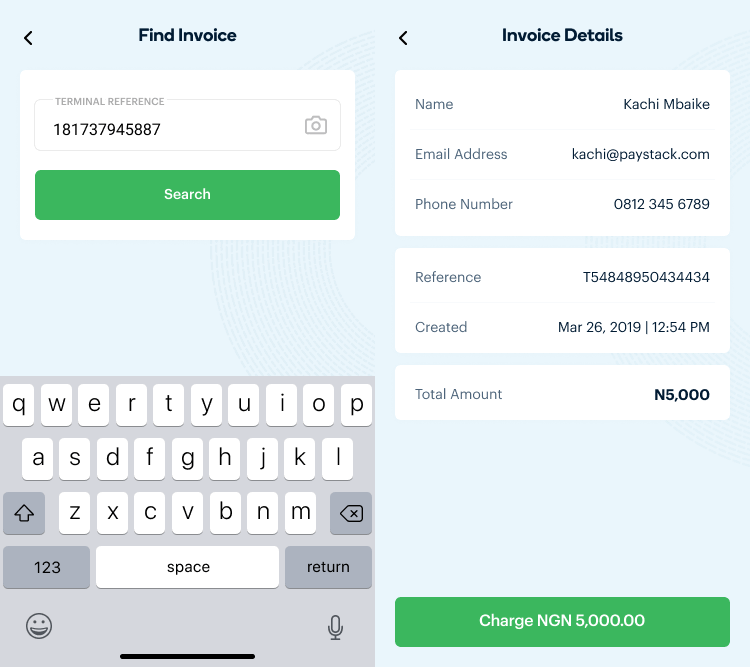
Input the offline reference number at the bottom of the email notification on the 'Find Invoice' tab of the terminal. The invoice details will come up as shown in the screenshot below:
The customer can go ahead to complete the payment using any of the payment channels (Card, USSD, Bank Transfer) available on the Terminal by clicking on the 'Charge NGN X' button.

