Invoices
Paystack Invoices are one of the ways you can accept payments directly from your Dashboard without needing a website. When you create a Paystack Invoice, your recipient will receive a detailed invoice via email that they will use to initiate their payment and complete the transaction online.
Creating an Invoice
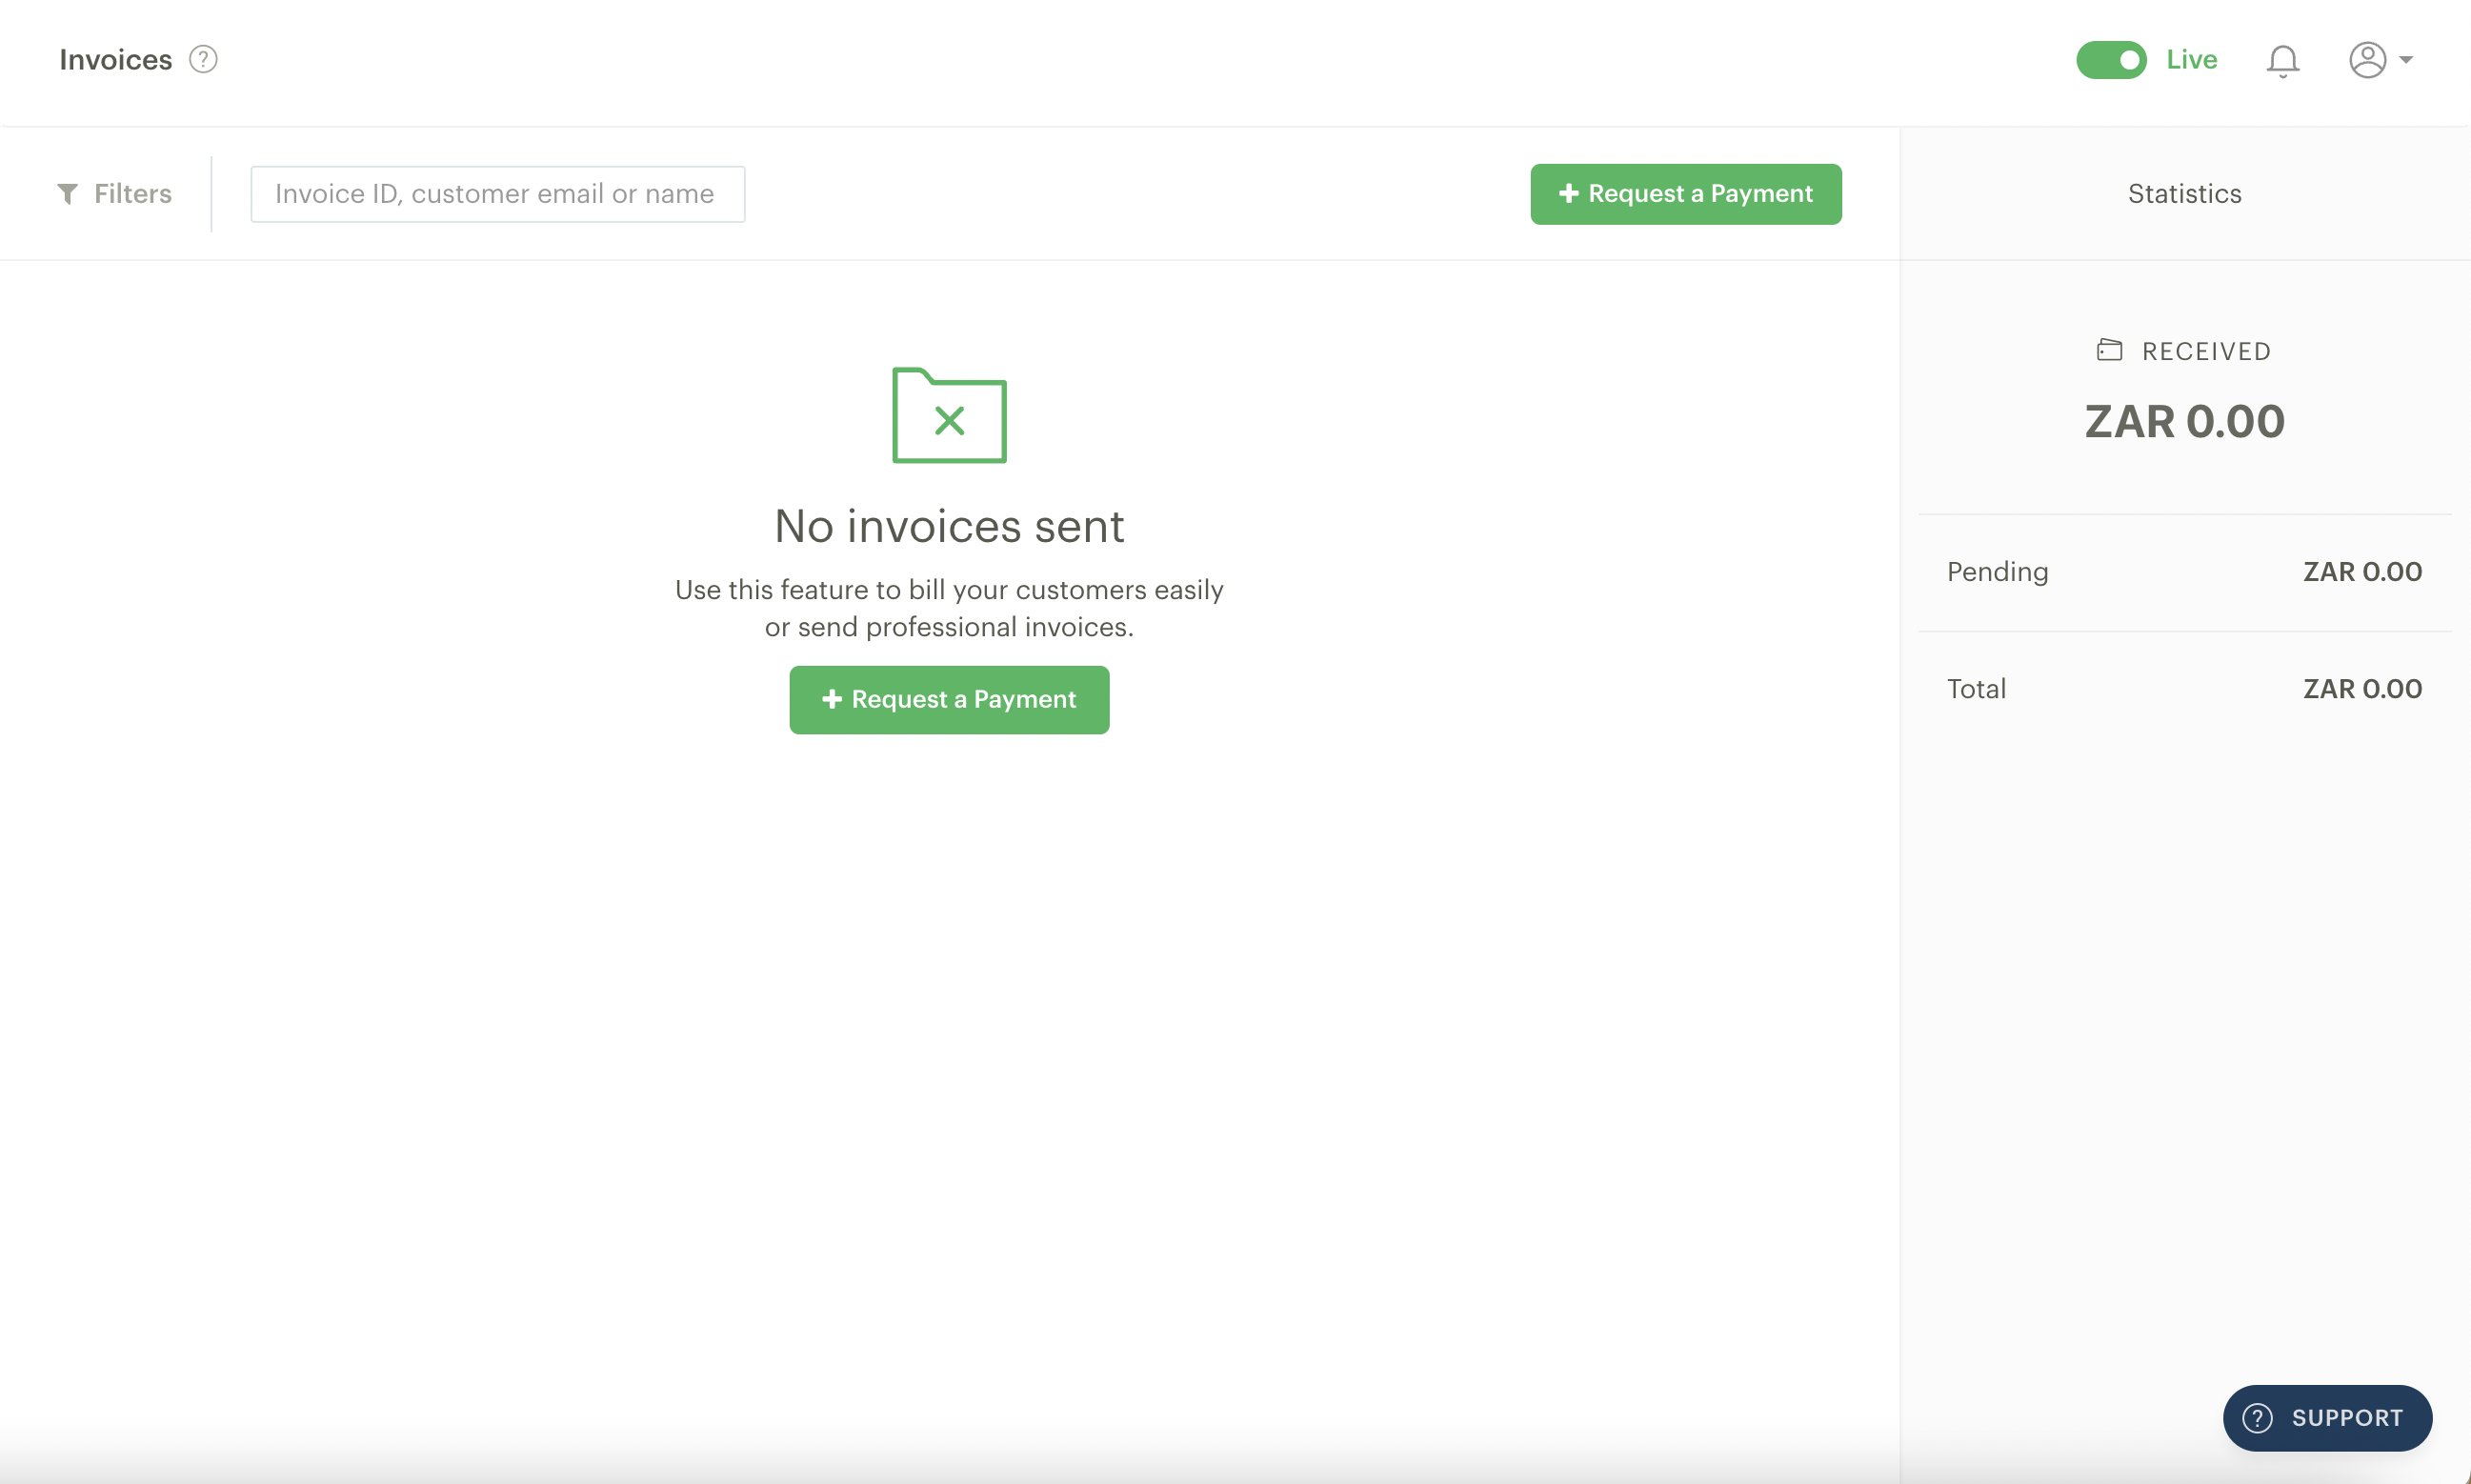
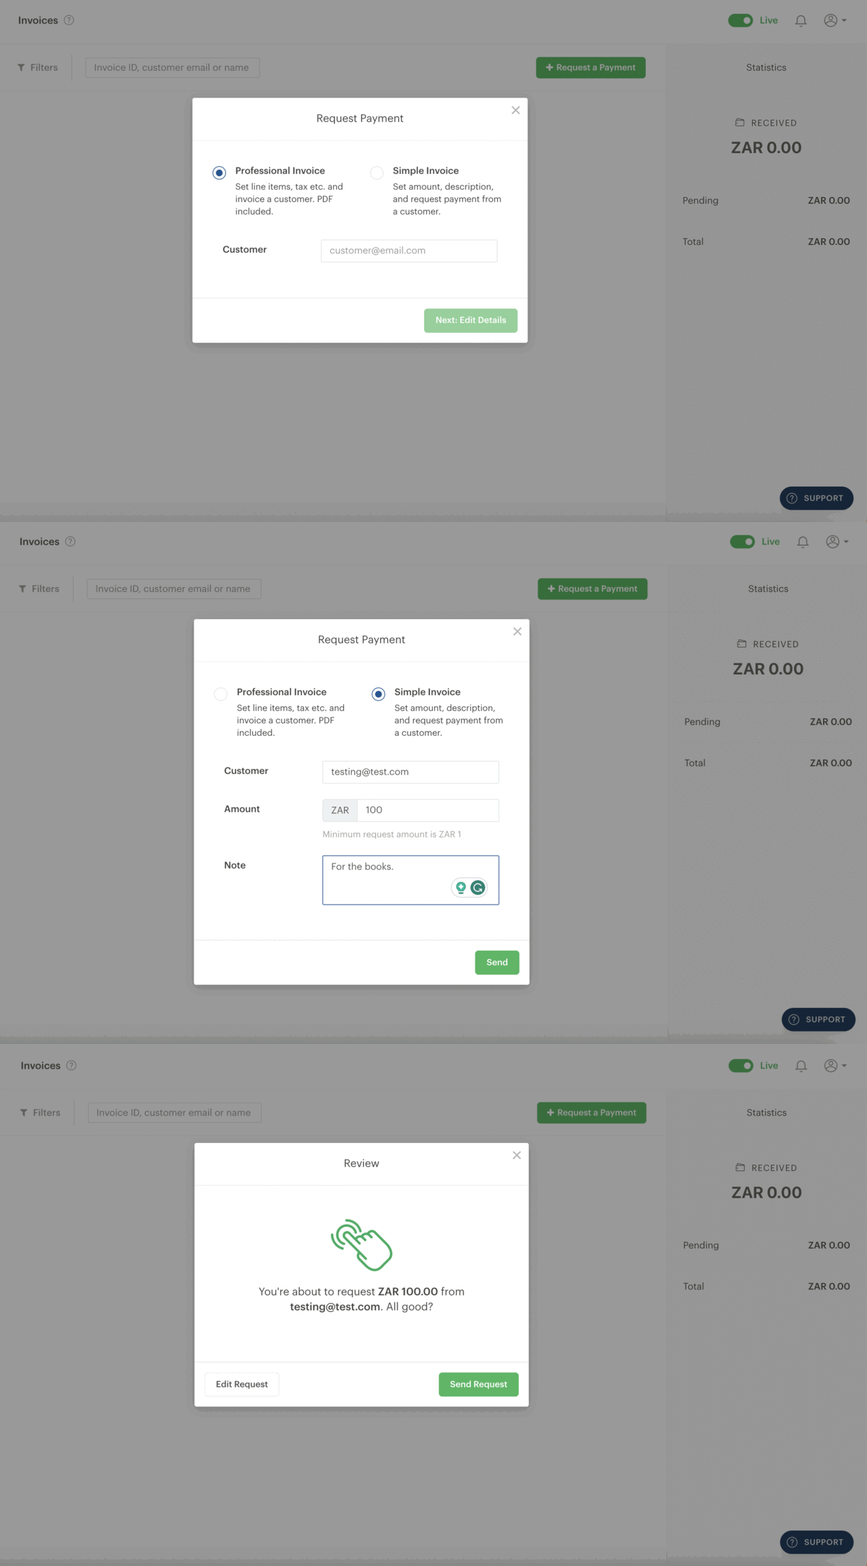
First, you'll need to click the 'Request a Payment' button in the top right corner (or also in the centre of the page if you’re creating your first invoice). A form will pop up with the option to create two types of invoices:
Simple Invoice: this is the simplest way to send an invoice.
Professional Invoice: this option is great if you need to include more information on the invoice, such as tax and line items.
Simple Invoice
Select the 'Simple Invoice' option and include the email of the customer for whom you want to receive the invoice, the amount, and a note that explains the reason for the payment request. After typing the customer’s email, you can include additional customer information like their first name, last name and phone number.
Click on ‘Send,’ review the payment information and click on ‘Send request.’
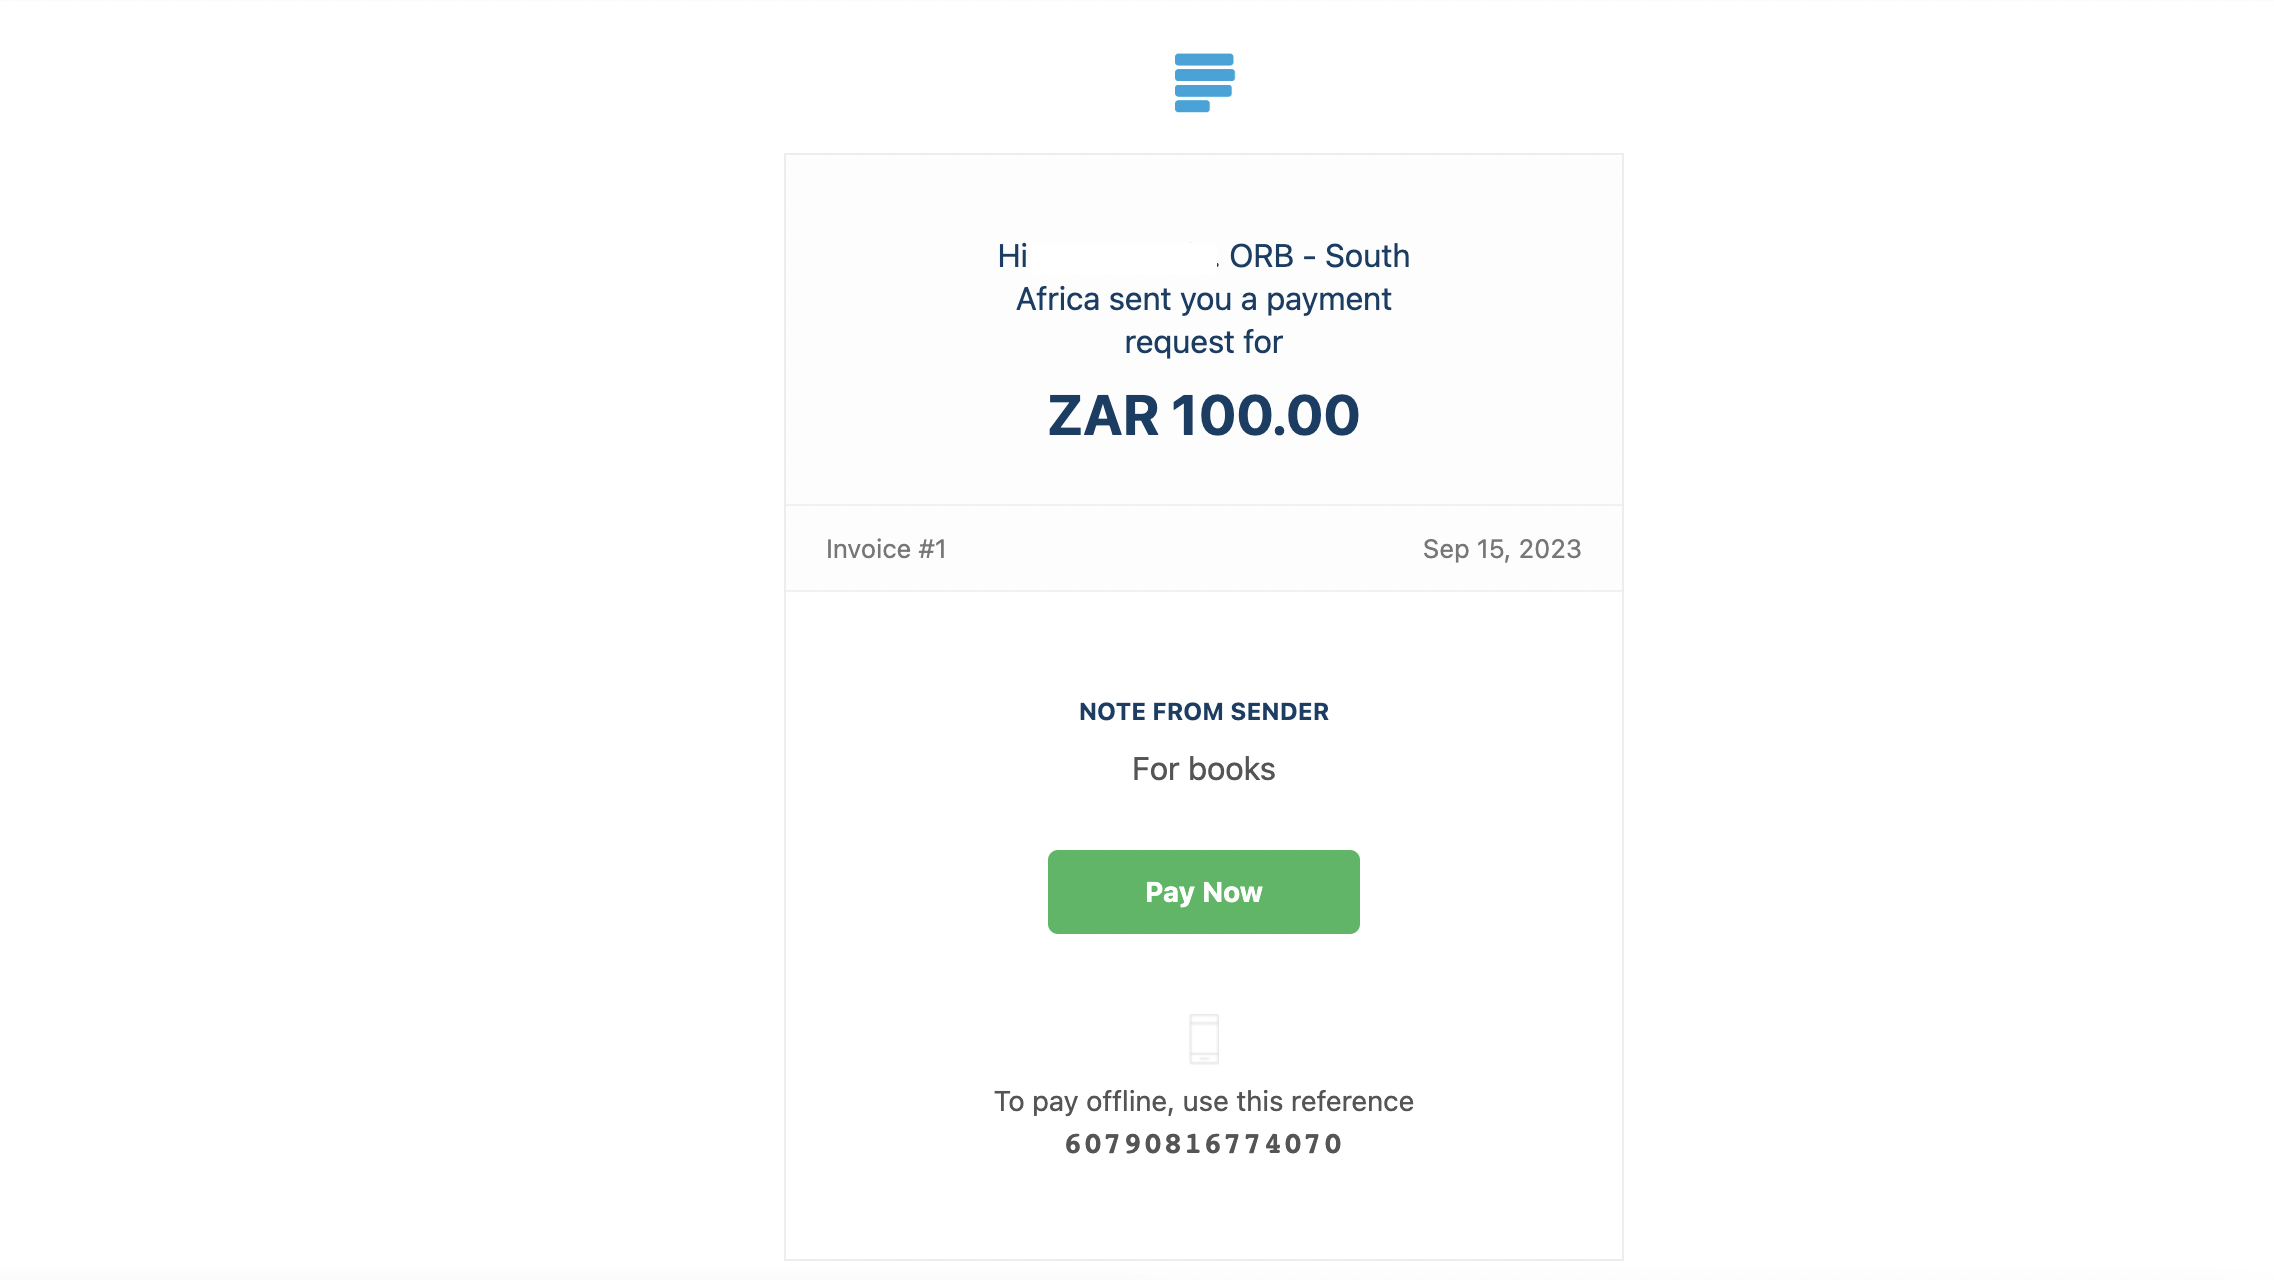
Your customer will receive a notification to their email address, which looks like the image below. All they have to do is click on ’Pay Now’, and a secure page will open on their browser where they can make payment via the Paystack Checkout. You will be notified once this payment has been completed, and the payment link will expire.
Professional Invoice
A Professional Invoice allows you to send an invoice with a more detailed transaction breakdown. With this type of invoice, you can break down different line items, their quantity, and cost and even include tax and discounts.
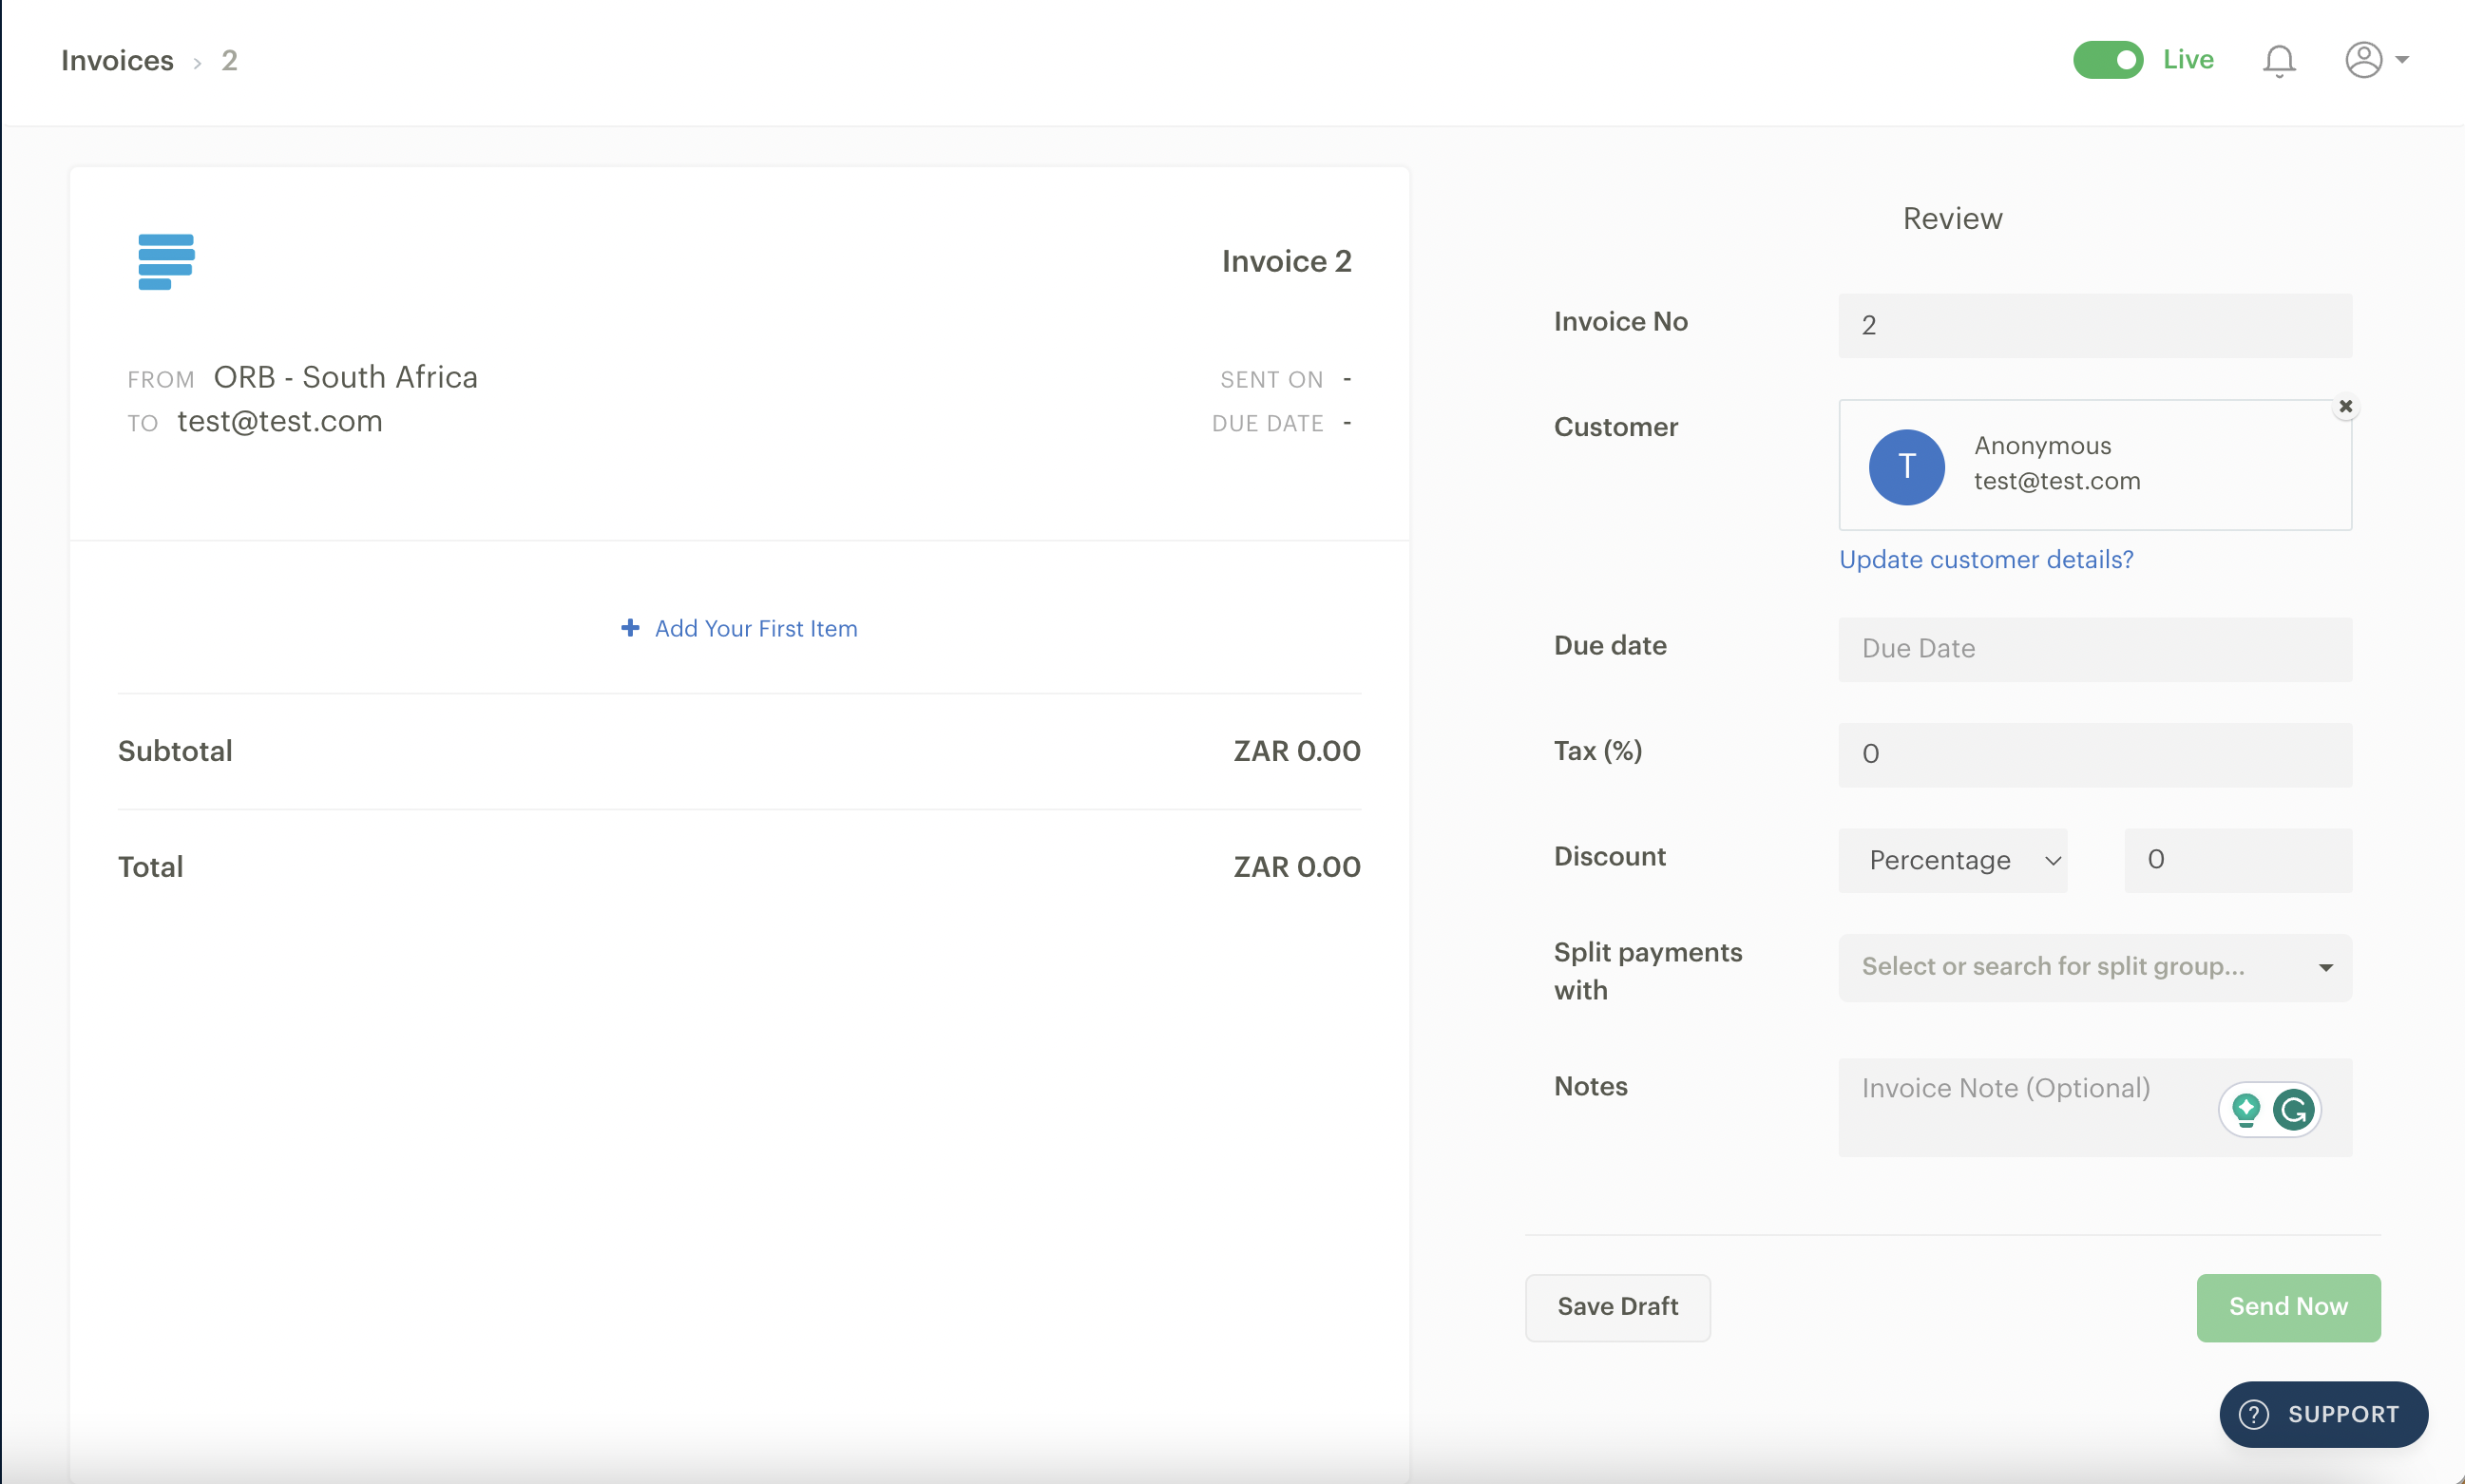
A Paystack Professional Invoice includes the following fields:
Line items: Each invoice item, the quantity and unit cost in your currency.
Invoice No: The invoice number.
Customer: The email address and name of the recipient.
Due date: The deadline for payment.
Tax: An optional field for a tax percentage, such as VAT.
Discount: An optional percentage discount or flat rate discount on the total amount.
Split payment with: An additional option to split the payment proceeds with another bank account. You can learn more about Split Payments here.
Note: An optional field to share notes or instructions with the customer.
Save Draft: You can save a draft invoice and pick up where you left off later on. When you’re ready to send it, click the ‘Send Now’ button.
After the invoice is sent
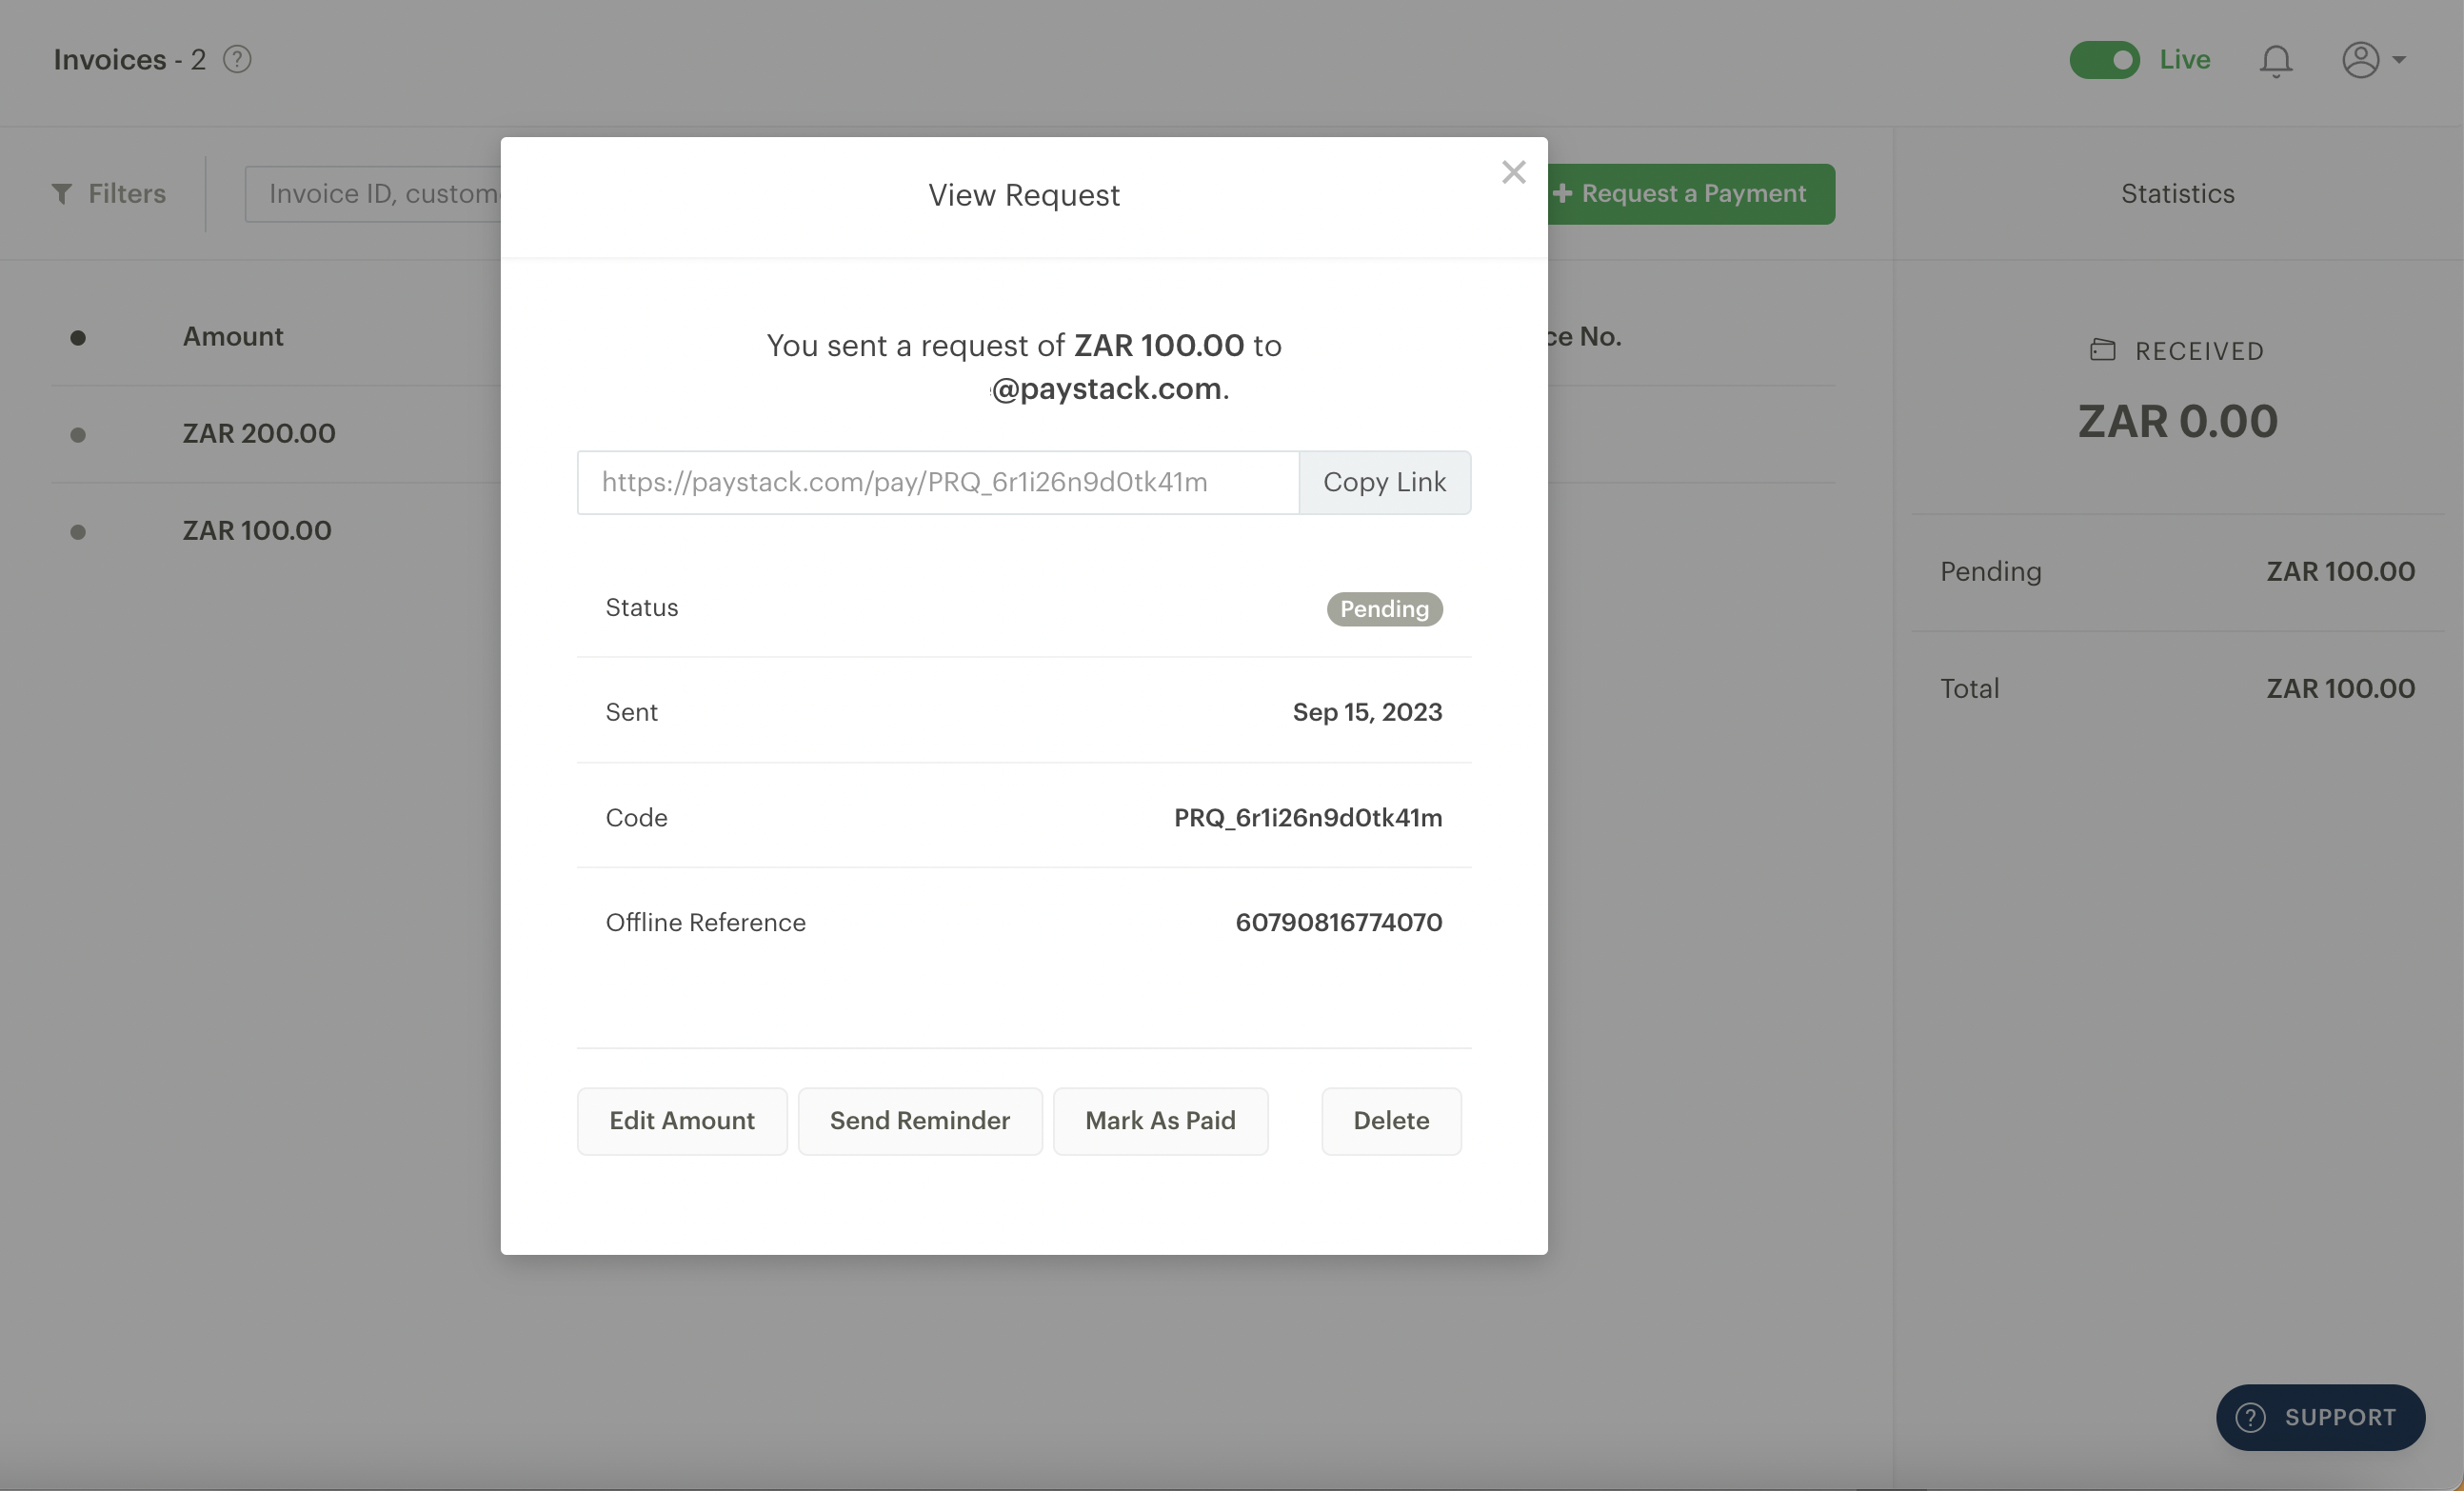
Once an invoice is sent, clicking it on the Invoices summary page brings up this pop-up. You can copy a direct link to the invoice and send it via WhatsApp, social media, or any other way you communicate with your customer. You can also edit the amount requested, send a reminder about the payment request, mark the invoice as paid if the customer pays offline and delete the payment request entirely.
You can filter your list of invoices in multiple ways on the Invoices Summary page. You can filter by status (draft, not paid and paid), type, Invoice ID, customer email or name.
Paystack Merchant App requests
The Paystack Merchant App allows you to send an invoice to customers straight from your mobile phone, which can be paid for with a few clicks. You can also track which of your outstanding invoices have been paid and which haven't.
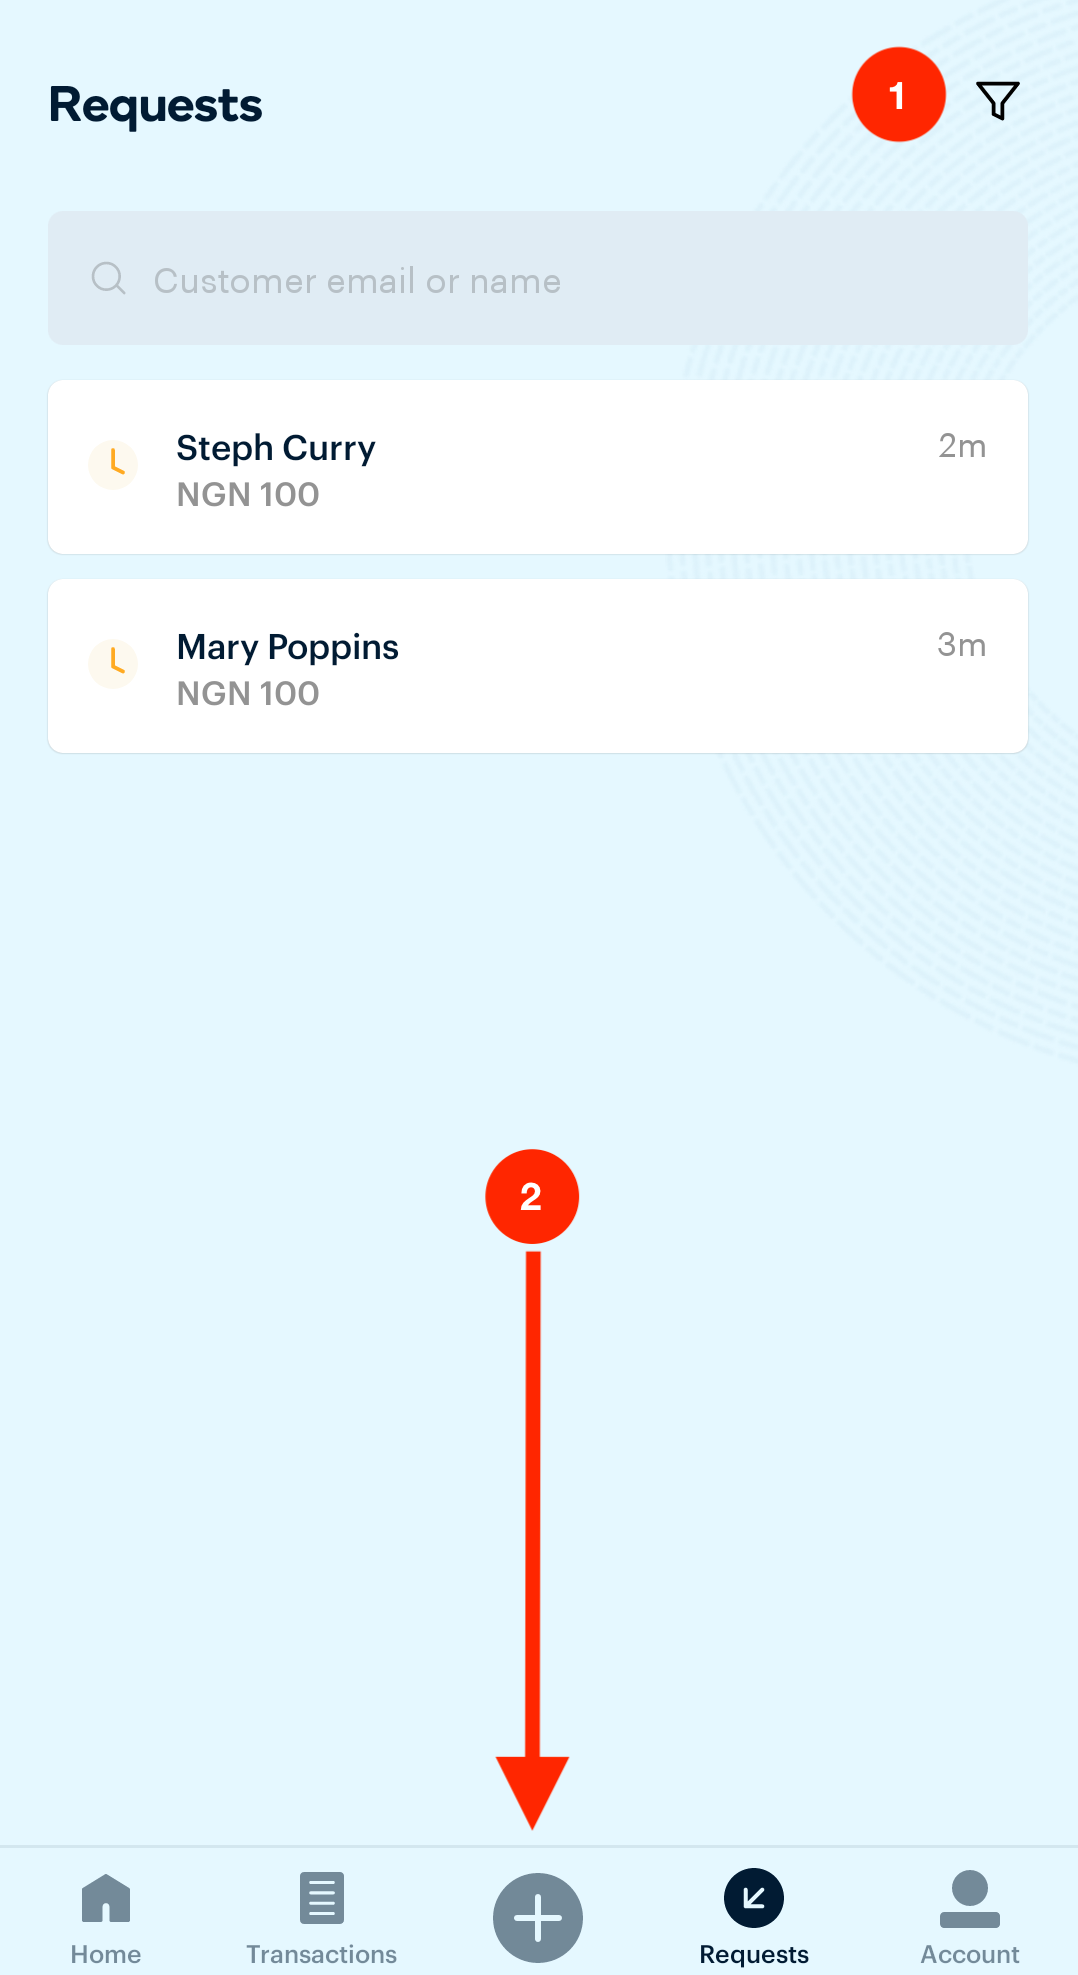
Clicking the Requests icon on your Paystack App takes you to a page that looks like the image below. This page shows you all existing invoices on your business.
Filter by: The funnel icon lets you filter the invoices by status or by date period.
New Invoice: This + button allows you to create a new invoice. Clicking the + button gives you the option of requesting payment from an existing customer or requesting payment from a new customer.
Requesting payment from a new customer
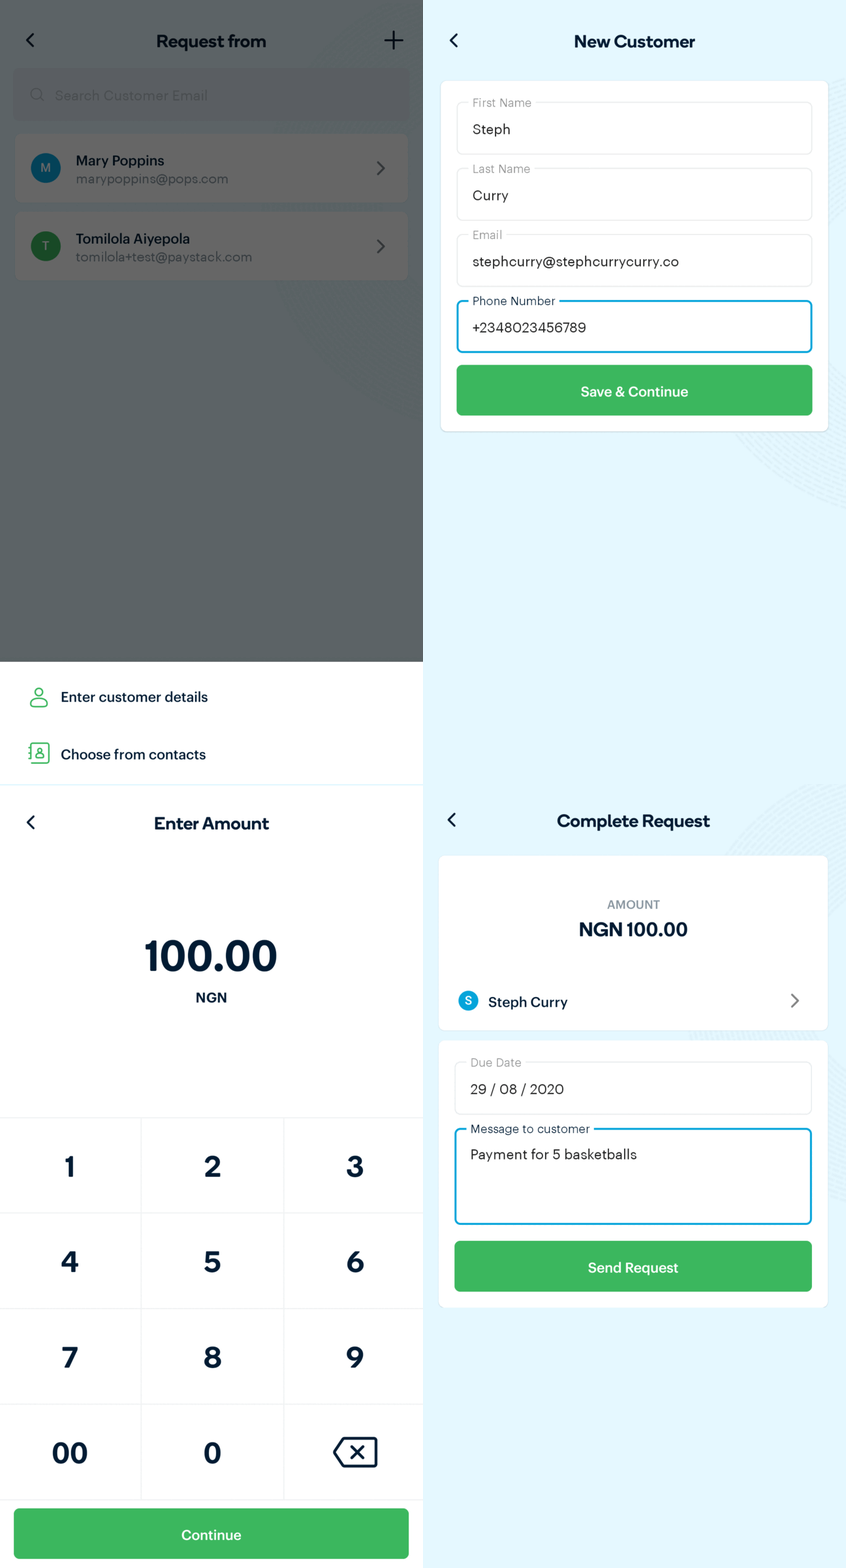
Click on the New Invoice (+) button.
Click on the + icon at the top right corner. This action allows you to enter the customer details or choose someone from your phone contacts. Choose your preferred option.
Populate the fields in the generated form and click on 'Save and Continue.'
Enter the transaction amount and click 'Continue.'
Choose a due date and add a message to the customer.
Click on 'Send Request.'
Requesting payment from an existing customer
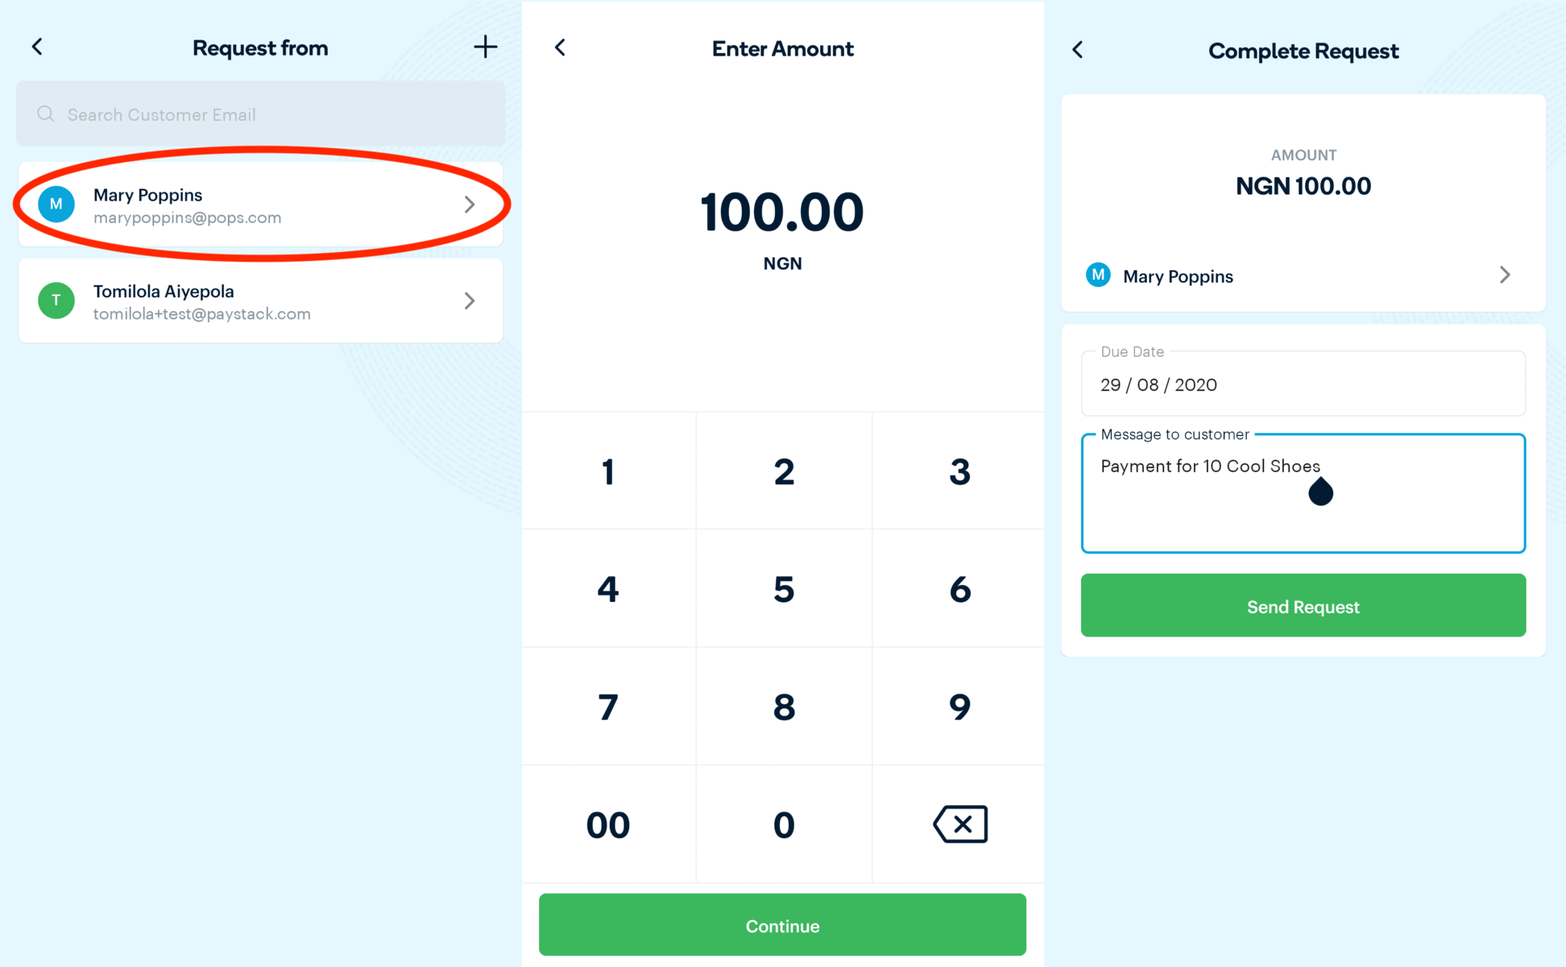
Click on the New Invoice (+) button as shown above.
Click on the existing customer from the list of customers.
Choose a due date and add a message to the customer.
Click on 'Send Request.'
When should I use Invoices or Payment Pages?
Payment Pages are the simplest way to collect payment through Paystack. With Payment Pages, you can generate a simple link that allows customers to make one-time or recurring payments, while Paystack Invoices lets you send a payment request or invoice to a specific person.
Payment Pages are a good choice when you want to accept payments from many different people you may not know. With Payment Pages, you can share the link freely and publicly with the world. You likely want to use Payment Pages if:
You're selling a standard set of goods or services with a fixed price to a mass audience
You'd like to charge a recurring subscription
You'd like the customer to be able to name their own price.
Paystack Invoices, in contrast, are a lot more targeted. They're meant for a specific person and can include different line items, tax considerations, etc. Additionally, when you use Paystack Invoices, you can send payment reminders to customers who owe you money, track how much you're owed, and how much you've collected. You likely want to use Invoices if:
You sell specialized or bespoke goods and services for specific clients
You need to list line items on an invoice and calculate taxes on your bill
You want to be able to send reminders to a client.

