Managing your preferences
User profile and changing your user email or password
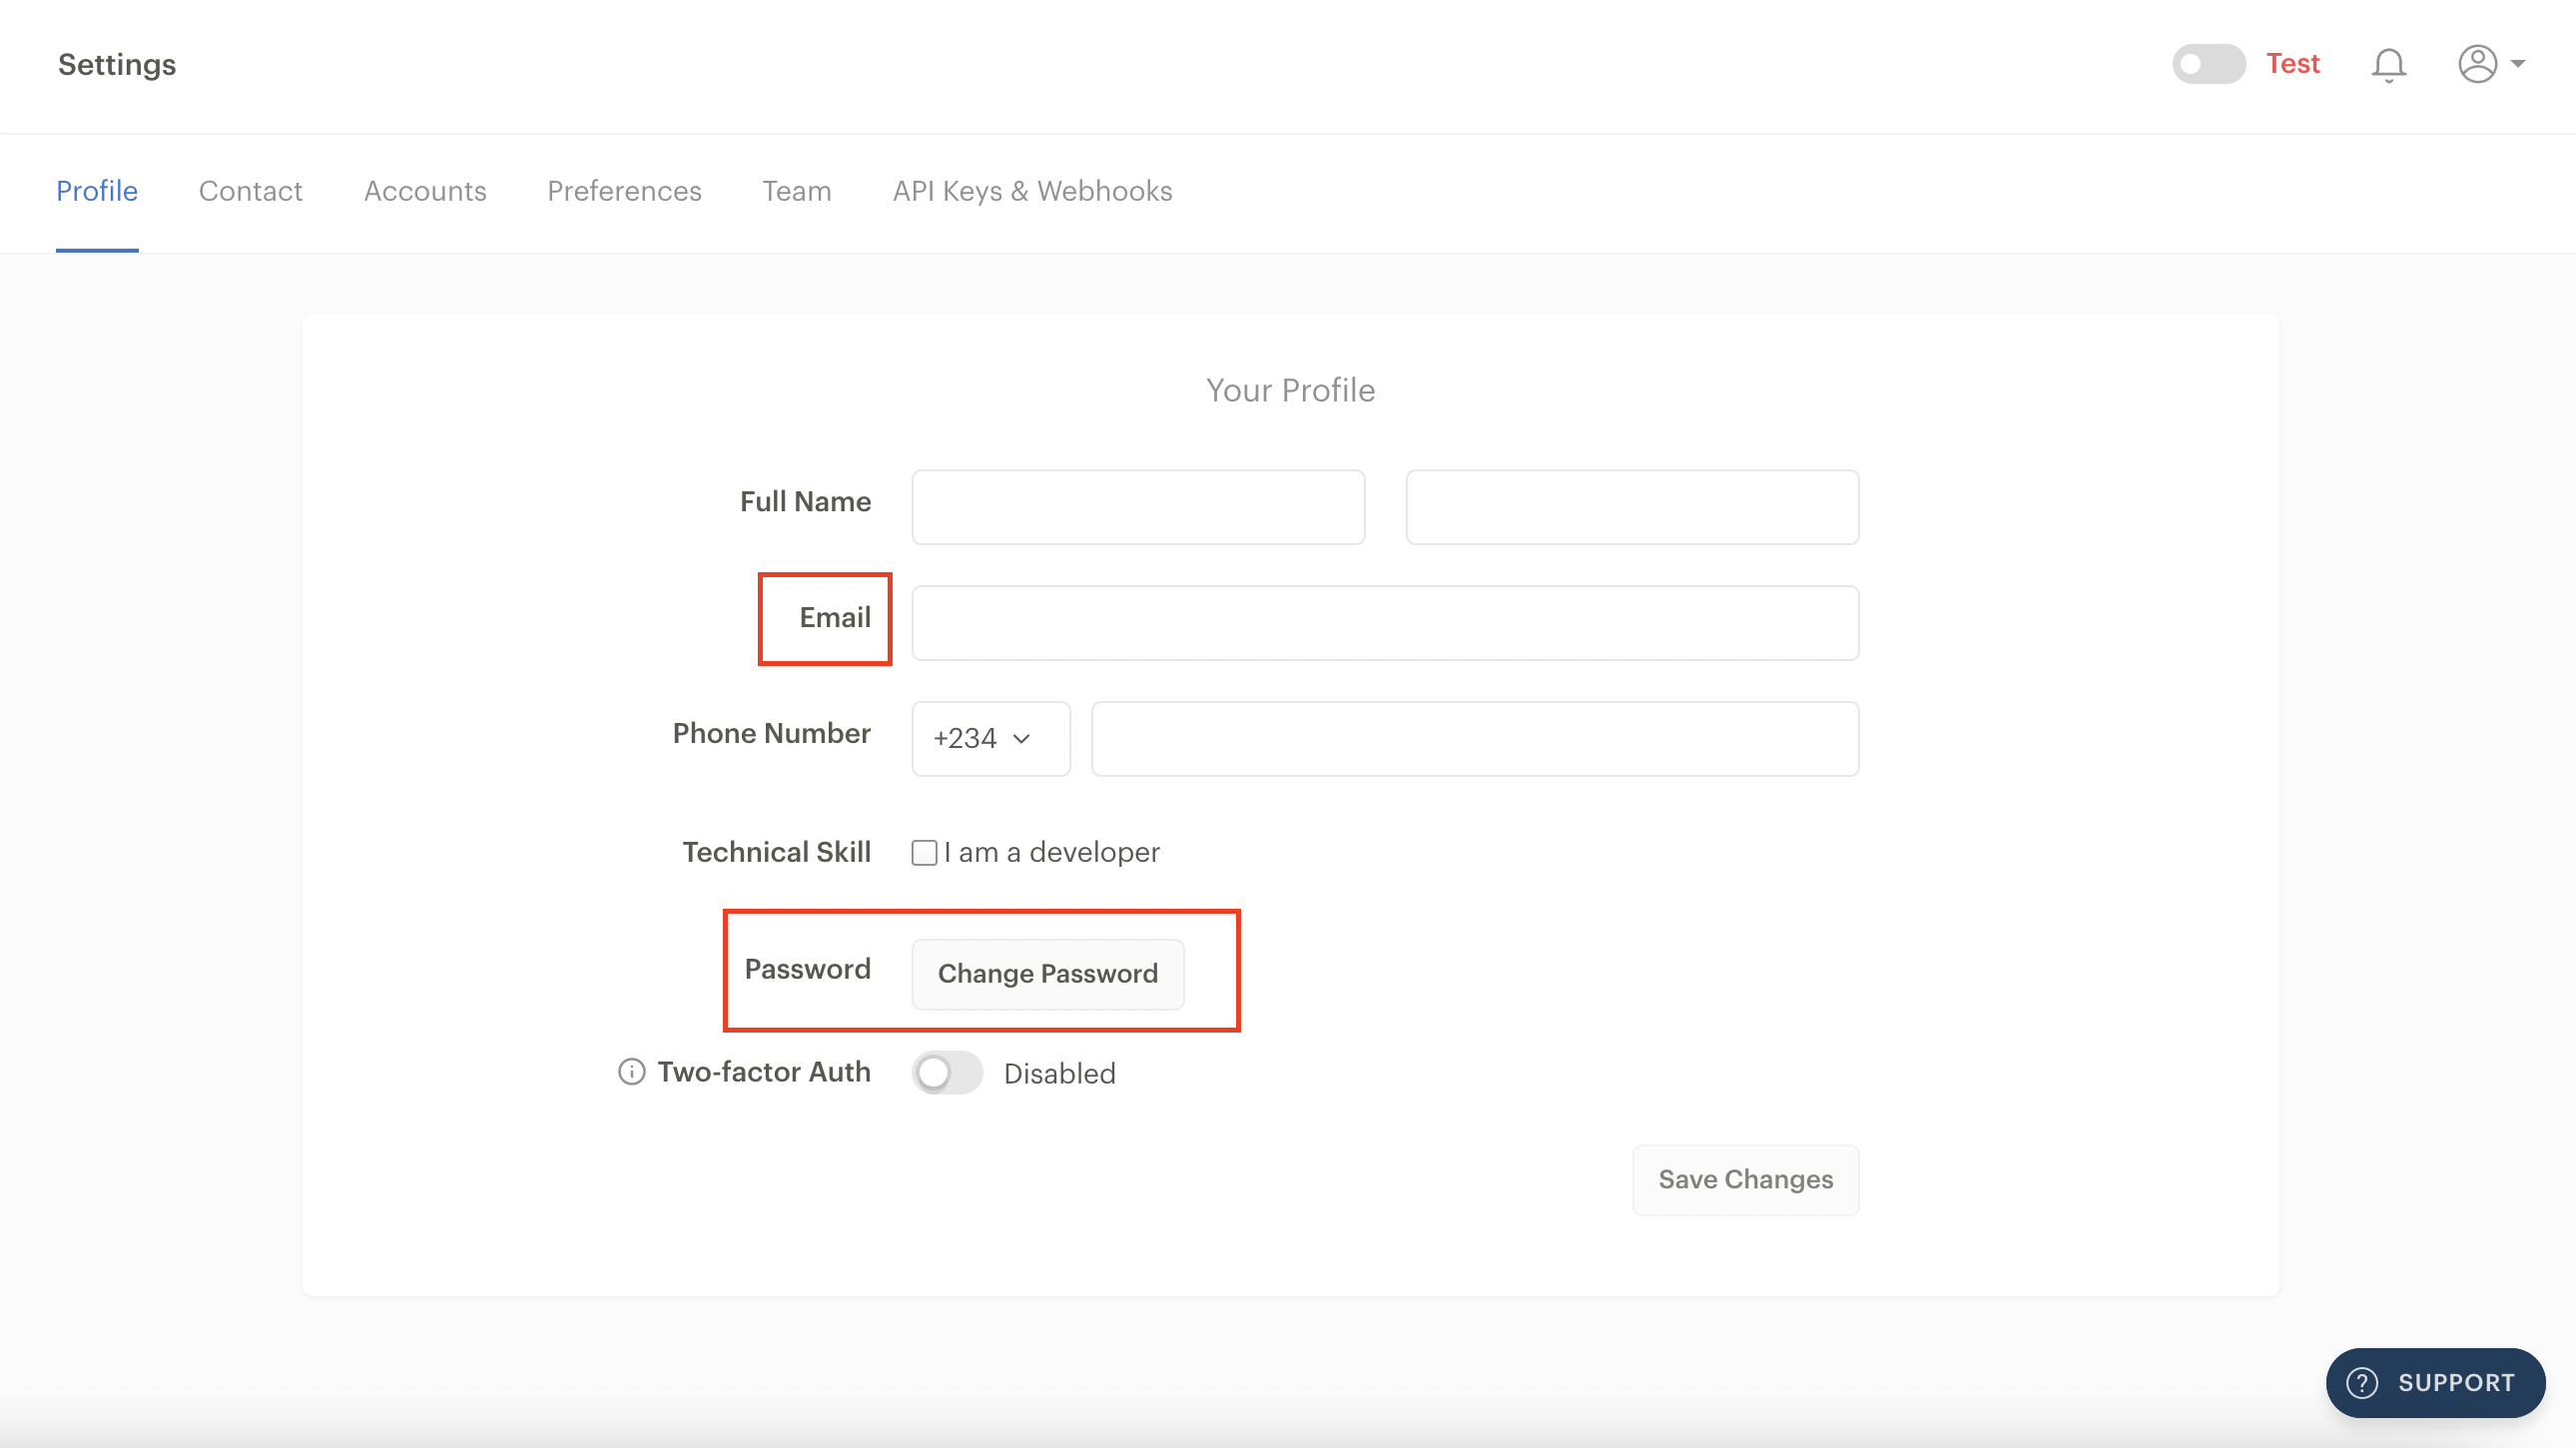
The profile tab contains basic information about your user account, like your name, email and phone number.
You can choose to change your email address and password. To change your email all you need to do is clear the email field and type in the new one, then click on the ‘Save Changes’ button.
To change your password, click on the ‘Change Password’ button. A pop-up will appear, requiring you to input your old and new passwords. Fill in both fields and click ‘Change Password’ to complete the process.
Contact information
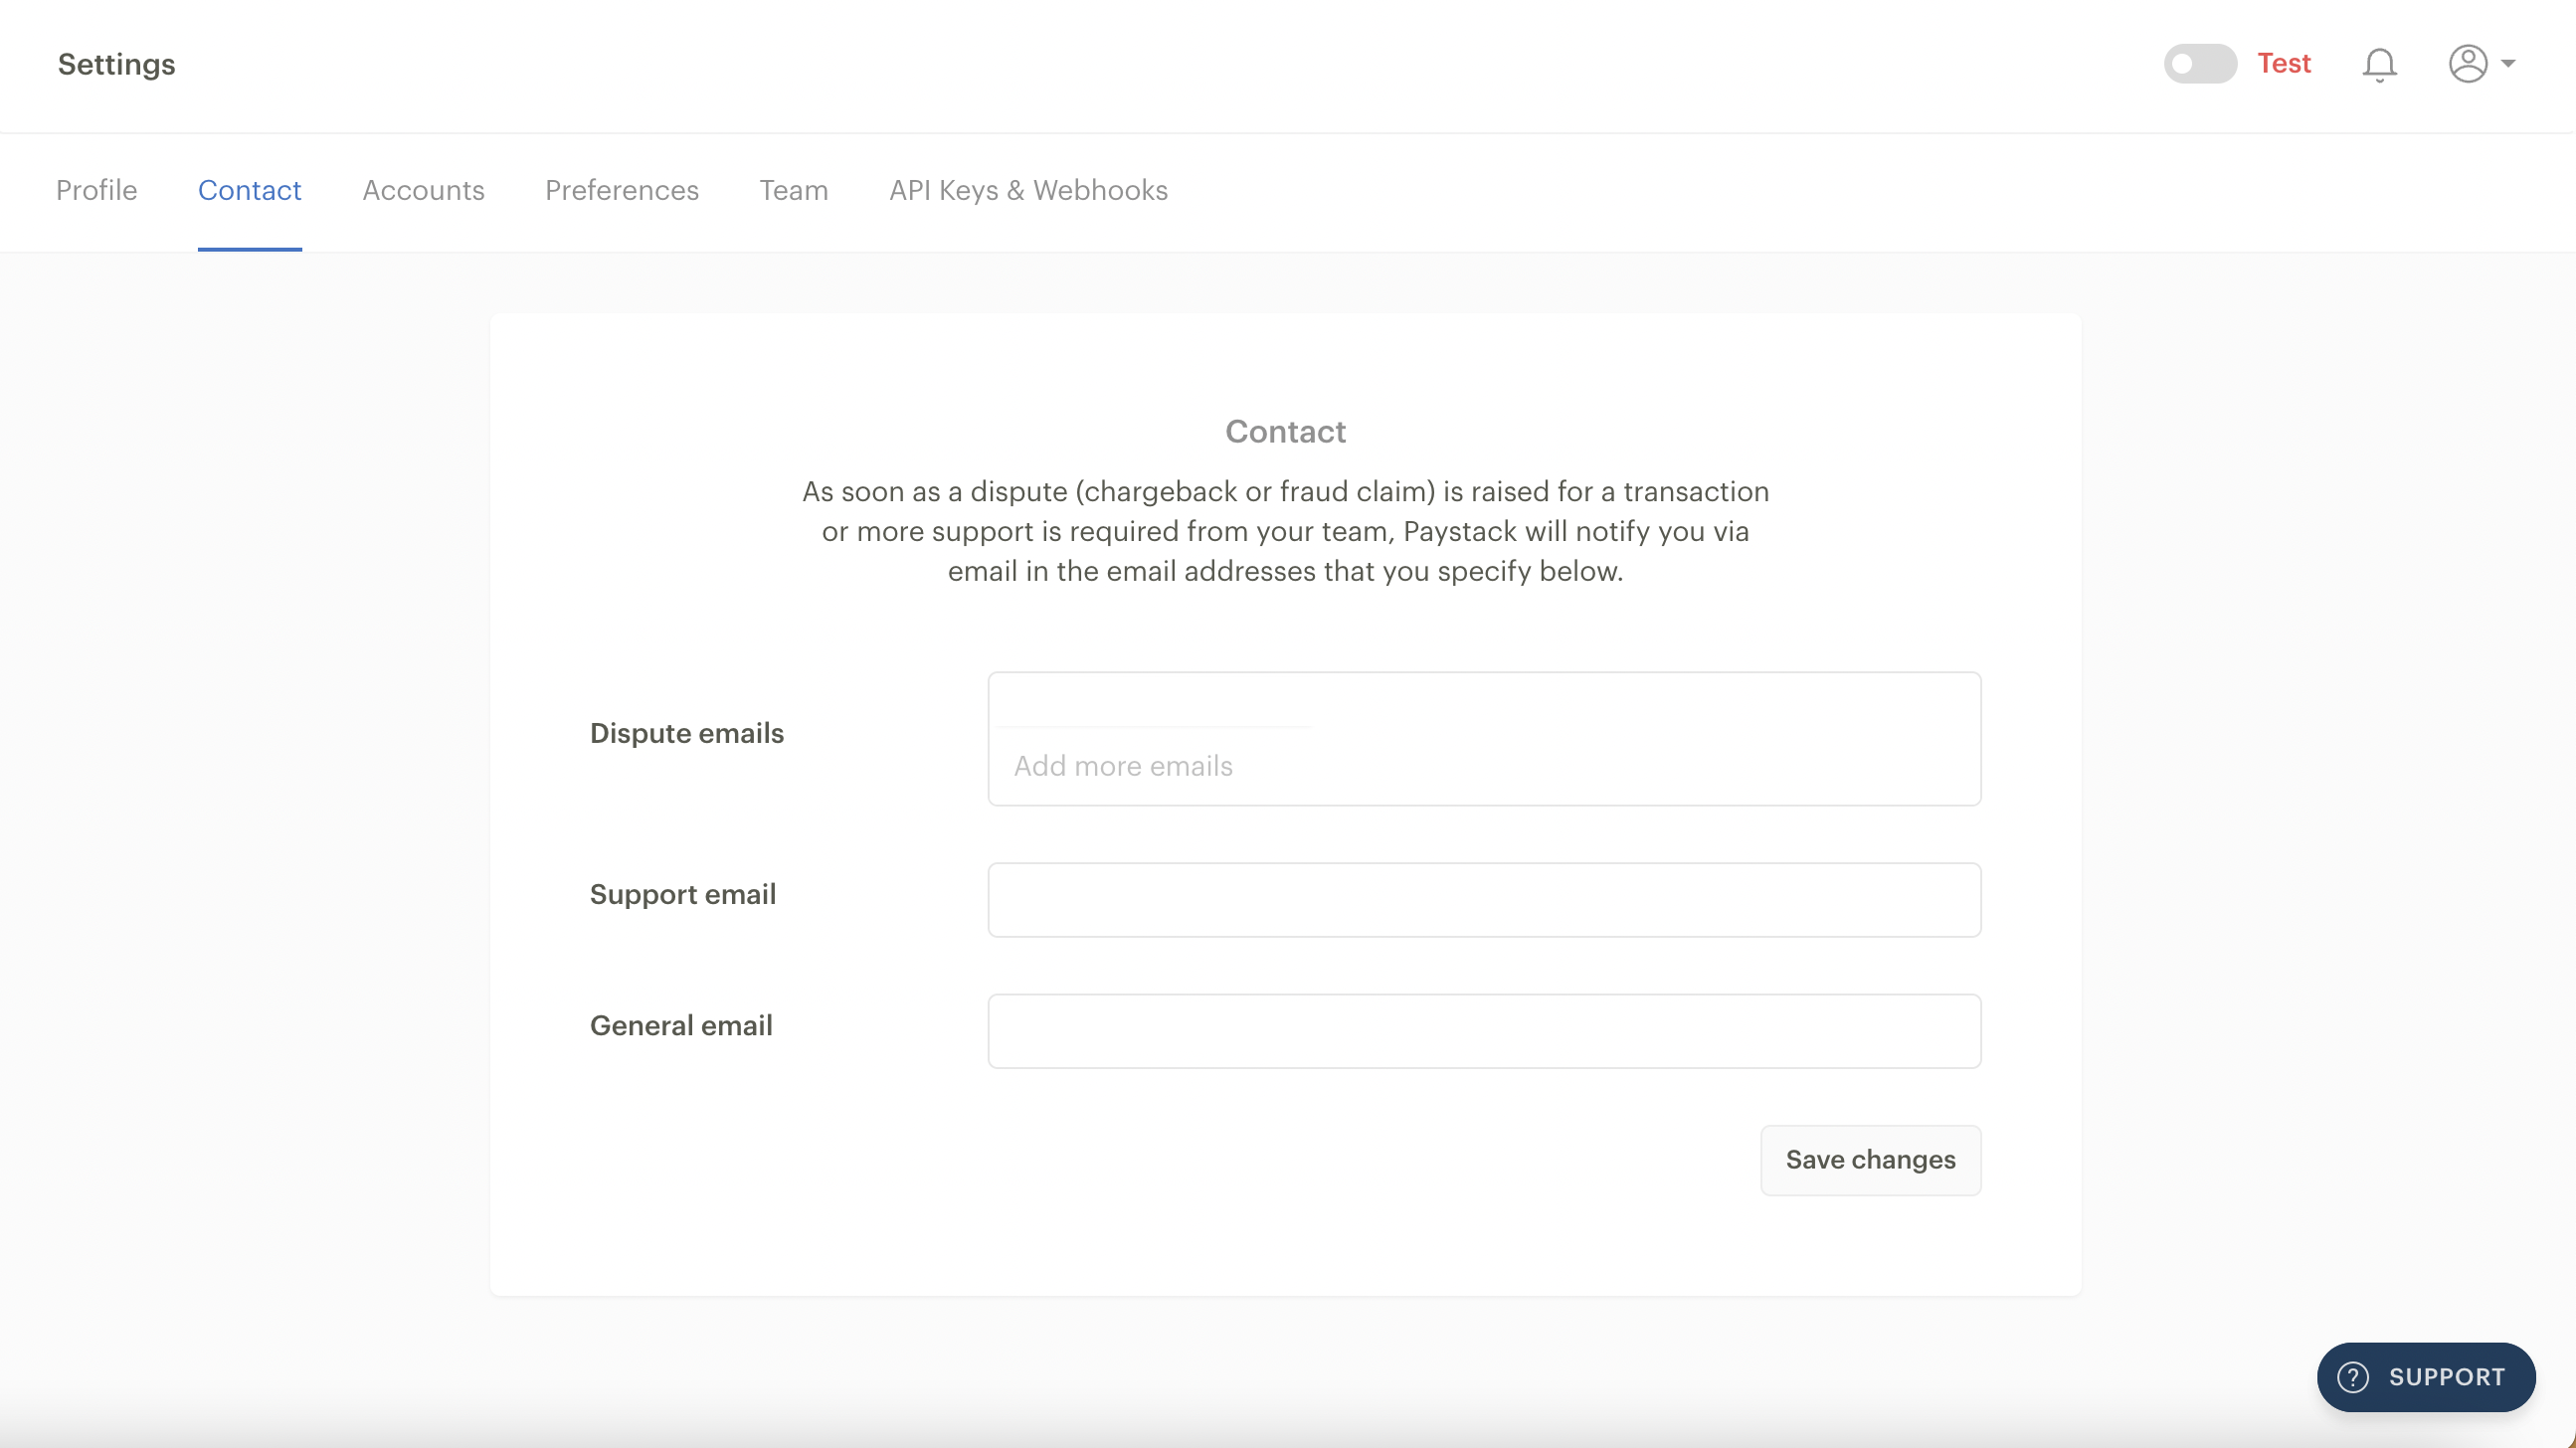
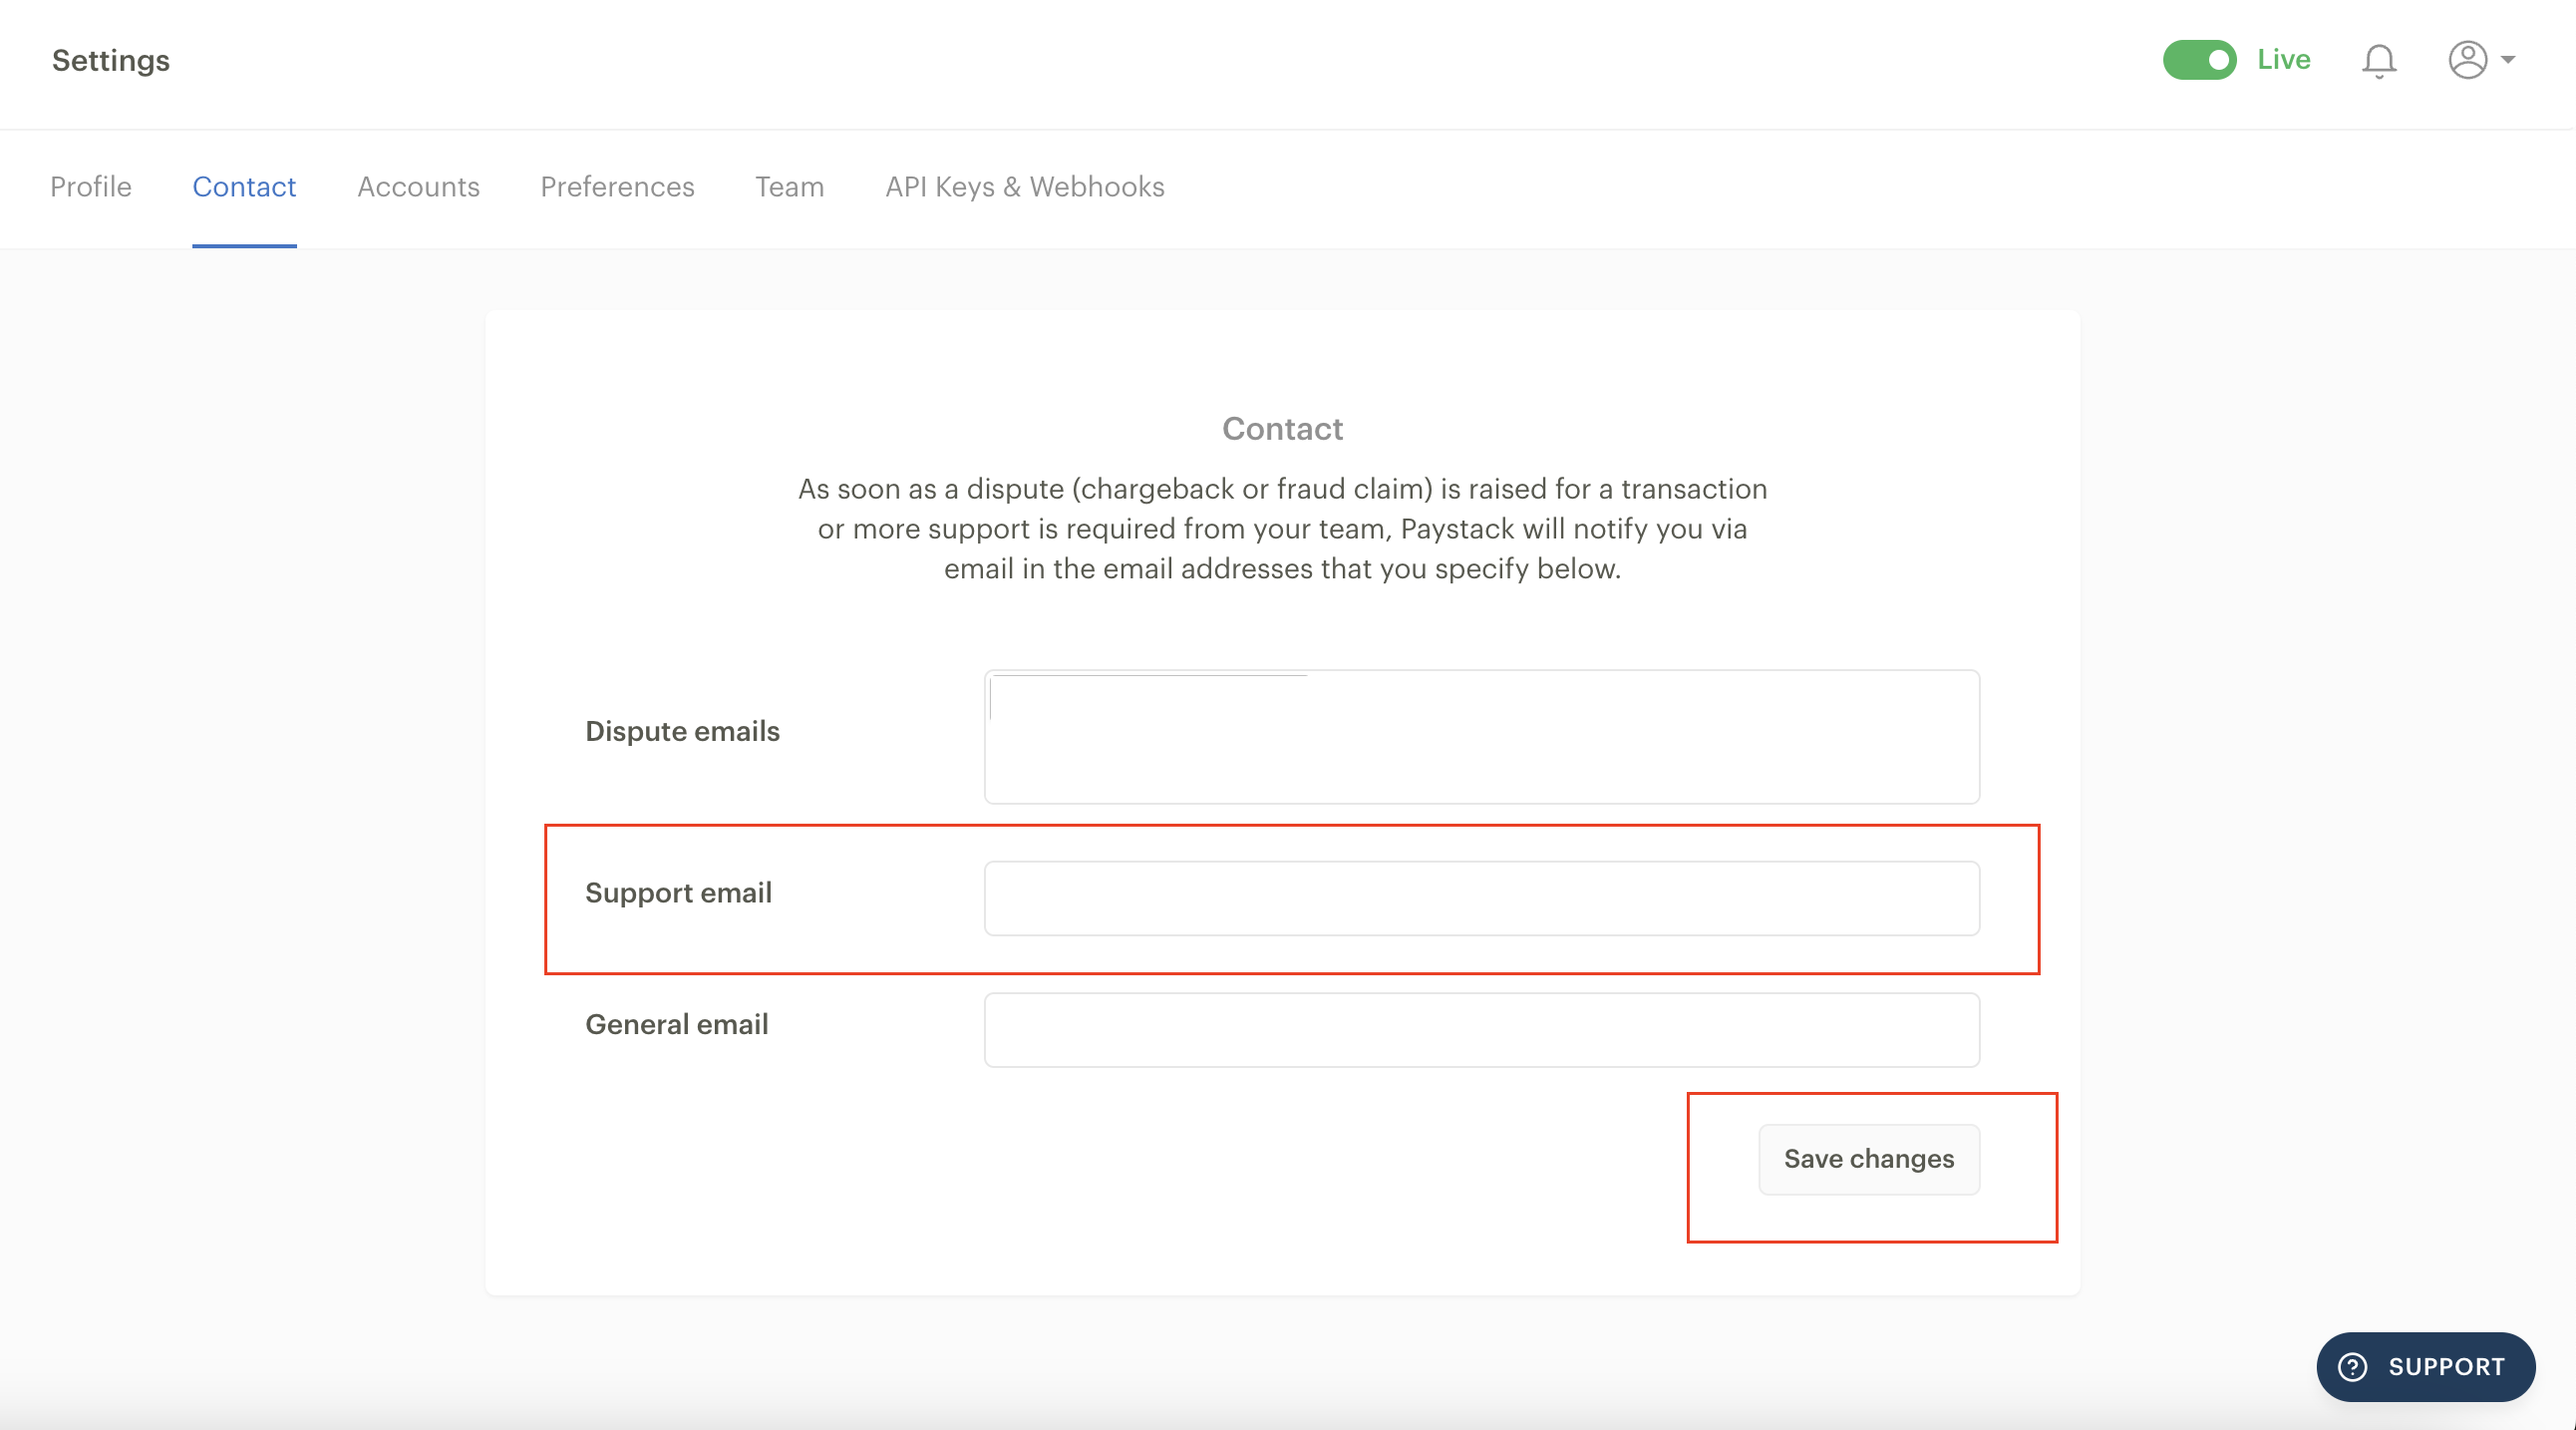
On the Contact tab of the Settings page, you can add the following email addresses:
Dispute email: Notifications of chargebacks and fraud claims raised against your business will be sent to this email. Since chargebacks and fraud claims are time-bound, we advise only providing email addresses you frequently check in their inbox. This way, if you miss the notifications sent to one inbox, the persons managing the other inboxes will most likely not miss them. You can add up to five active email addresses in this field.
Support email: Your support email address is what will appear on the Paystack transaction receipt your customers will receive after a successful payment. They can use this email address to contact you with any complaints or questions about your business.
General email: This is our default email address to communicate with you about your business. If you also choose to receive transaction receipts, they will be sent here.
You can change or remove any of the email addresses entered here by clearing the field, filling in the new email address, and clicking on the ‘Save Changes’ button at the bottom of the page.
Payment preferences
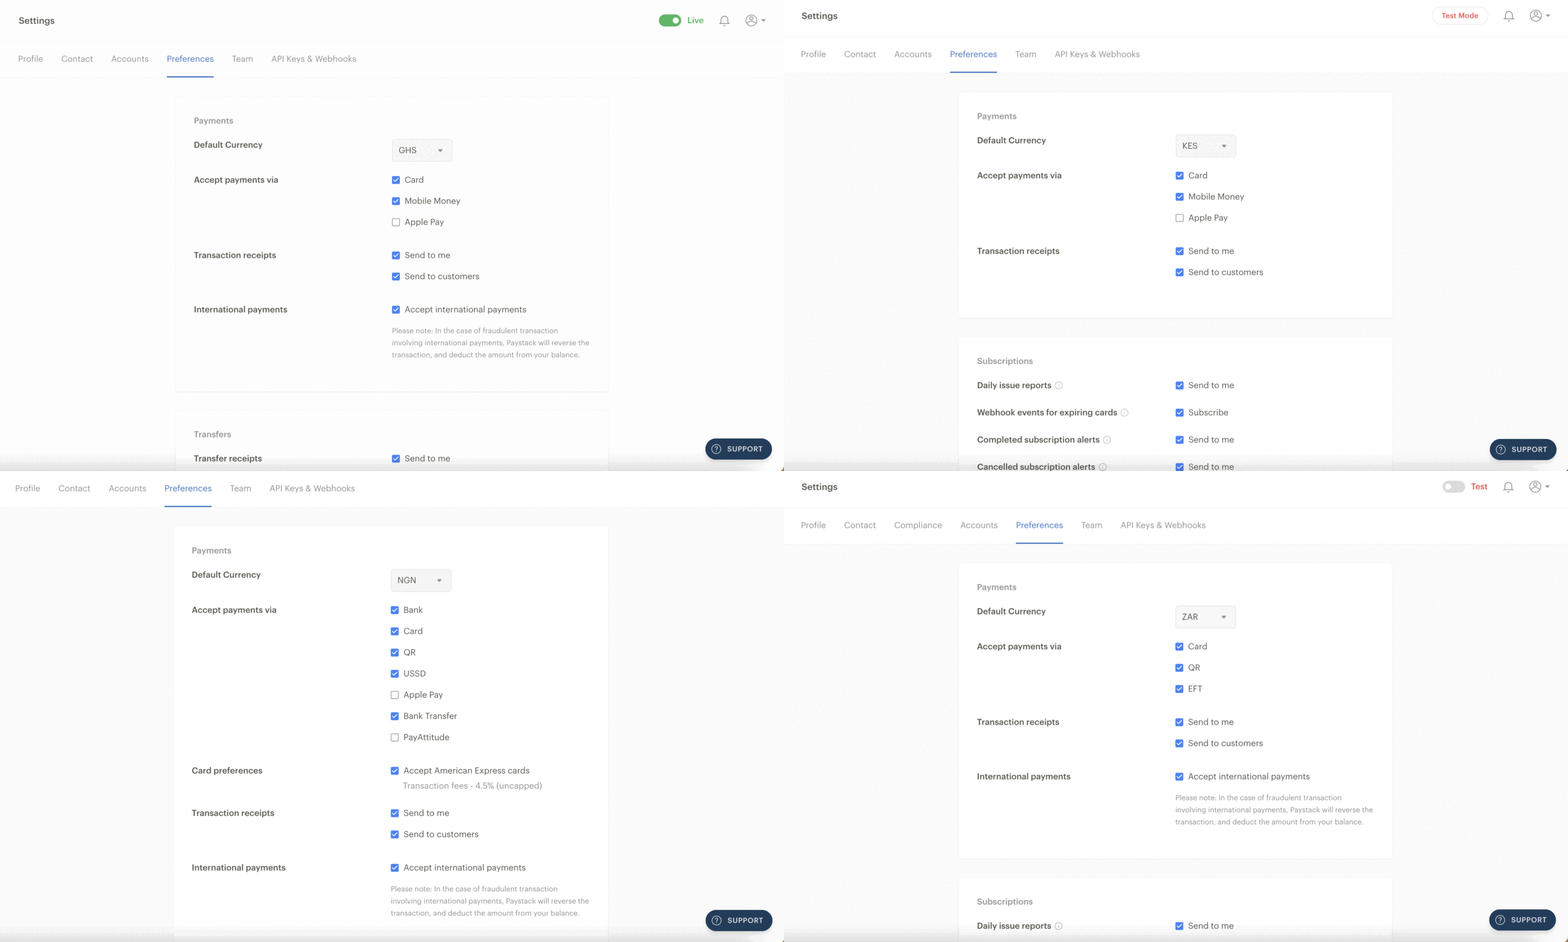
Transaction preferences on the Dashboard for Ghana, Kenya, Nigeria and South Africa-based businesses.
Once you click on the Preferences tab under the Settings page, you’ll see options to choose your preferred payment channels from a list of payment channels that are available to your country to receive payments from your customers.
You’ll also find the option to have transaction receipts sent to you (your general email address), your customers or both.
Updating your trading or legal business name
Your legal business name is the name on your business registration documents. This means that the name you provide in this field must match what is on your registration documents, while your trading name is the name your customers or the public use to identify your business.
To update your trading or legal business name, kindly follow these steps:
Click on the Settings page from the menu on your Dashboard.
Select the Compliance tab (you should see your current business information displayed).
Click 'Edit' at the bottom of the Profile section to change the legal or business name field as it applies to your business type.
Click 'Save', and when the page refreshes, you should see your new legal business name displayed on the page.
Adding another business to your Dashboard
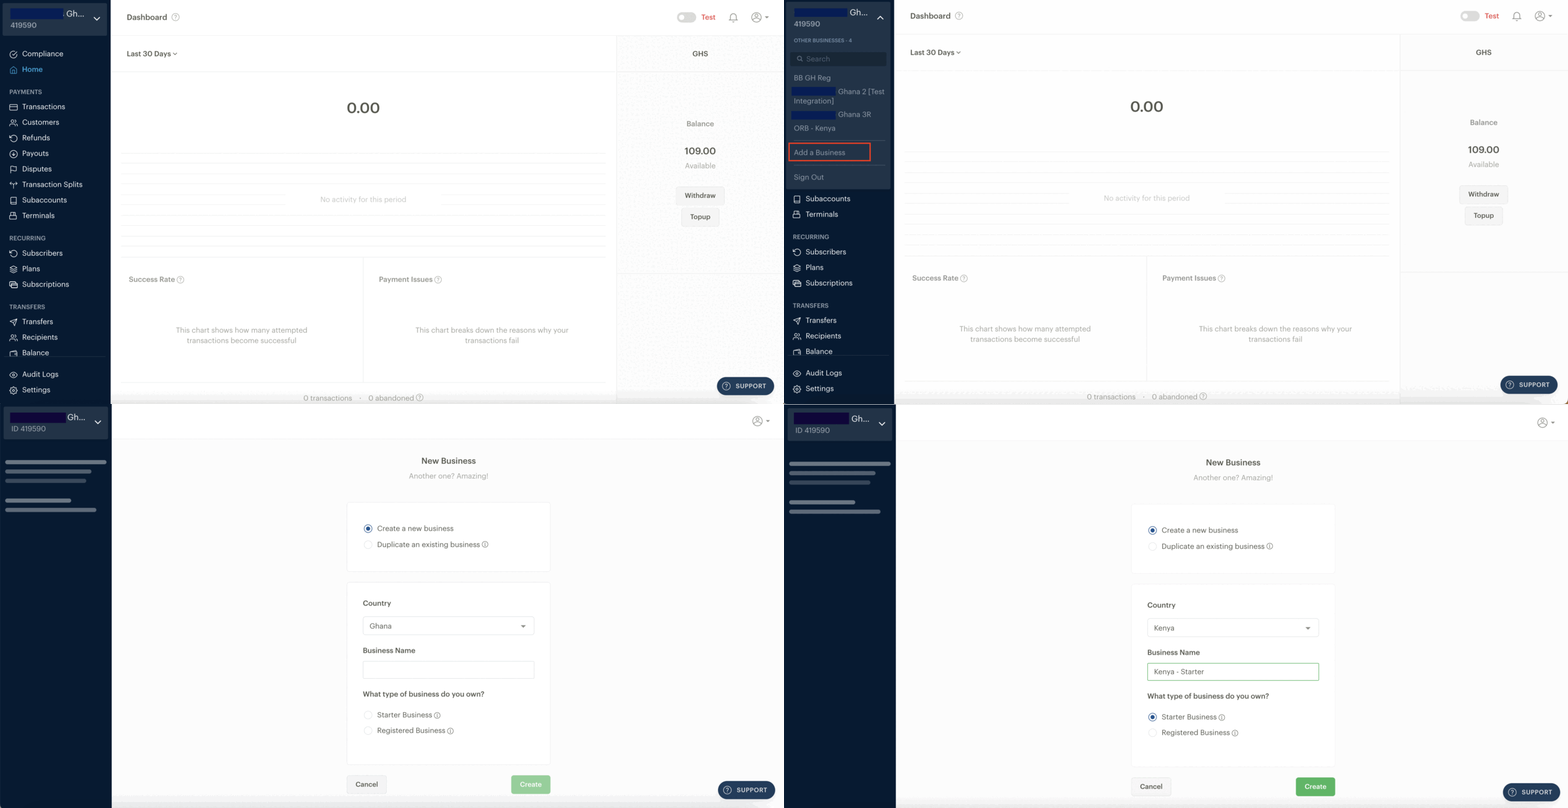
If you have multiple businesses and you would like to manage them with a single Paystack user account, you can add new businesses under an existing user account. This eliminates the need to create multiple user accounts with separate login details.
For example, if you sell shoes online and manage a beauty salon, you can separate each business without creating a new account. Similarly, if your organisation is a school with many branches, set up these branches as individual businesses to help track the performance of each branch separately.
Once your account email address has been added as a user on another business on Paystack, you can switch to that business at any time, even when you're not the primary owner.
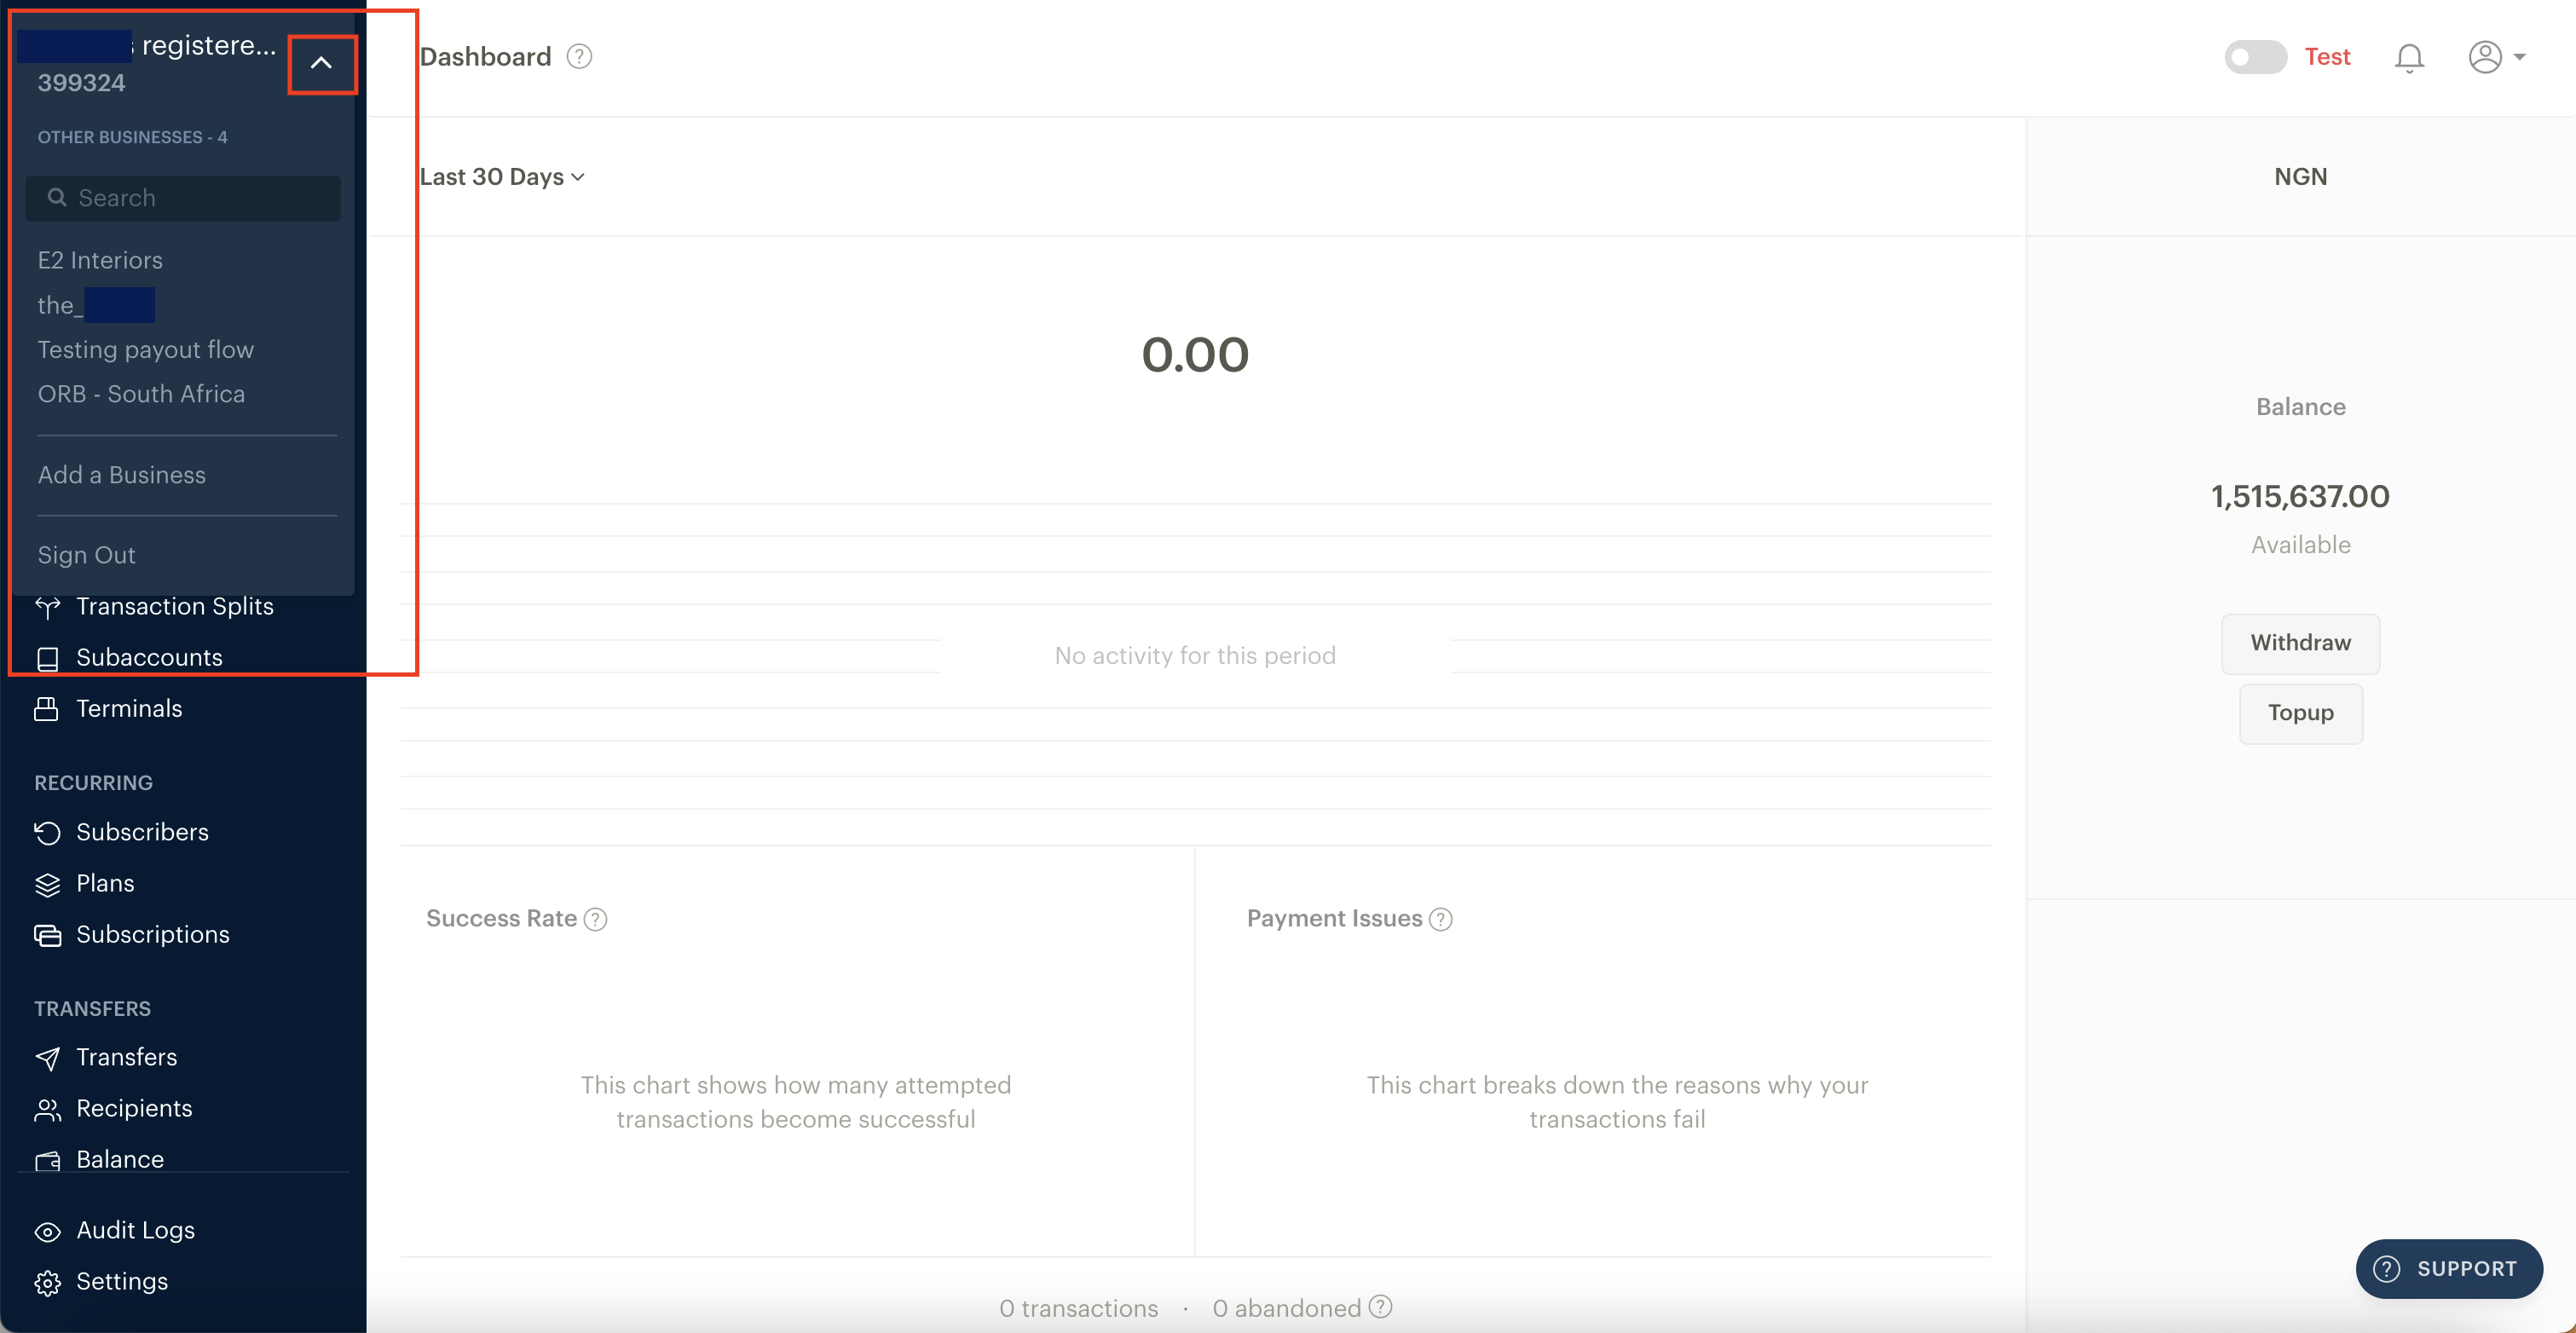
You can toggle between all the businesses you own and those you've been added to as a team member by clicking on the arrow at the top of the Dashboard left navigation bar.
Once you click on it you’ll see a dropdown of all the businesses, and all you have to do is click on the one you want to switch to.
This feature is ideal if you plan to use the same registration documents across multiple businesses. For example, if you run a bakery with multiple branches in different locations, you should separate these businesses for easy reconciliation while maintaining the same Compliance documents.
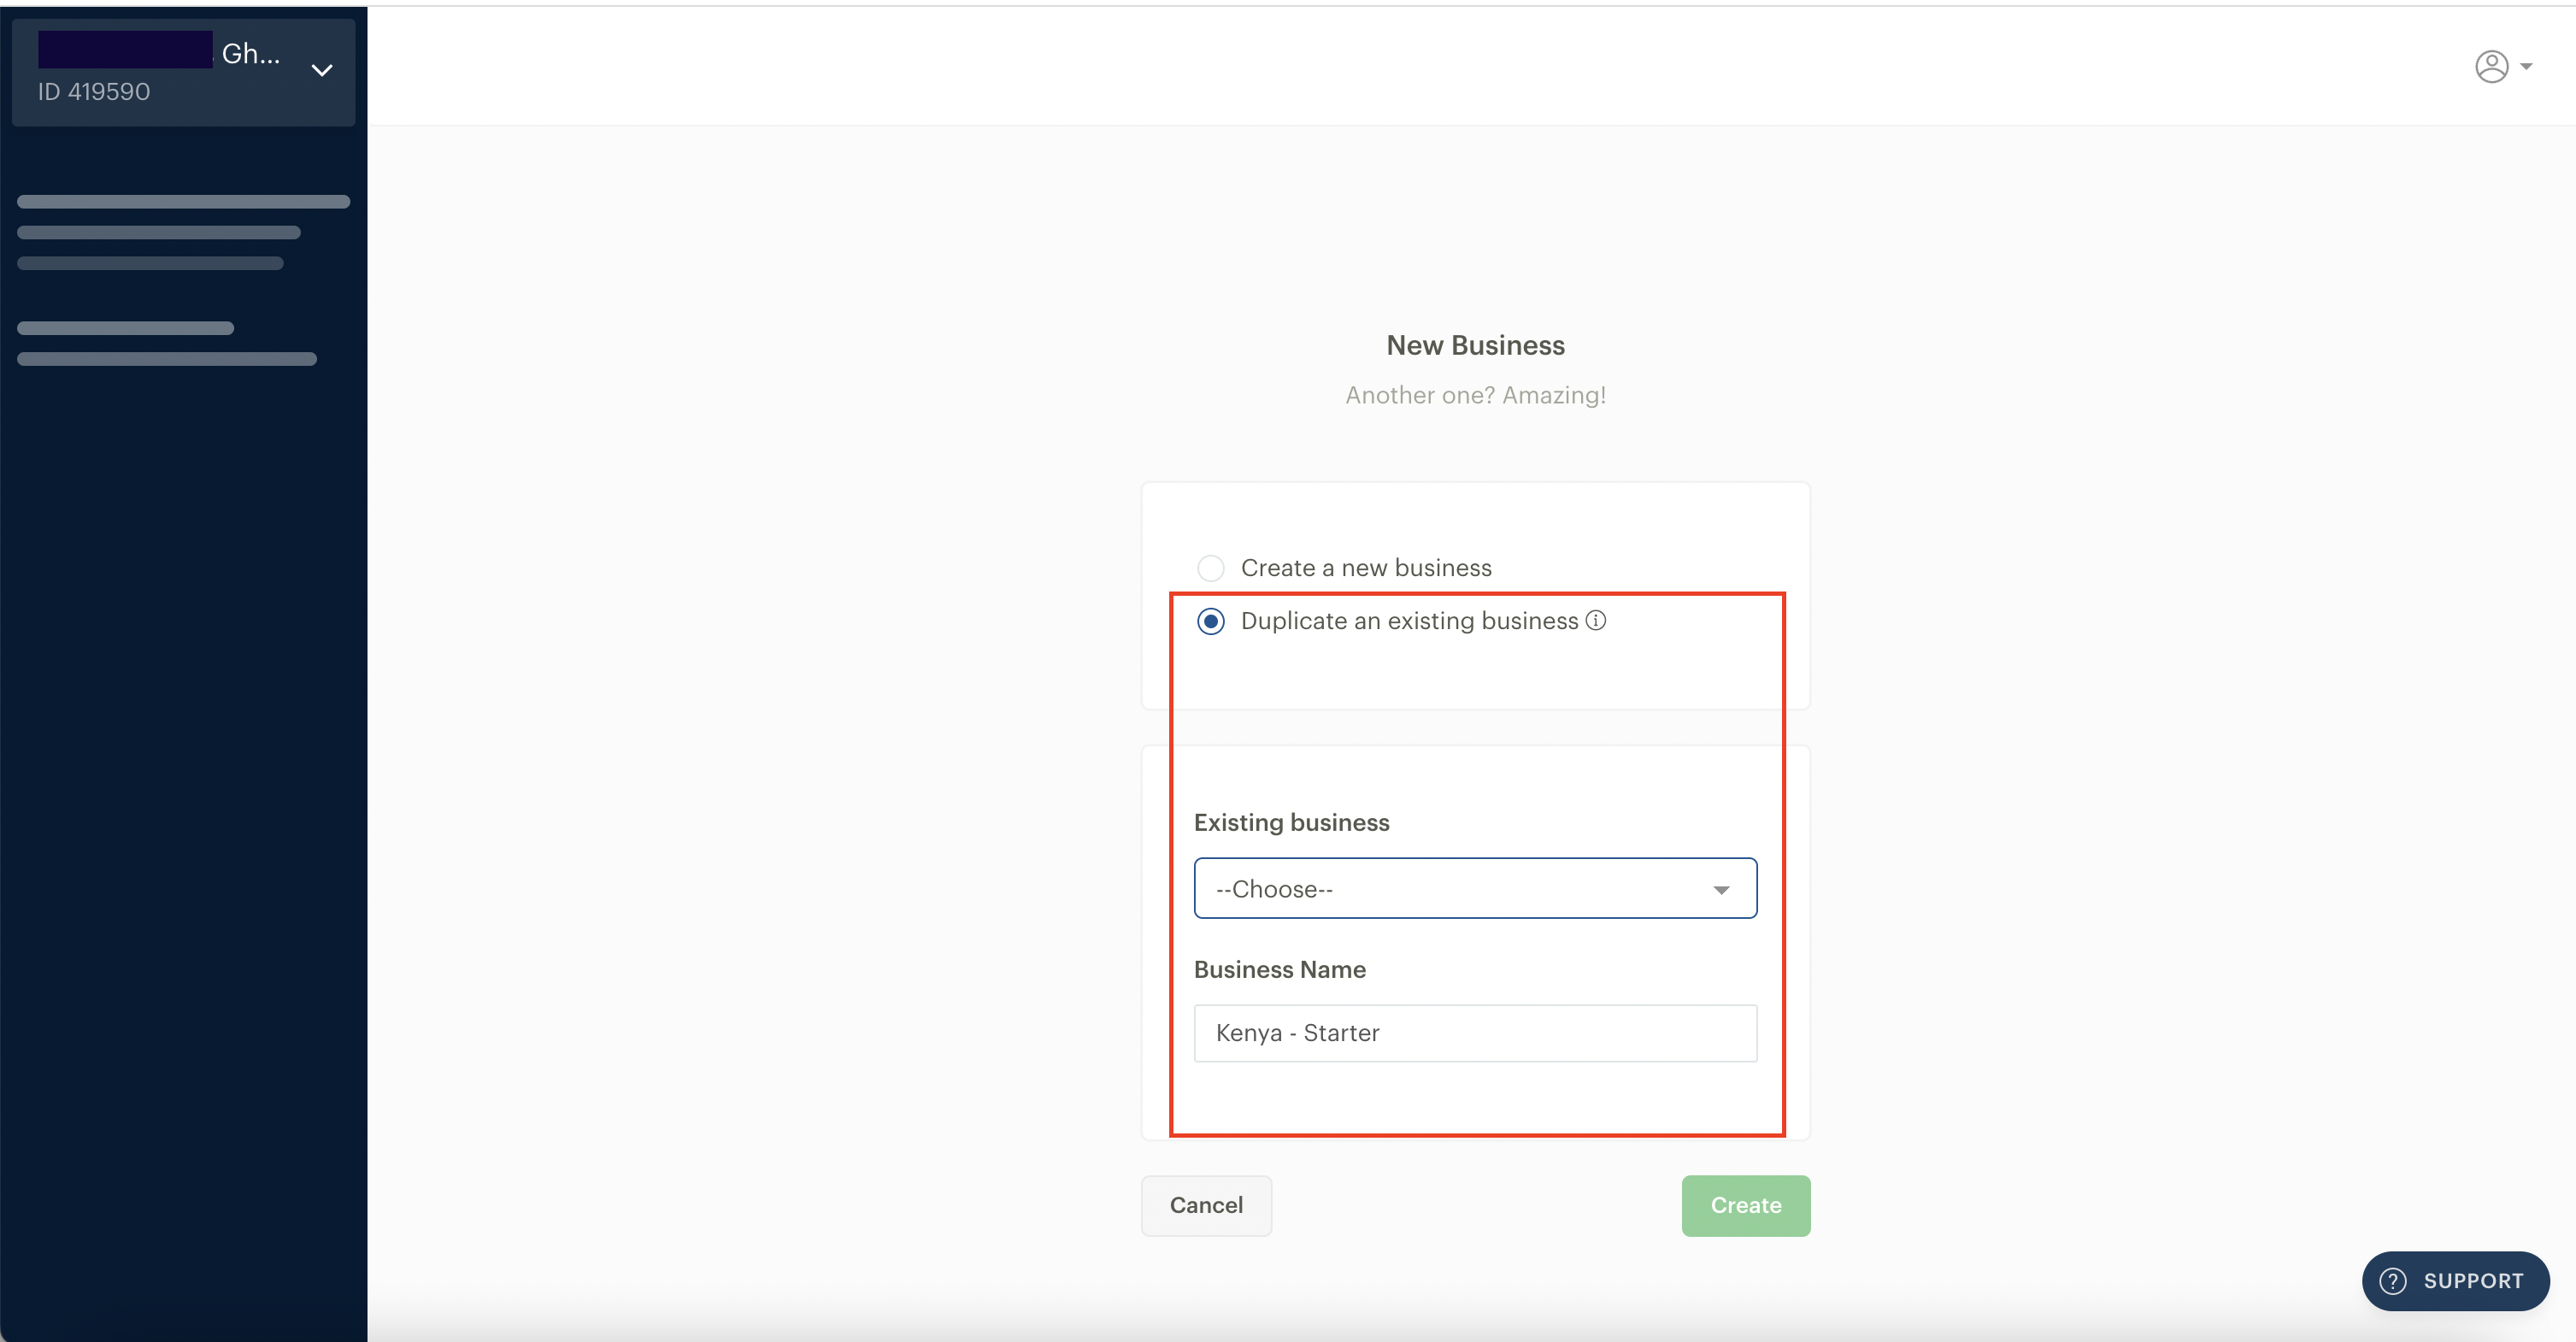
You can choose to duplicate your compliance information for a new business you want to add.
This feature is ideal if you plan to use the same registration documents across multiple businesses. For example, if you run a bakery with multiple branches in different locations, you should separate these businesses for easy reconciliation while maintaining the same Compliance documents.
To duplicate your compliance information for a new business, you will need to follow the steps above and choose the ‘Duplicate an existing business’ option. You’ll see the option to choose which business information you’d like to duplicate.
Pagination, timezone and logo
Pagination
Pagination is a Dashboard setting that decides how we fetch and list data on your Dashboard. This data could be your Transactions, Transfers, Payouts, Disputes or any other set of records on your Dashboard.
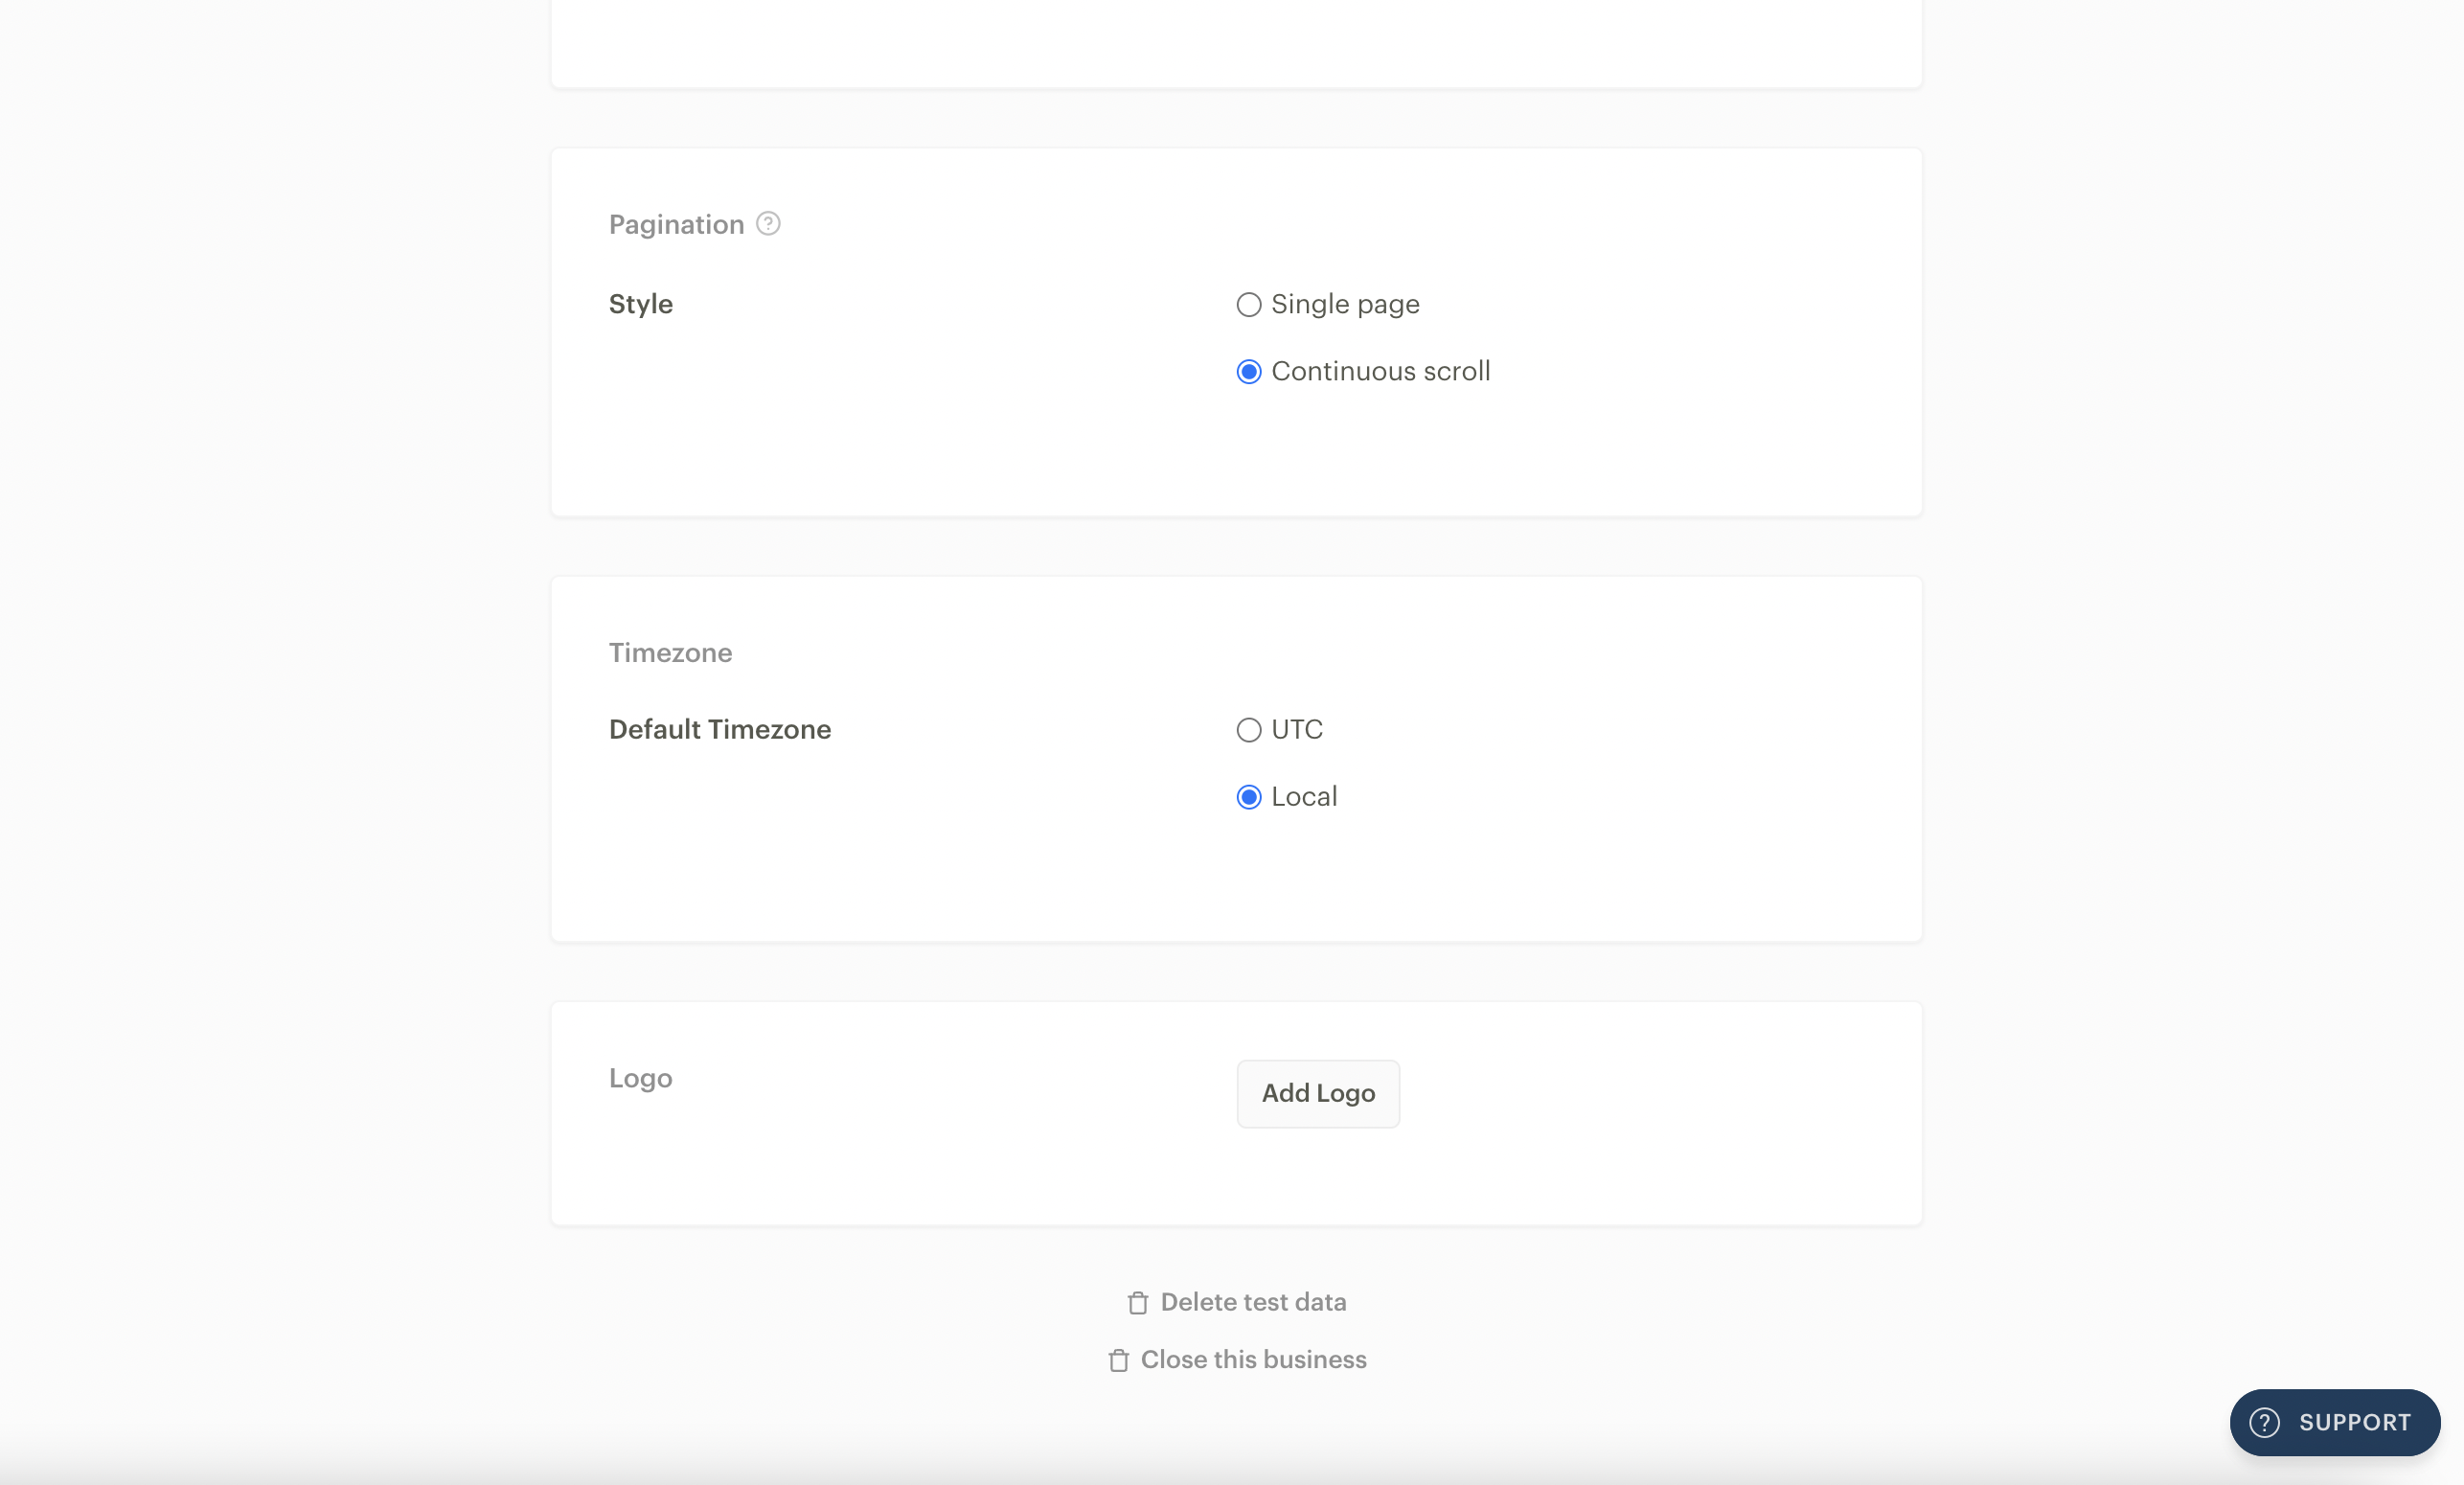
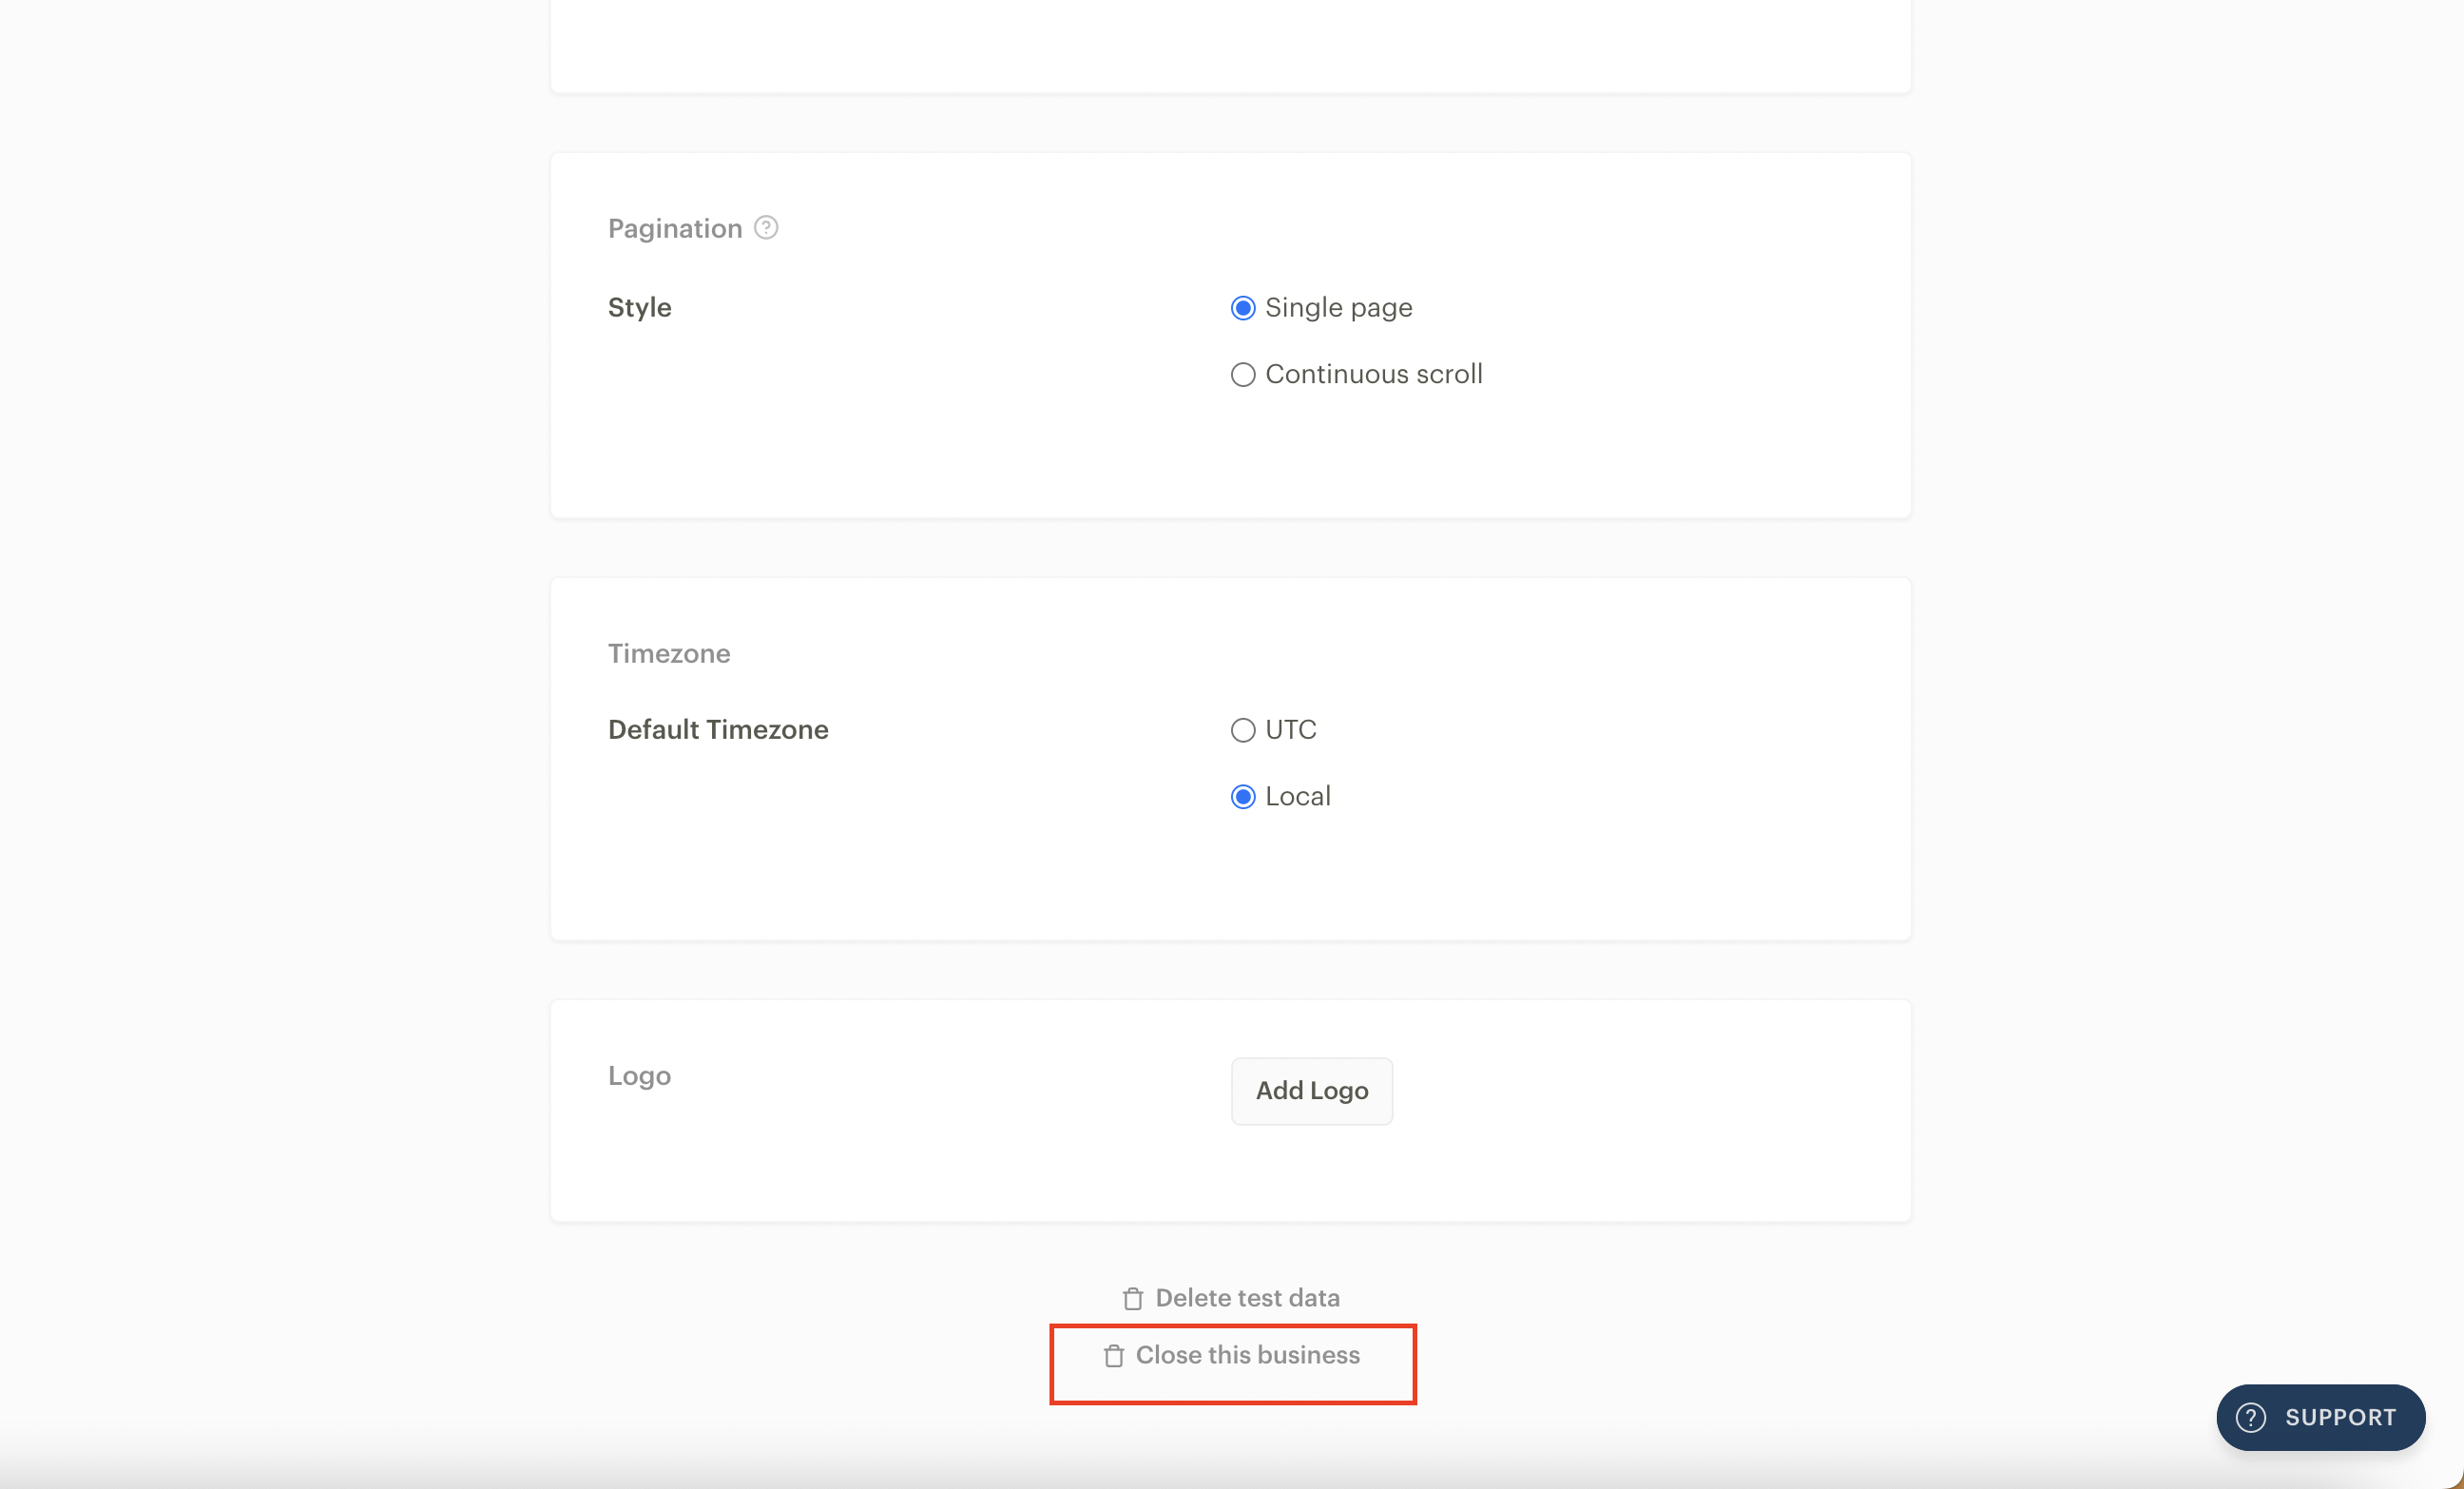
You can choose your preferred pagination style from the Preferences tab on the Settings page of your Paystack Dashboard, and there are two pagination style options:
Single page
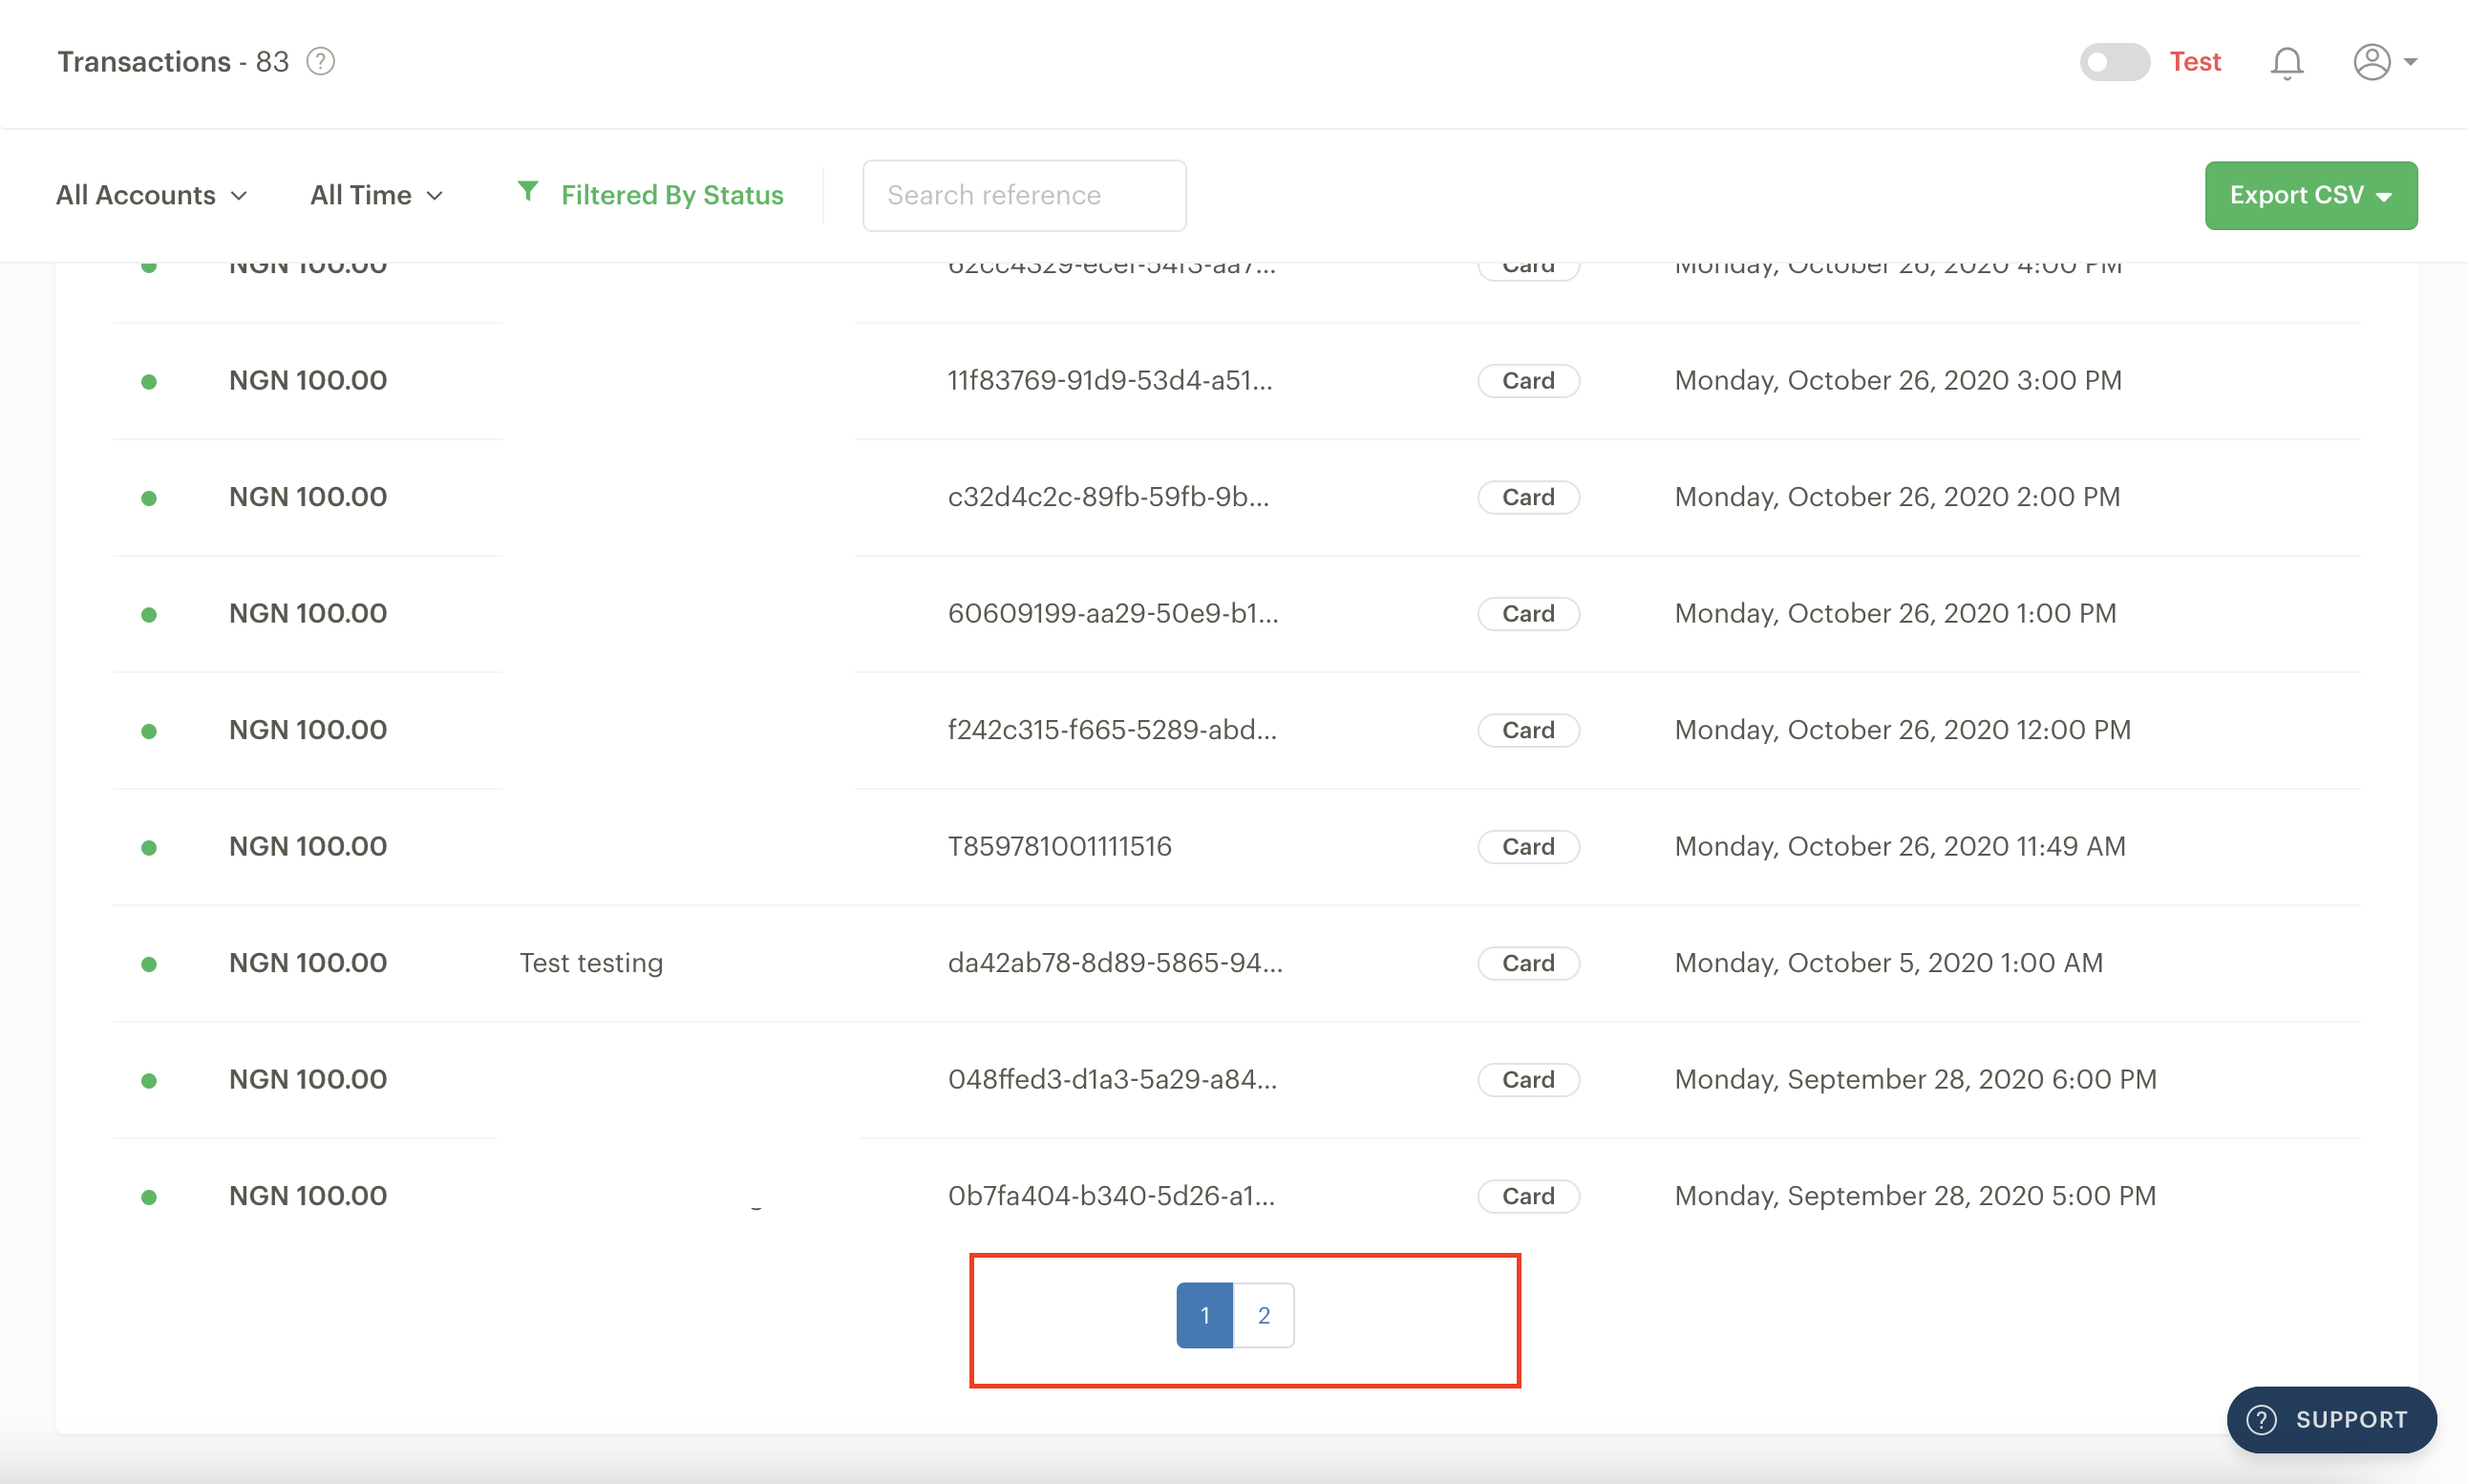
Single page pagination is our default pagination experience. With this pagination, you can see how many pages of records you have and click on any page to view the records on that page. The single page pagination option might retrieve data slower if your business generates a lot of data or has millions of records.
Continuous scroll
The continuous scroll Pagination style is a new and improved pagination experience. This option helps you to retrieve data up to 10 times faster than single page pagination. You'll prefer this option if you're a business that generates lots of data and millions of records.
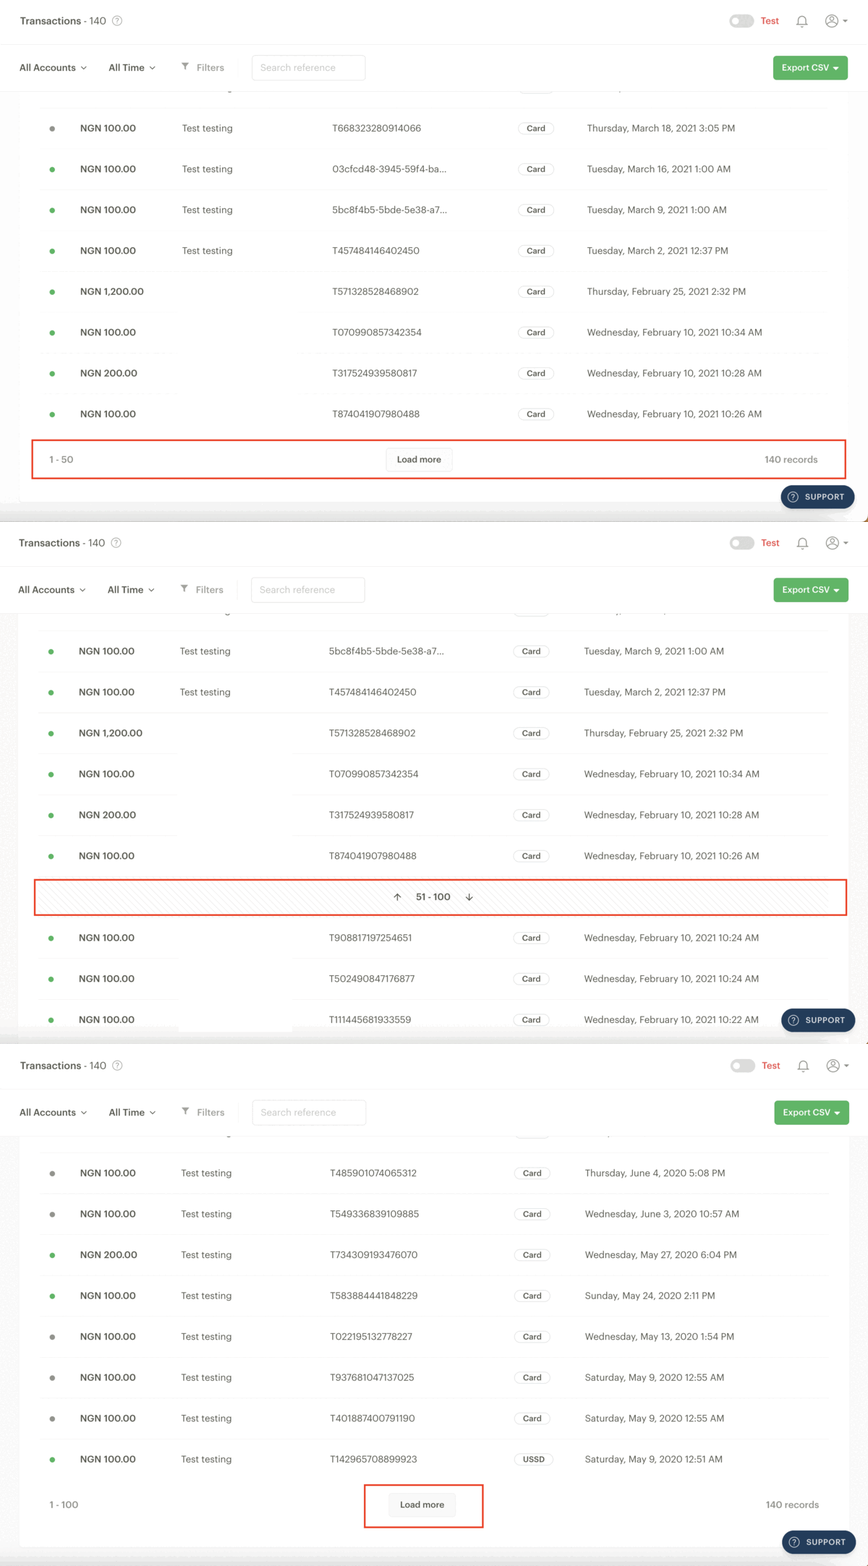
The continuous scroll navigation has a ‘Load more’ button at the end of the page, which you can click to fetch the next set of records.
Fetching a new set of records will insert a break-point between the new set of data and the previous set or sets. If you hover your mouse over that break-point, arrows pointing up and down will appear. You can use these arrows to jump back and forth between different records sections.
Timezone
All data in Paystack's database is stored in the Coordinated Universal Time (UTC) time zone by default. UTC is the time standard commonly used across the world. This means that the default timestamps on your Dashboard will reflect UTC.
However, you can have the timestamps on your Dashboard reflect your local time, that is, the time zone set on your browser.
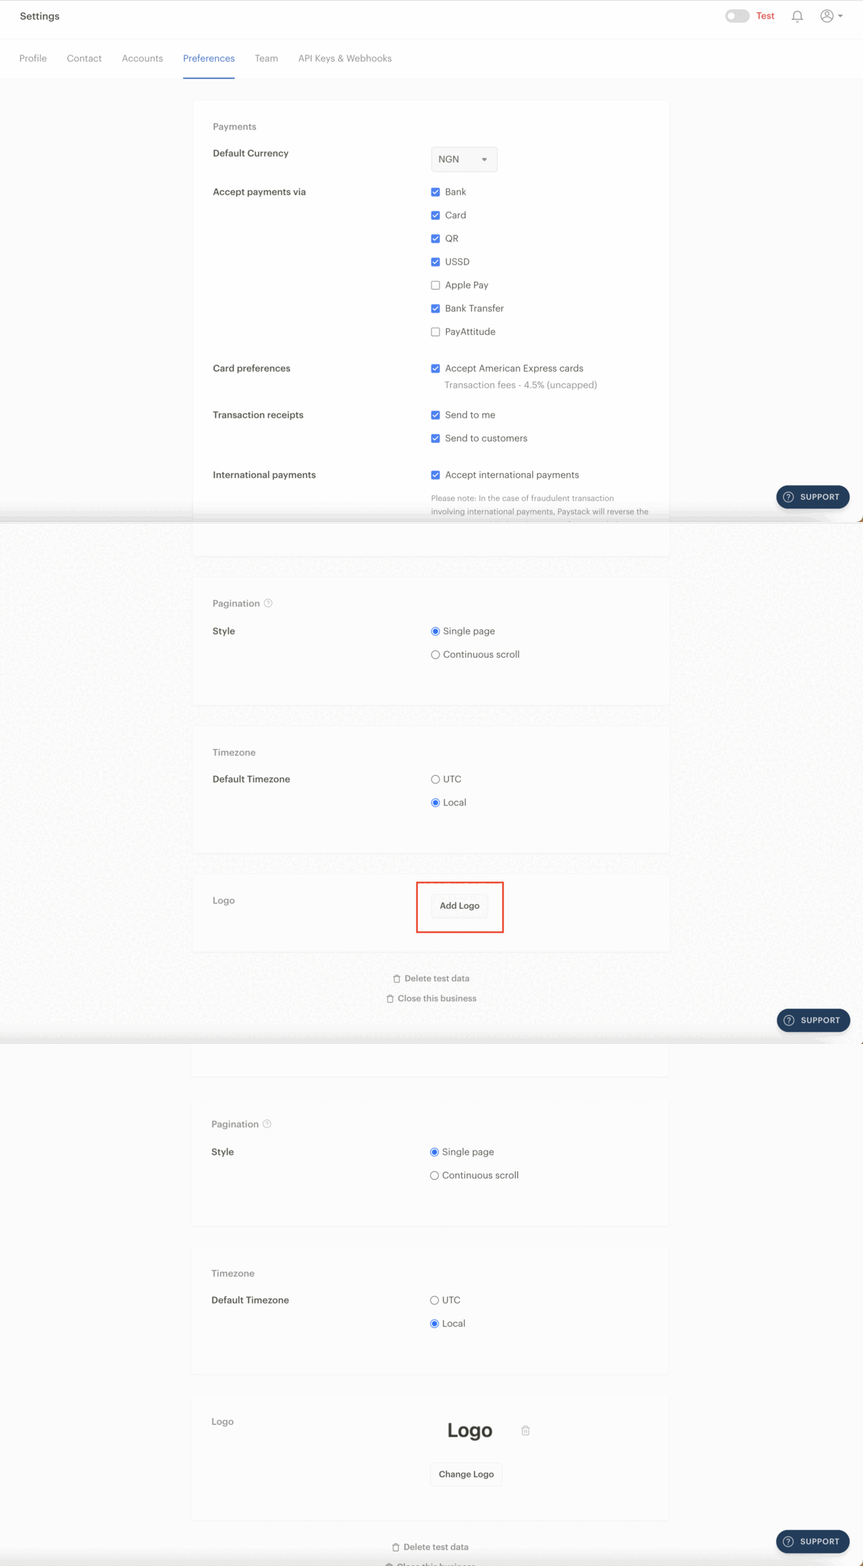
To change your time zone preference, kindly visit the Settings page on your Dashboard and click Preferences. When you scroll to the bottom, you’ll see a timezone section like the one above, and you can click on your preferred option.
It’s important to note that since our database is in UTC, this has implications for your data exports via the Dashboard. When you export data from your Dashboard, the timestamps in the report will be in UTC.
Logo
Adding a logo to your Paystack business helps link your brand to your Paystack account. When you add your business logo to your account, the logo will appear on the checkout form.
You can add a logo or change your current business logo via the Preferences tab of your Dashboard Settings page.
To do this, you only need to visit the Preferences tab of the Settings page and scroll to the bottom. You'll find the option to add or change your business logo there. Click on the 'Add Logo' button and select a logo for your business from the files on your device. The maximum allowed file size for the logo is 1 MB.
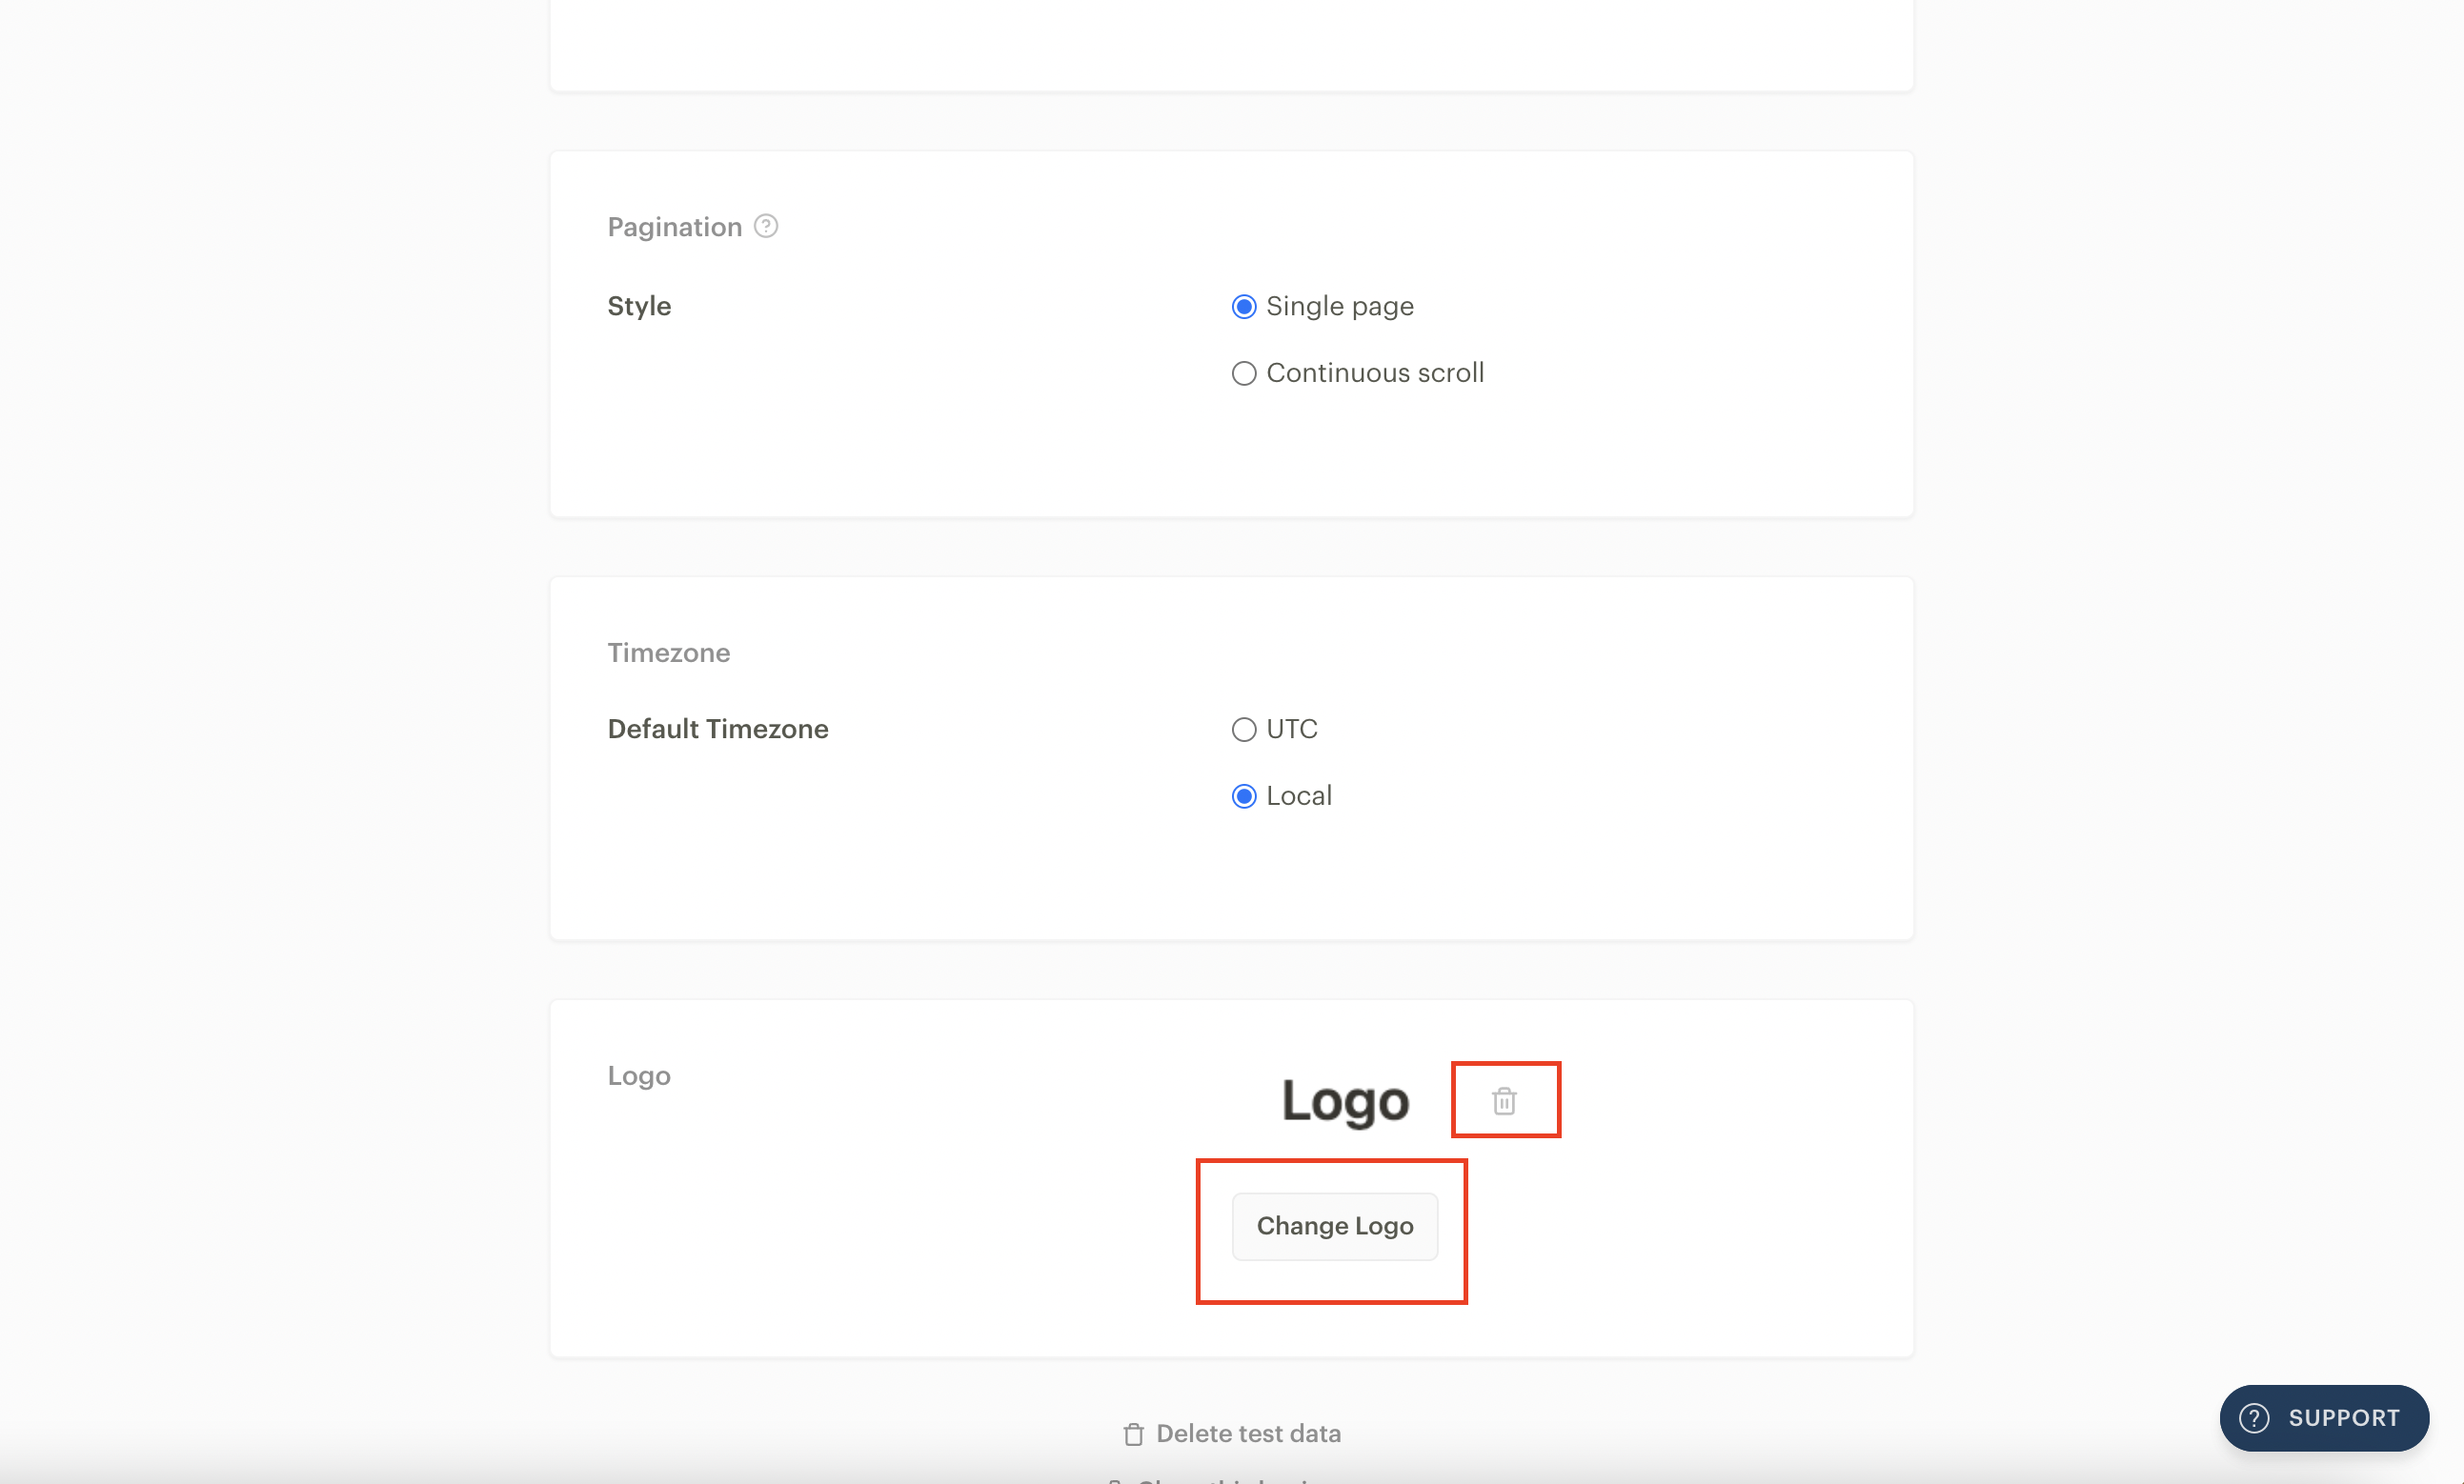
If you'd like to delete the current logo, you can use the bin icon button to do so.
On the other hand, if you'd like to change the logo to a different image, you can use the 'Change logo' button, as shown above, to select a new logo for your business. Once you choose an image (your logo) by clicking on it, your Dashboard will refresh itself, and your logo will be saved.
Tracking Dashboard user activity with audit logs
From your Paystack Dashboard, you can track all the activities carried out by your team members. This gives you visibility into all that is happening on your Paystack business for extra security and accountability. Every action taken on your dashboard will appear on your Audits Logs, which means you can see who did what and when it happened.
Audit Logs are only visible to users who can view and edit business settings & preferences in your team roles. By default, all admins can view Audit Logs.
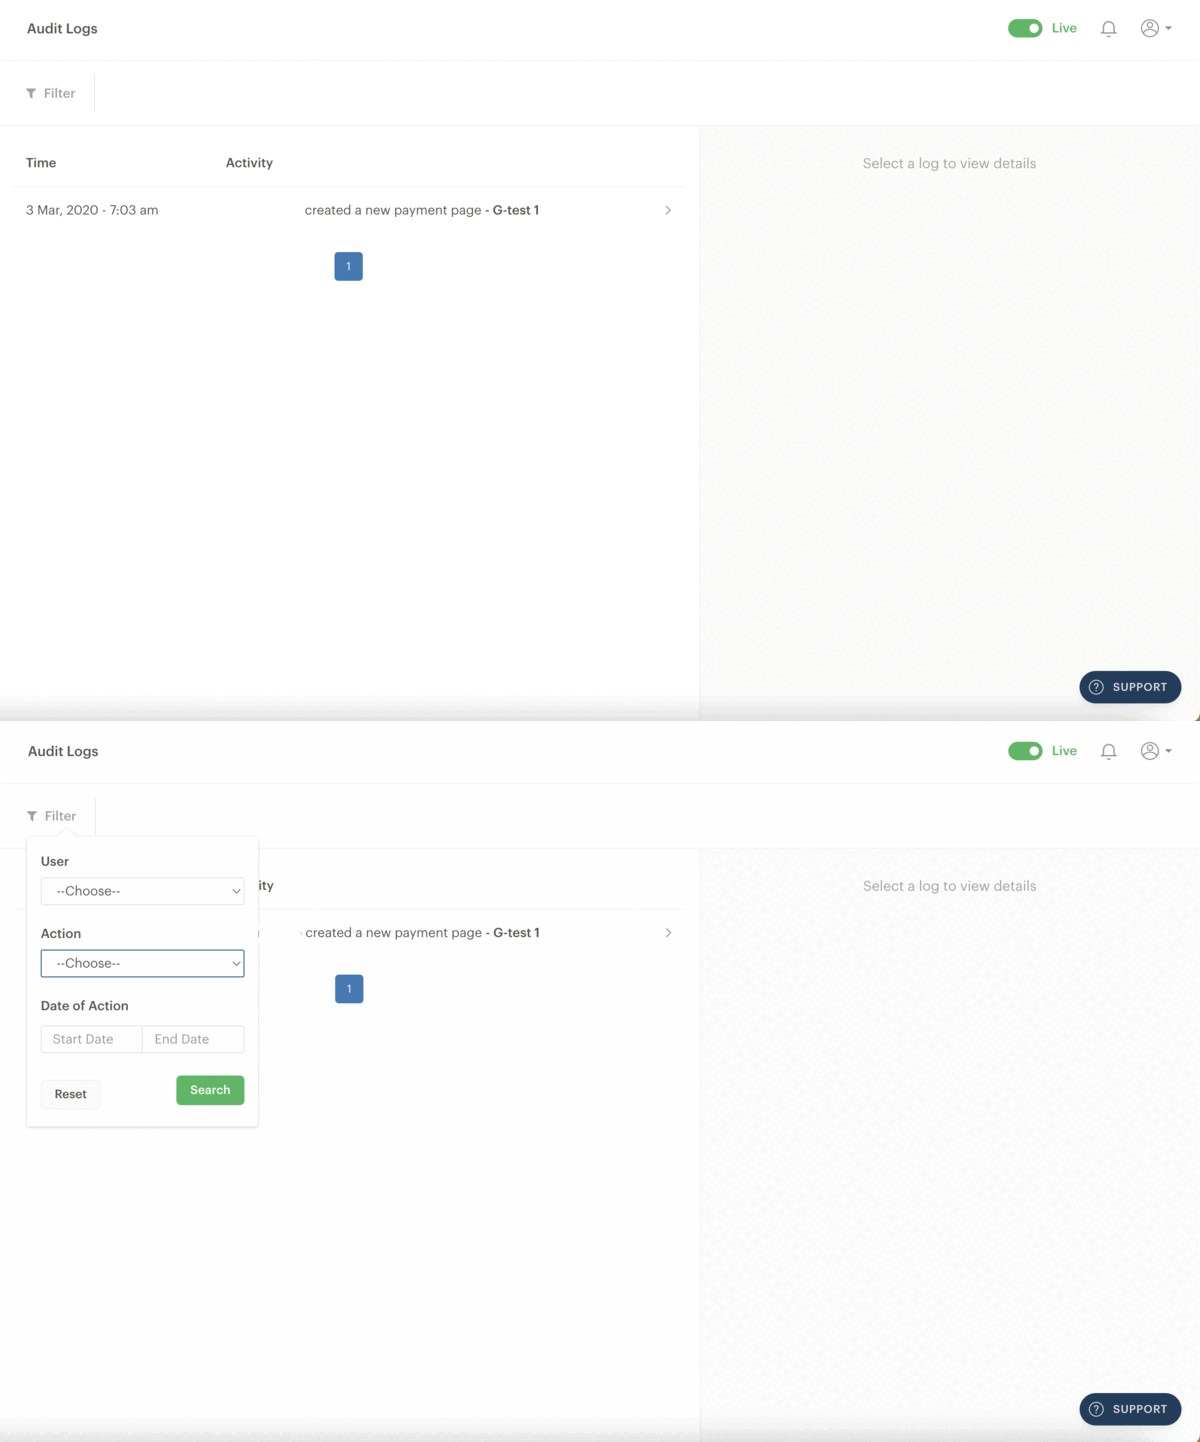
You can filter Audit Logs by the user (from the users with access to your Dashboard) who made the action, by the action that was made, and by the date this action was taken.
If you click on a particular action on your audit log, you get additional information, such as the user's name, email, IP address, and the exact time this action was taken. You can also view what exactly the user changed or created, such as an invoice, subaccount, refunded transaction, etc.
Updating the contact email on your payment receipt
If a customer has an issue with a payment they made to your business, they will need to contact your support team. Customers can reach you by emailing the email address on their Paystack payment receipt.
To change the email address that customers see on their payment receipts, please follow the steps below:
Go to the Contact tab on the Settings page of your Paystack Dashboard
Fill in your preferred support email in the support email field and click 'Save changes.'
Once you’ve done this, the email address that your customers see on their payment receipt will be the new email address you have set.
Closing your business
You can close your business on Paystack at any time by following these steps:
Log into your Paystack Dashboard.
Go to the settings page and select the Preferences tab.
Scroll to the bottom of the page and click on 'Close this business'.
Here are a few things you should know about closing your business on Paystack:
Only a business owner can close a business.
When you close a business, all other business users will receive an email informing them that it has been closed.
You can only close a business if your business has no pending disputes.
If a dispute is lodged against your business after you close your business, the business account will be re-opened, and you'll be notified of the dispute.
You can also choose to delete your test data by following the steps outlined above and clicking on ‘Delete test data.’

