How to set up Paystack on WooCommerce
The Paystack WooCommerce plugin allows you to receive payment on your WooCommerce store using Paystack. You can download and install the plugin here.
Setting up your WooCommerce plugin
You can set up your WooCommerce plugin via two methods:
Via the set-up wizard
Download and install the plugin.
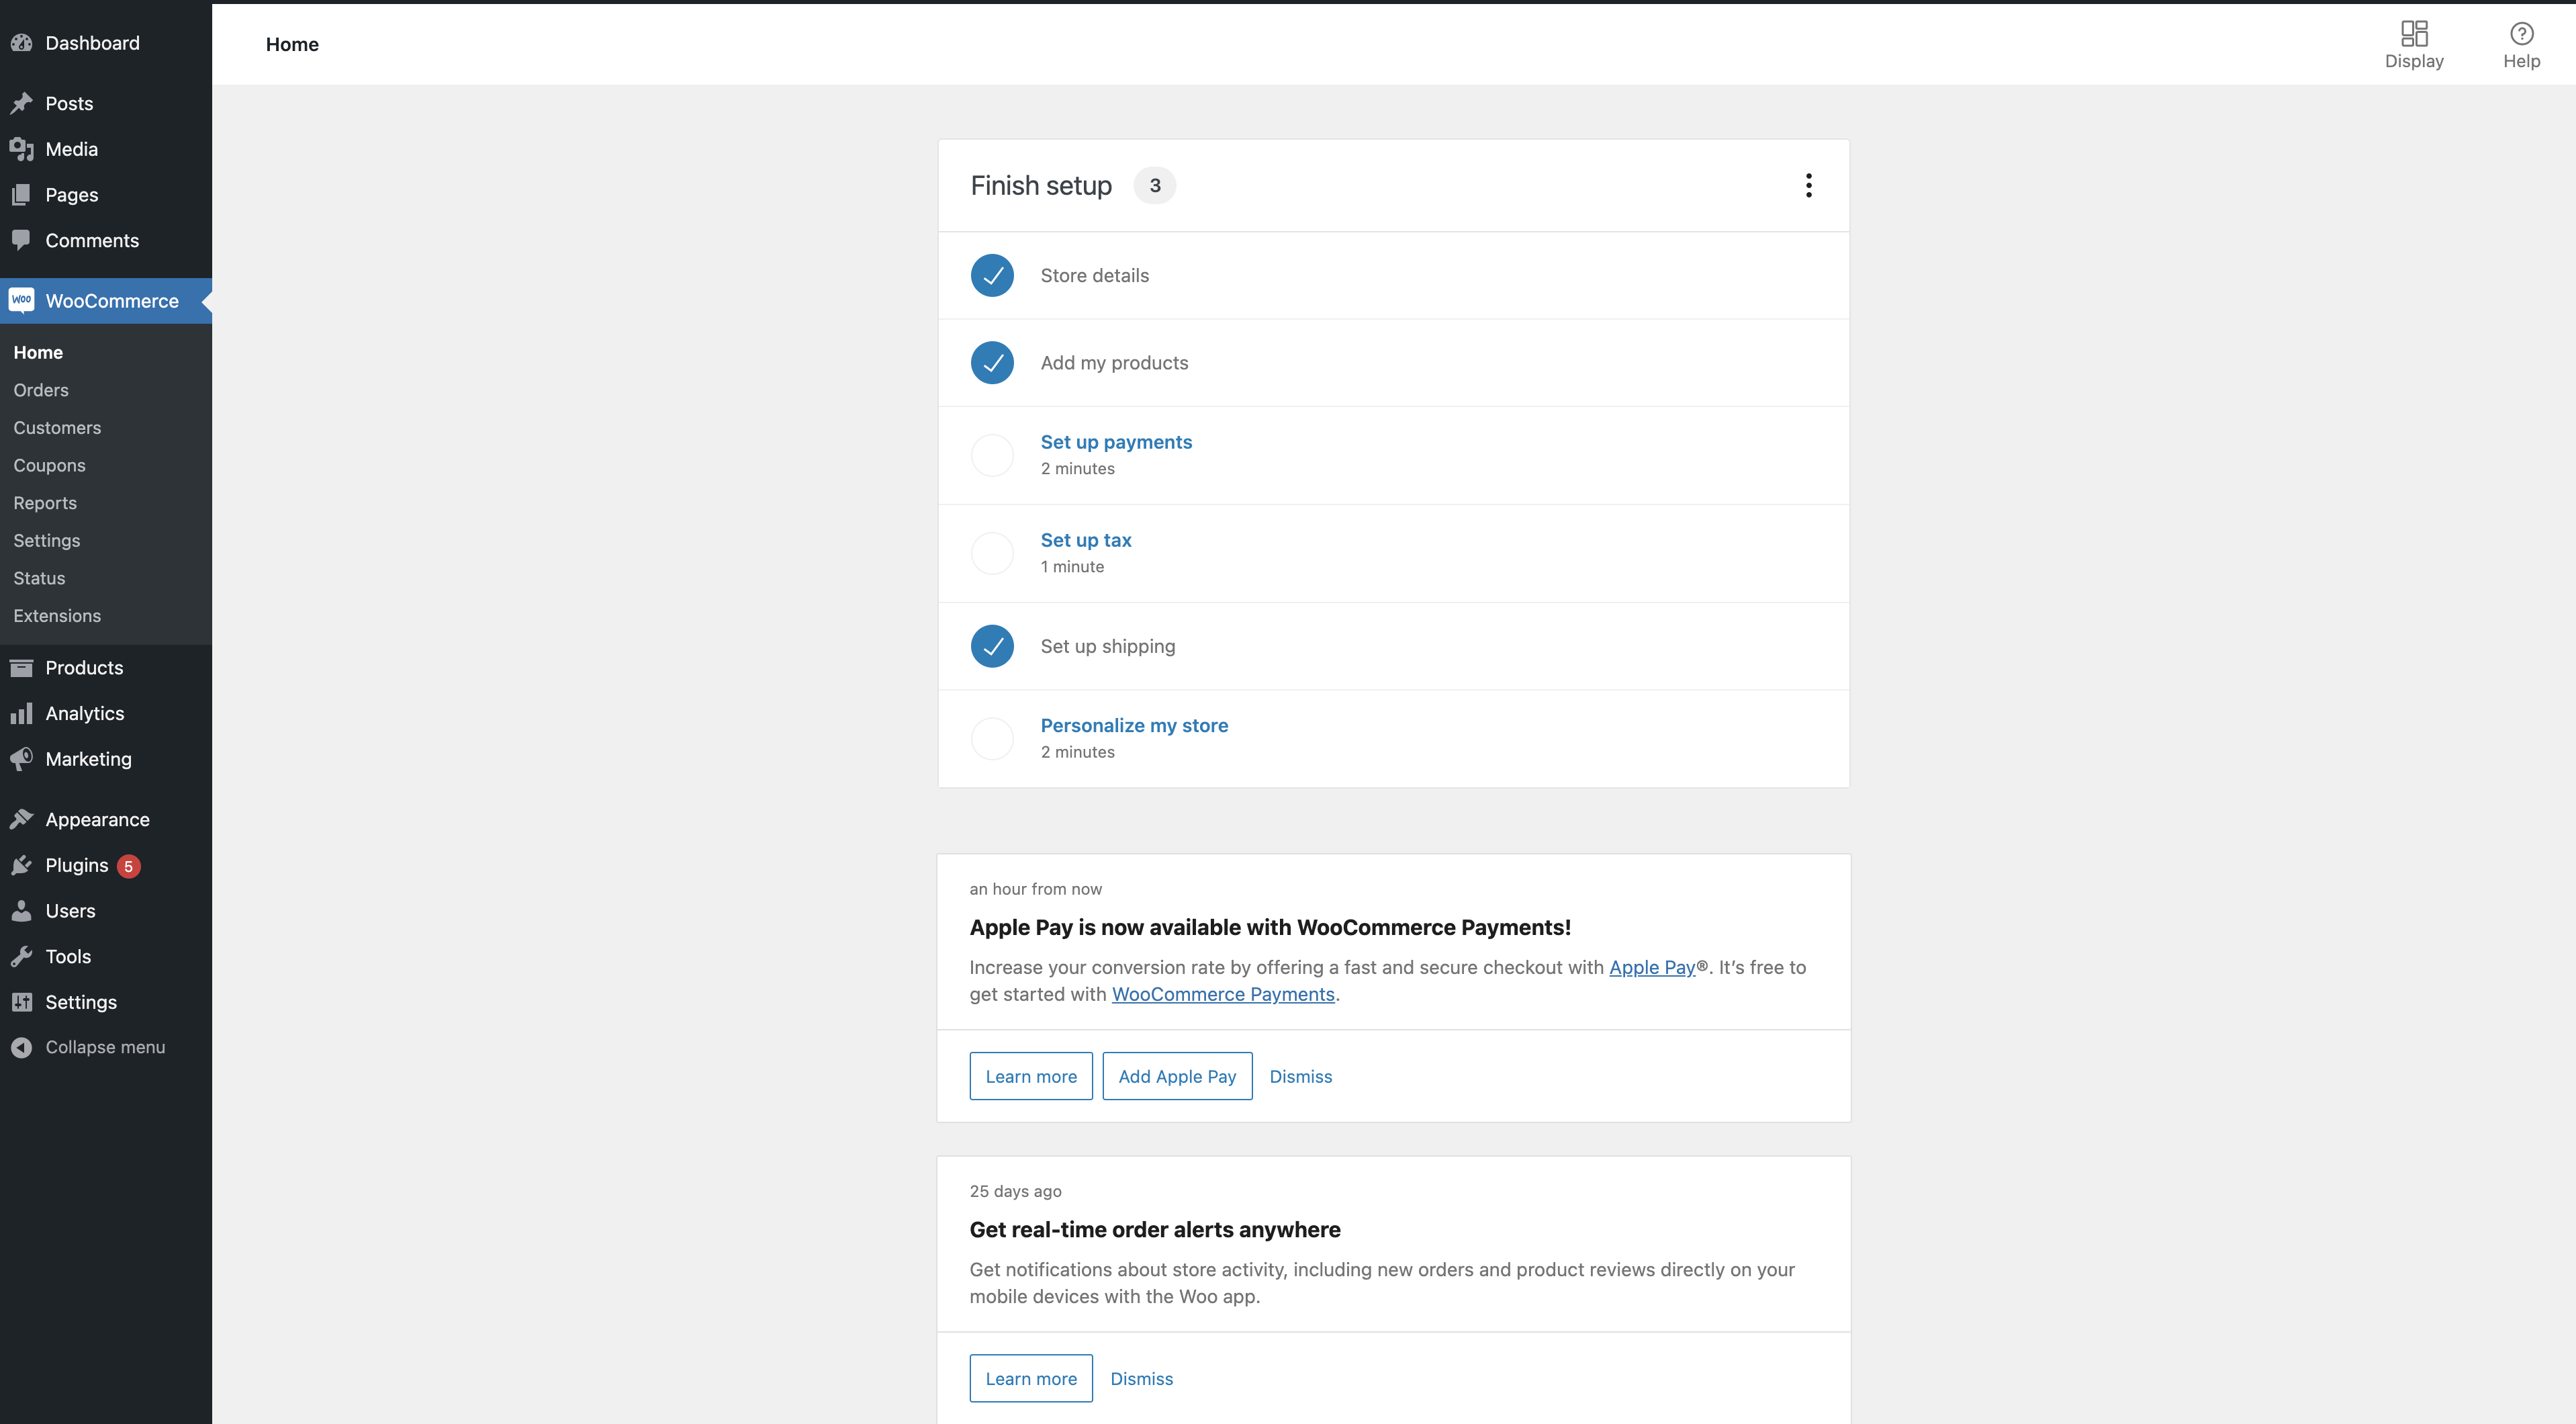
Go to the plugin's home page, where you'll find a setup wizard. This wizard guides you on setting up your WooCommerce-powered site easily.
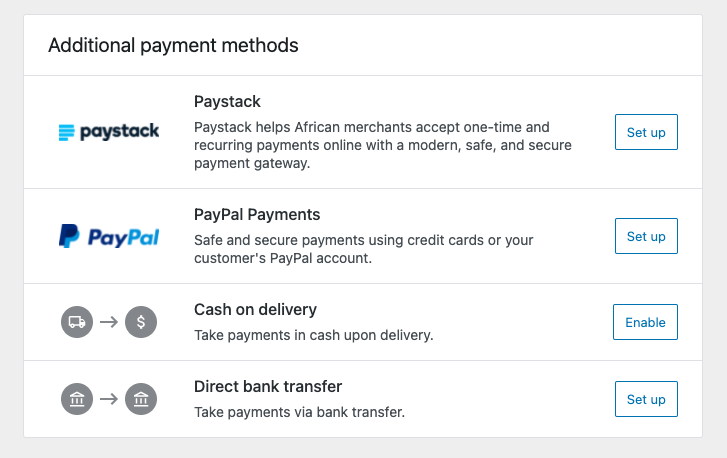
Click on 'Set up Payments'. This will show a list of pre-installed payment methods.
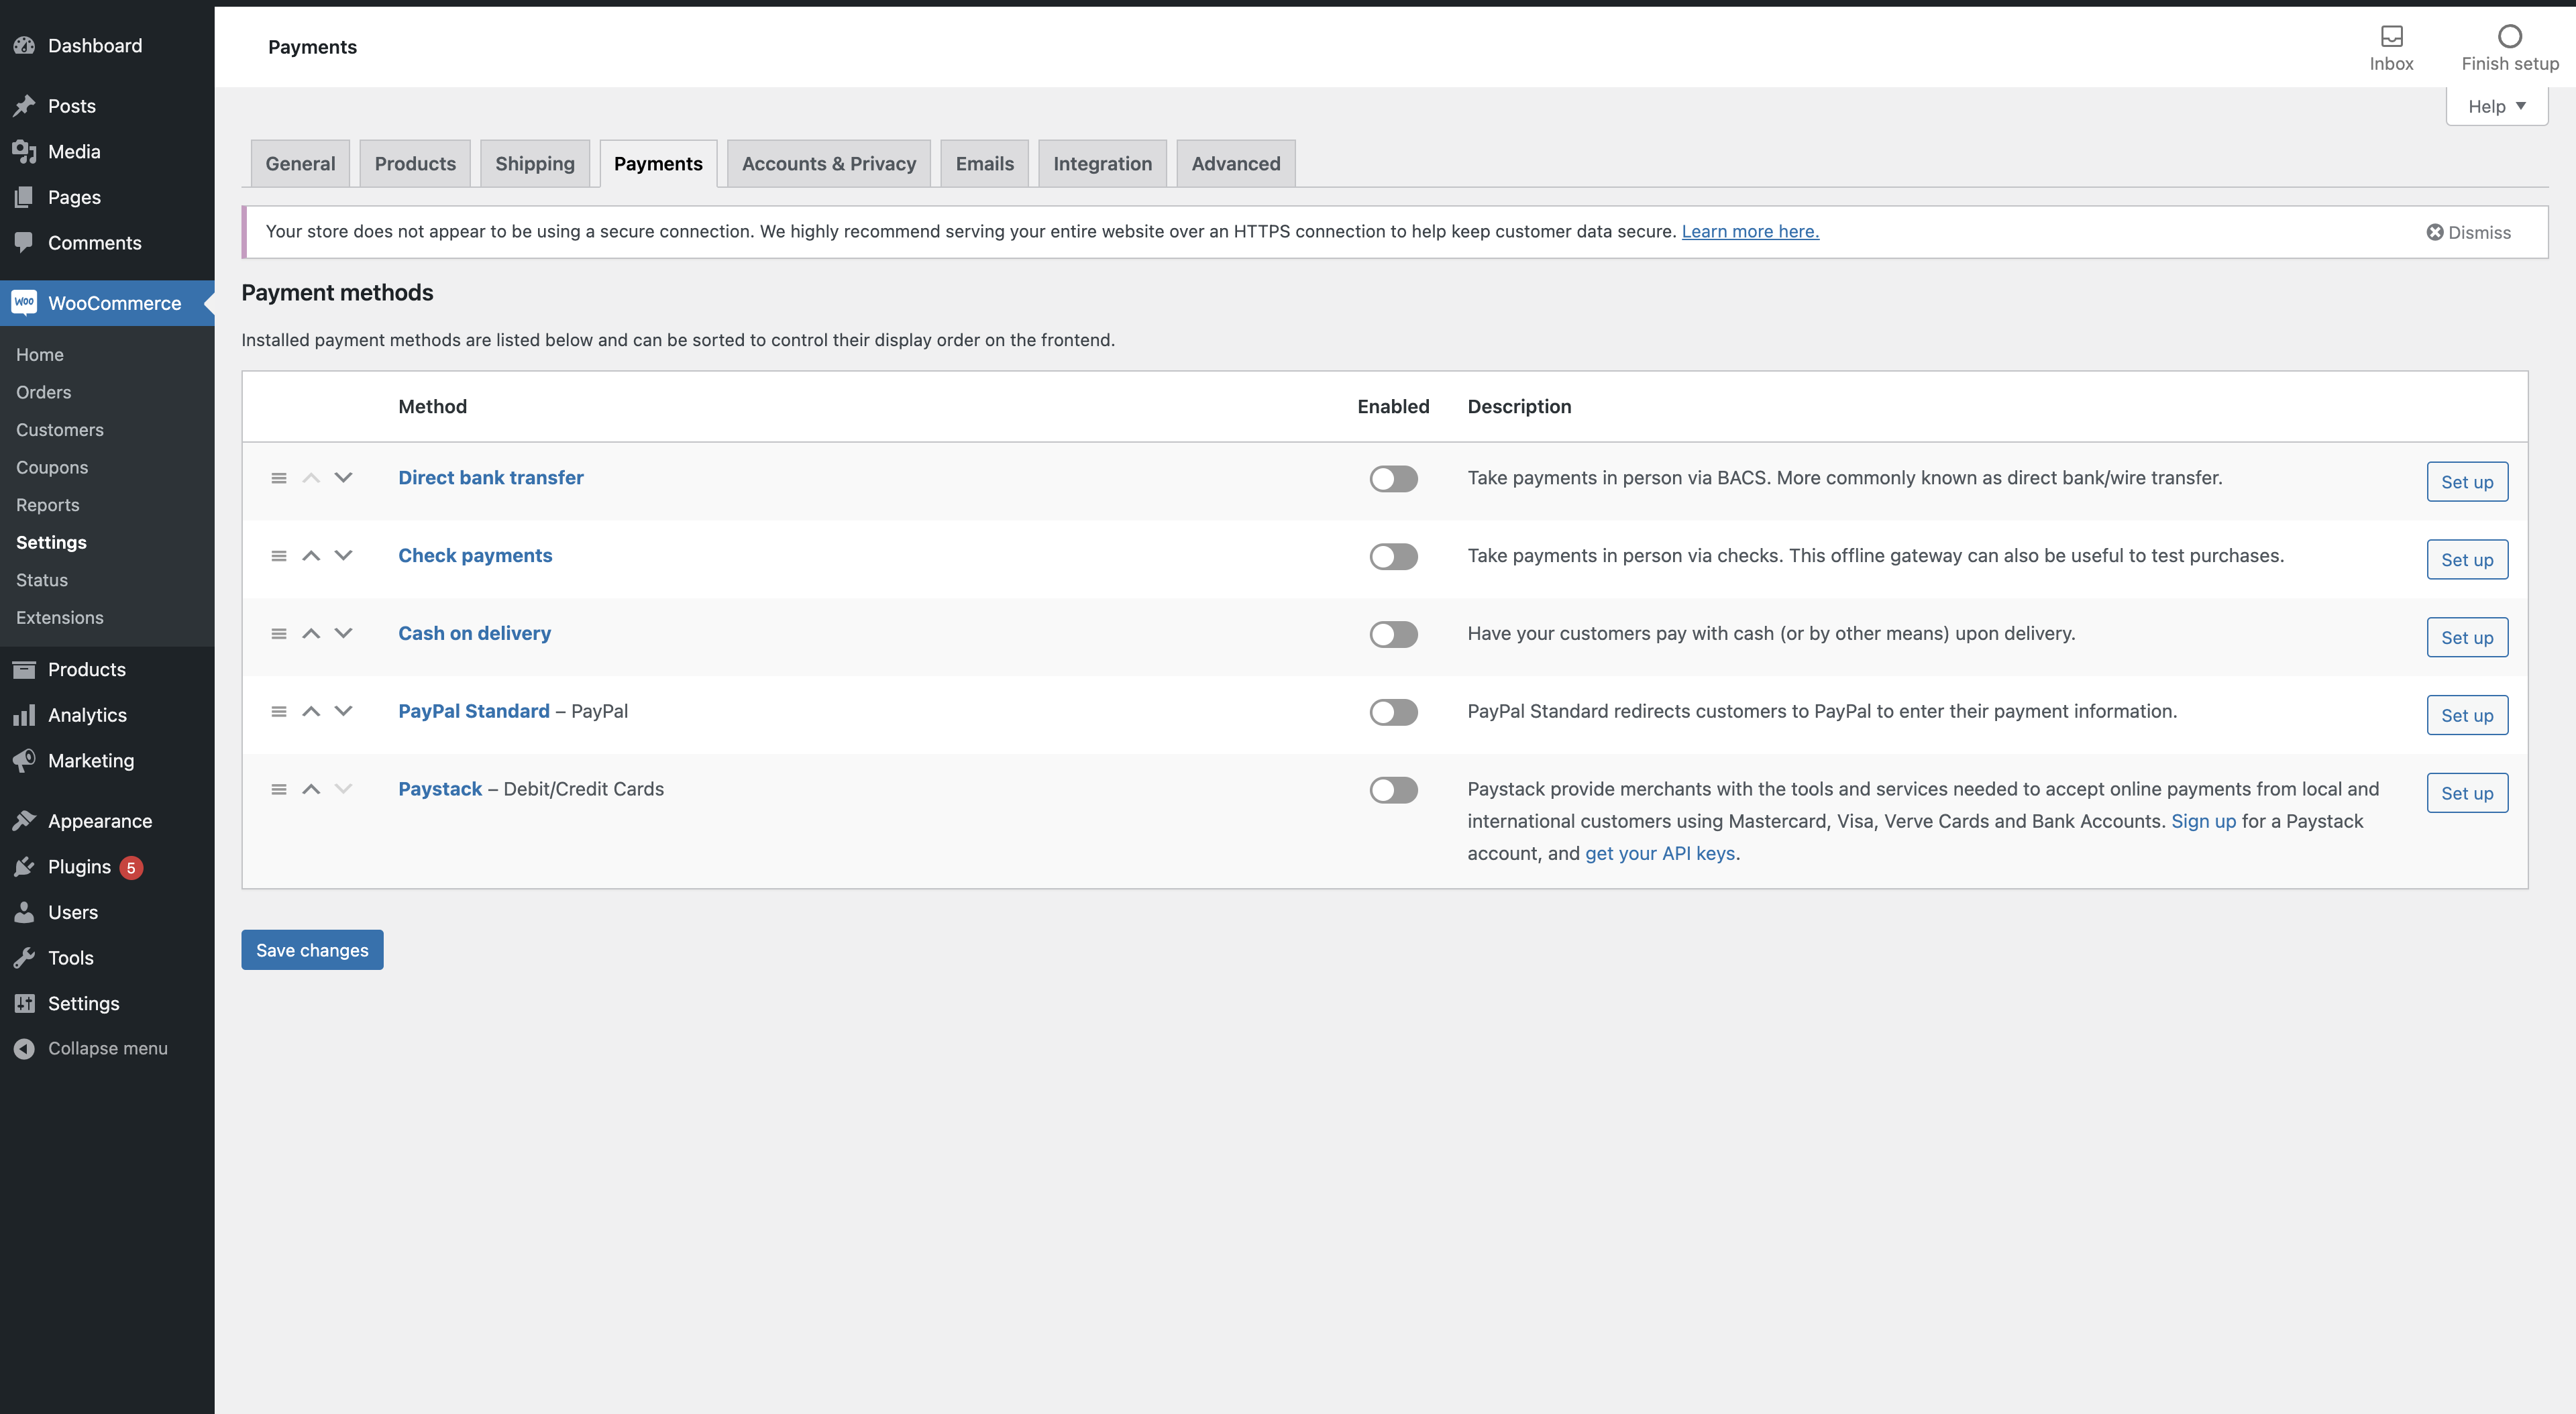
Click on the 'Set up' button beside the Paystack option to install Paystack as your payment option. After this, you need to go to the WooCommerce Plugin Settings on the menu tab of your WordPress site and click the Payment tab. This will show a tab containing all the Payment options on your site. If you have installed the plugin correctly, you should see Paystack on that list. This is where you can configure the Paystack Plugin.
Via the WooCommerce plugin settings
Download and install the plugin.
After you have installed the plugin, you'll go to the WooCommerce Plugin Settings on the menu tab of your WordPress site. Click the Paymentstab. This will show a tab containing all the Payment options on your site. If you have installed the plugin correctly, you should see Paystack on that list. This is where you can configure the Paystack Plugin.
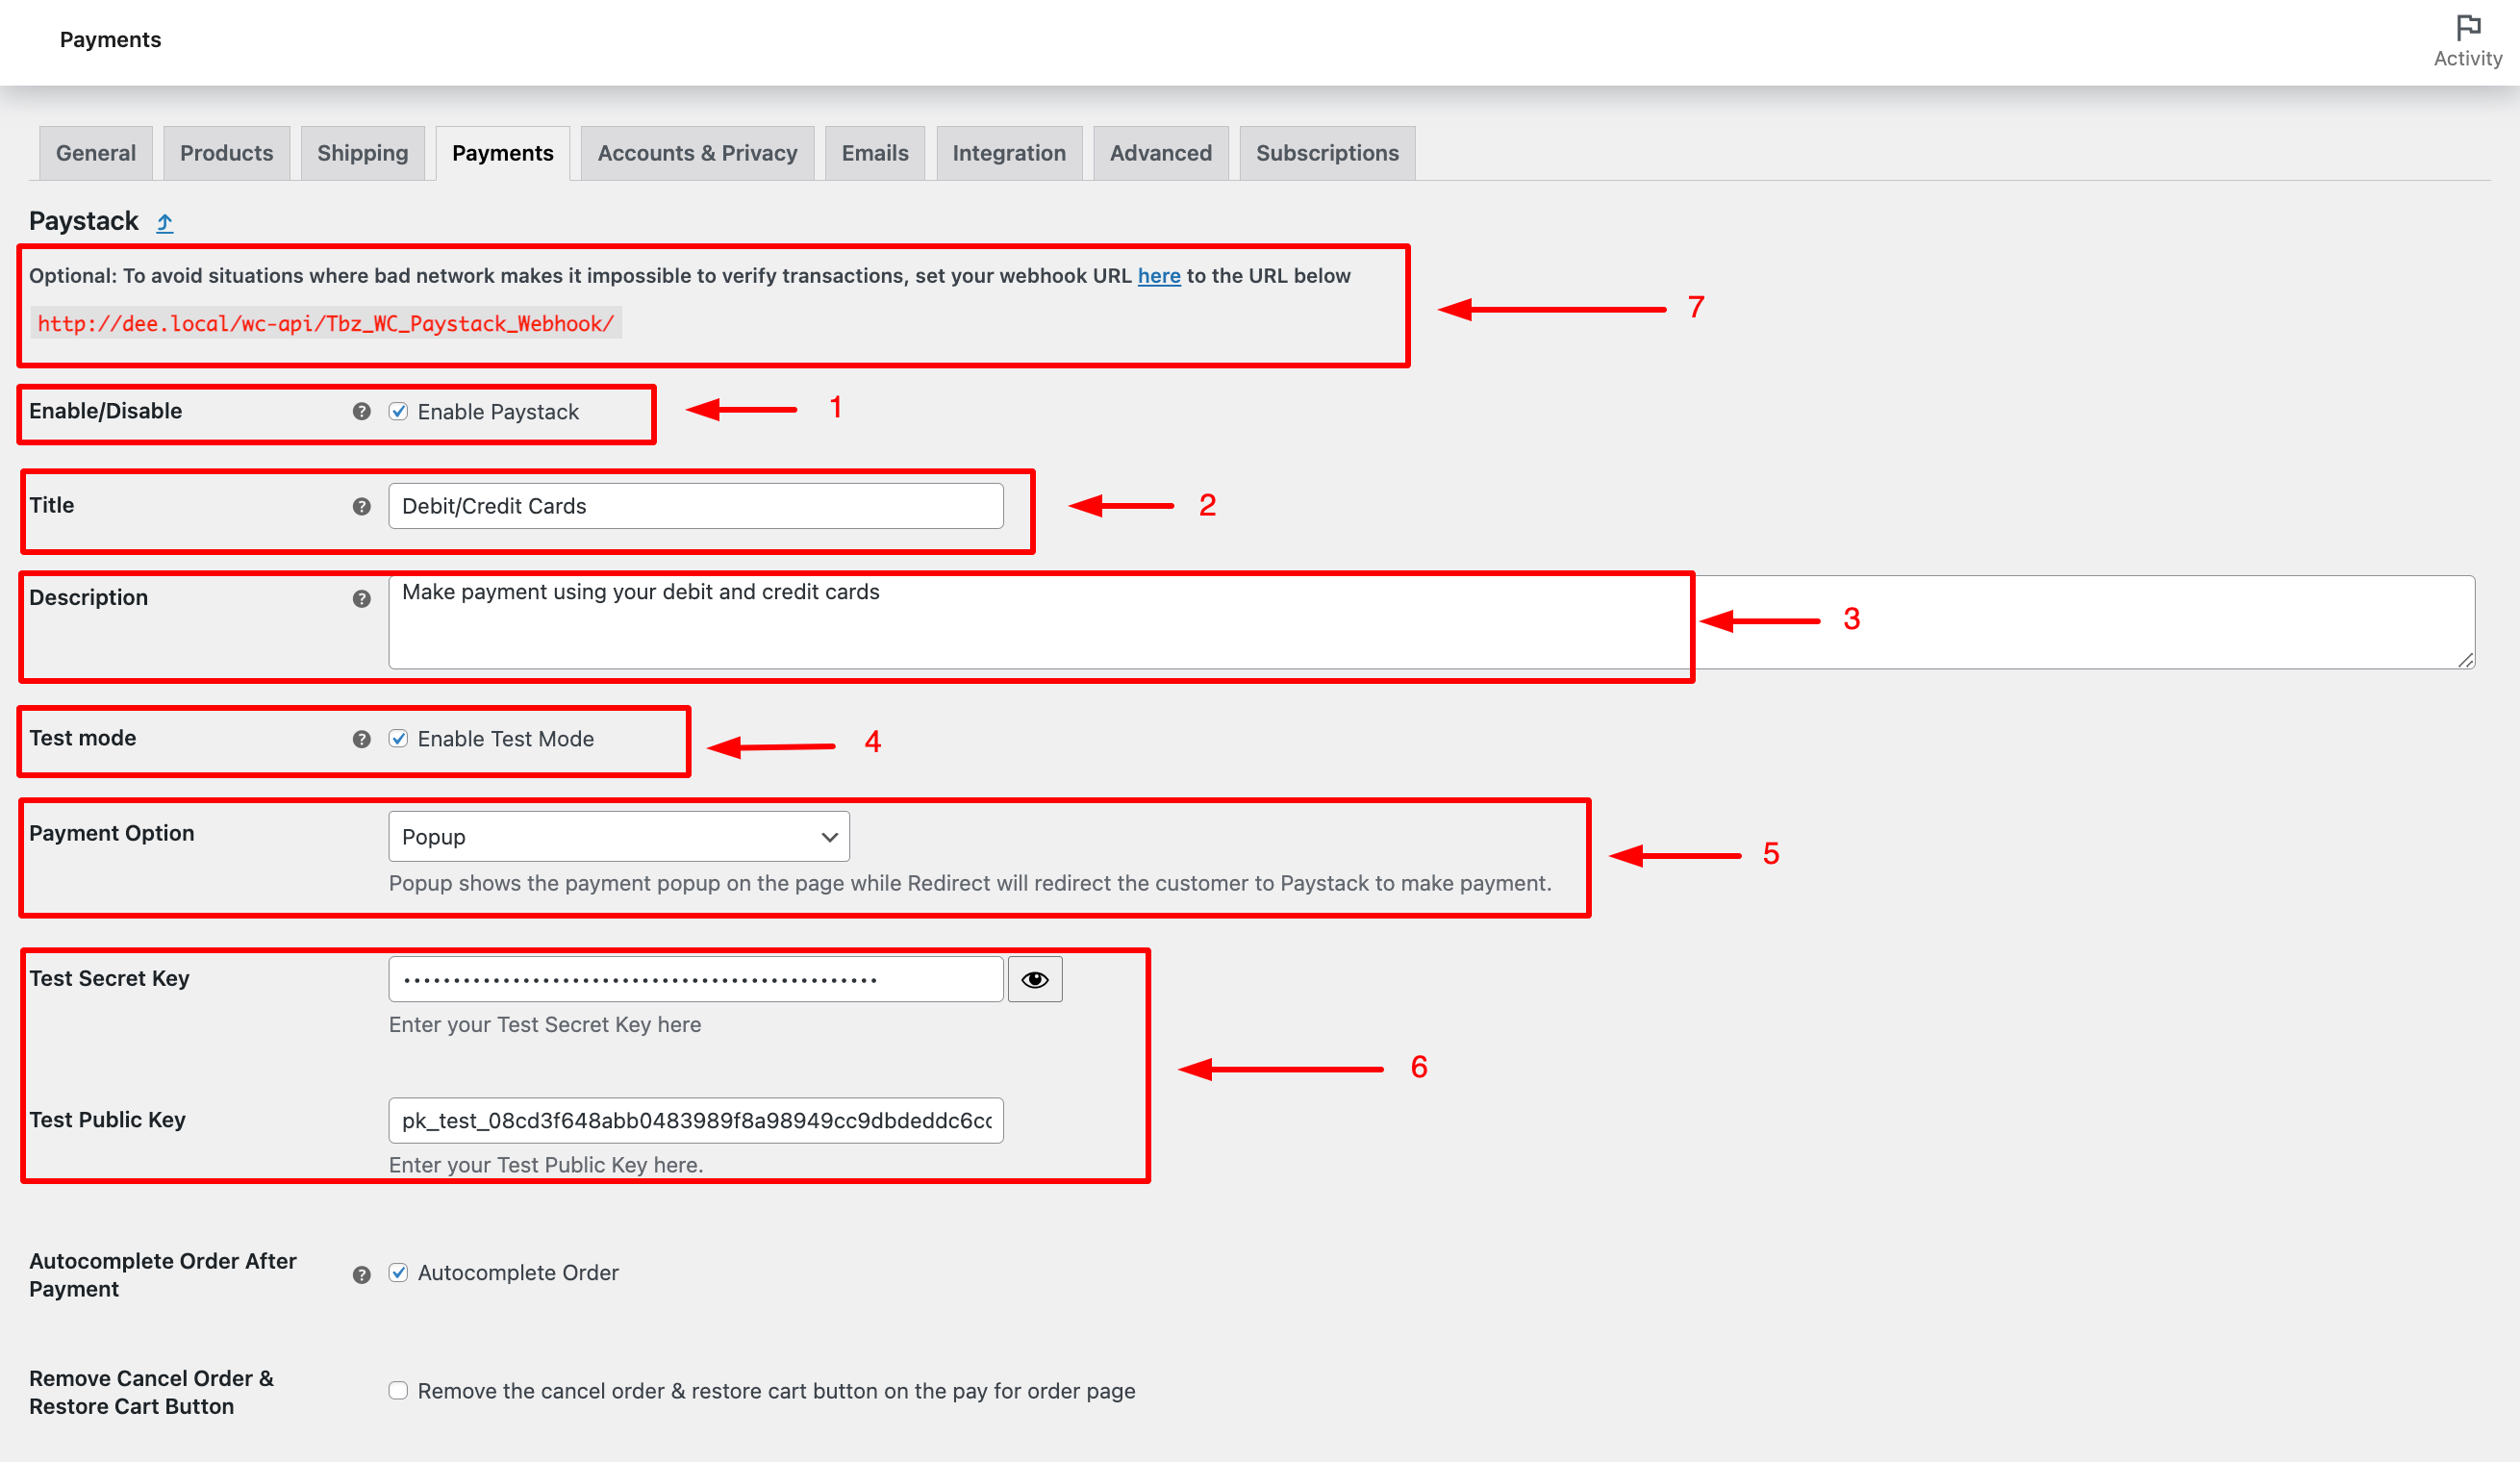
Your WooCommerce Plugin Settings
Enable Paystack: Ensure that the Enable Paystack checkbox is checked so that Paystack can show up on the list of Payment options during checkout.
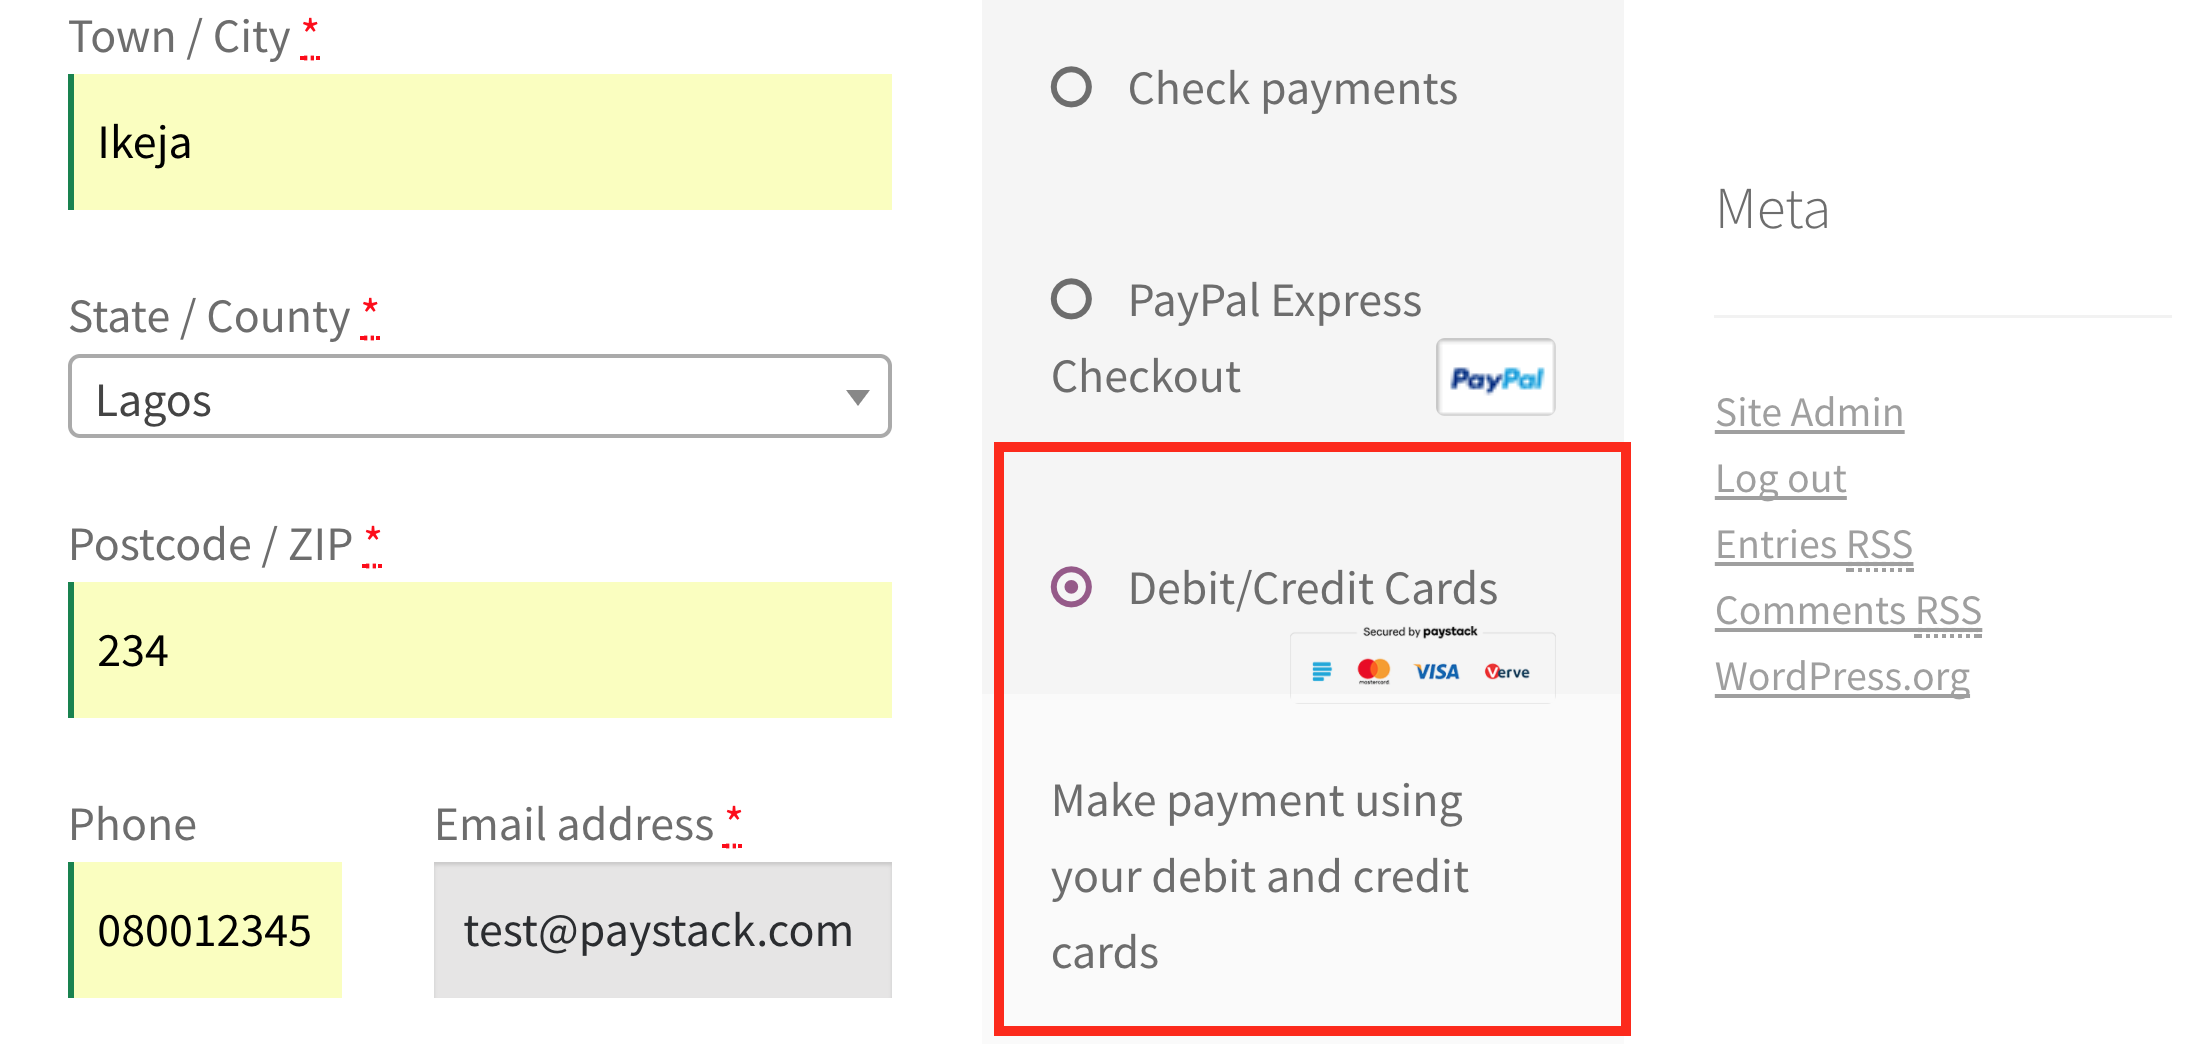
Title: This is the title that will represent Paystack on your list of Payment options during checkout. This title will guide users to know which of the options they should select to pay with Paystack. The current default is 'Debit/Credit Cards'.
Description: Similar to Title, this explains the Paystack payment option to the user.
Test Mode: Paystack provides test parameters that allow you to simulate a transaction without using real money. If you check to enable, Paystack will be using your Test API keys to parse the payments, meaning that the orders processed then will be done with test cards; no real money is exchanged, therefore, no real value should be delivered.
If you check to enable test mode, ensure that you have your test API keys. If not, make sure the live API keys are properly entered. If you don't do these, Paystack will not show in your list of Plugins.Payment Option: You can either select 'Popup' or 'Redirect'. The popup method displays the payment checkout as a popup on the page, while the redirect method will redirect the customer to a page that will have the Paystack checkout for the customer to make payment.
API keys: You can find your API keys here. Copy the right keys and enter them in the right fields in the plugin settings.
Webhooks: There is a URL, displayed in red, on the setup page. Copy this URL and save it as your webhook URL on the API Keys & Webhook tab of the Paystack Dashboard Settings page.
Viewing Paystack on the checkout
If all the settings above were done correctly, you should find Paystack in the list of enabled payment options on your checkout page like this:
If you do not find Paystack on the Payment method options, please go through the settings again and make sure that:You checked 'Enable Paystack'
You entered the API Keys correctly
If you encounter any issues while integrating the plugin, contact us at techsupport@paystack.com or via our contact form.

