How to integrate Paystack with Paid Memberships Pro
Paid Memberships Pro is a powerful plugin for managing memberships and subscriptions on WordPress. It’s perfect for premium content sites, clubs, associations, subscription products, newsletters—you name it!
With the Paystack Gateway for Paid Memberships Pro, you can accept payments easily if you’re based in Nigeria, Ghana, Kenya, or South Africa.
To be able to use the Paystack Gateway for Paid Membership Pro, you must have an account on Paystack from which you will get Test and Live API keys to connect the plugin to your Paystack business. Here are some benefits of using Paystack!
Gateway Features
Paystack offers a wide range of features that benefit both buyers and sellers.
Fraud protection with every transaction being checked by the IP, history, and geolocation.
Accept recurring payments with intervals of: daily, weekly, monthly, quarterly, biannually and annually.
Paystack dashboard to manage your customers, payments, and track your growth
Allow your customers make payments via their credit/debit card, bank accounts, USSD and Mobile Money. (More options are coming soon)
Paystack Go! – Progressive Web App that gives you access to your dashboard even when you are offline
Accept payments from anywhere in the world with internationally-issued cards and payment methods.
For more information about Paystack, visit this guide – https://paystack.com/why-choose-paystack
Installing the plugin
You must have the Paid Memberships Pro plugin installed and activated to use this Add On.
Navigate to Memberships > Add Ons in the WordPress admin.
Locate the Add On and click “Install Now“.
Or, to install this plugin manually, download the .zip file from this URL.
Upload the compressed directory (.zip) via the Plugins > Add New > Upload Plugin screen in the WordPress admin.
Activate the plugin through the Plugins screen in the WordPress admin.
Setting up
Register and complete your account with Paystack.
Log in to your Paystack account and select ‘Settings’ to retrieve your merchant details.
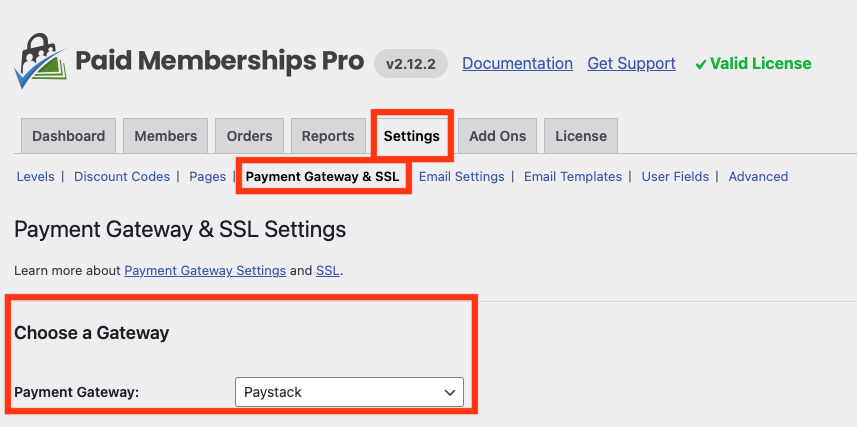
Log in to your WordPress dashboard and navigate to Memberships > Payment Settings.
Set your “Payment Gateway” to “Paystack”. Fill out your merchant details.
Set your currency to one of the supported currencies.
Save your settings.
Webhook Setup
To fully integrate with Paystack you must configure a Webhook URL in your Paystack account. This will ensure that your membership site can stay in communication with the gateway for recurring payment notifications, payment failures, and subscription cancellations.
Navigate to Memberships > Settings > Payment Gateway & SSL in the WordPress admin.
Locate the “Webhook” settings field.
Copy the Webhook URL from this field. The webhook URL will be in the sample format below:
https://www.YOURDOMAIN.com/pmpro/wp-admin/admin-ajax.php?action=pmpro_paystack_ipnIn your Paystack account, click on the icon in the upper right corner and choose “Profile”.
Then, click the “API Keys & Webhooks” menu option.
Enter your webhook URL into the relevant Webhook URL field and click “Save Changes”.


