Initiating and completing a refund
If you ever need to refund your customer for a sale, you can easily do this from the Paystack Dashboard. We've made it possible for our businesses to be able to refund any transaction with the click of a button. This way, you can keep a clean record of your transaction history, which makes reconciliations a breeze.
You can also create and fetch refunds via the Paystack API.
Important to note
Please note that our transaction charges are non-refundable. Processing a transaction is a service that has been offered and charged for. Thus, if you have to refund a customer, we will not return what we charged to process that transaction.
Initiating a refund to a customer
You can initiate a refund to a customer by following these steps:
Log into your Paystack Dashboard and go to the Transactions page.
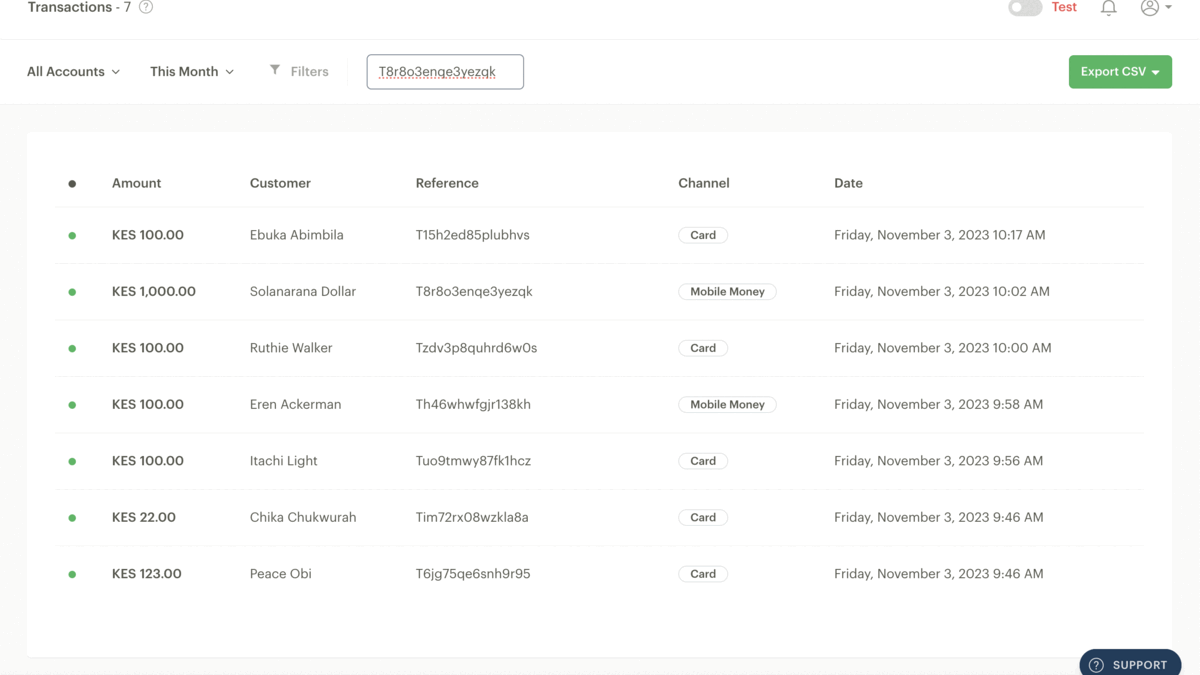
Find the customer's transaction by searching the page with the transaction reference. You can also filter by the customer's email or ID. Once you find the transaction, click on it to reveal the transaction details.
On the right half of the detail page, you'll find the Refunds tab. Click to open the tab and click the 'New Refund' button.
This will reveal a pop-up page that shows the transaction amount. You will have the choice to refund either the full amount or an amount agreed with your customer. Fill in the amount and click 'Confirm' to review the refund information and complete the process.
Both you and your customer will receive an automated mail from Paystack confirming this, and they can expect their refund within 3 to 10 working days.
Important to note
Refunds are first deducted from your pending payout. We can deduct this from your Paystack balance if you are a Registered Business. However, since you do not have a balance as a Starter Business, our only option is to deduct refunds from your pending payouts. You will not be able to refund customers from your dashboard if your pending payout is not enough to make the refund.
Bank transfer refund
Important to note
This feature is currently only available to Nigeria, Ghana, and South Africa.
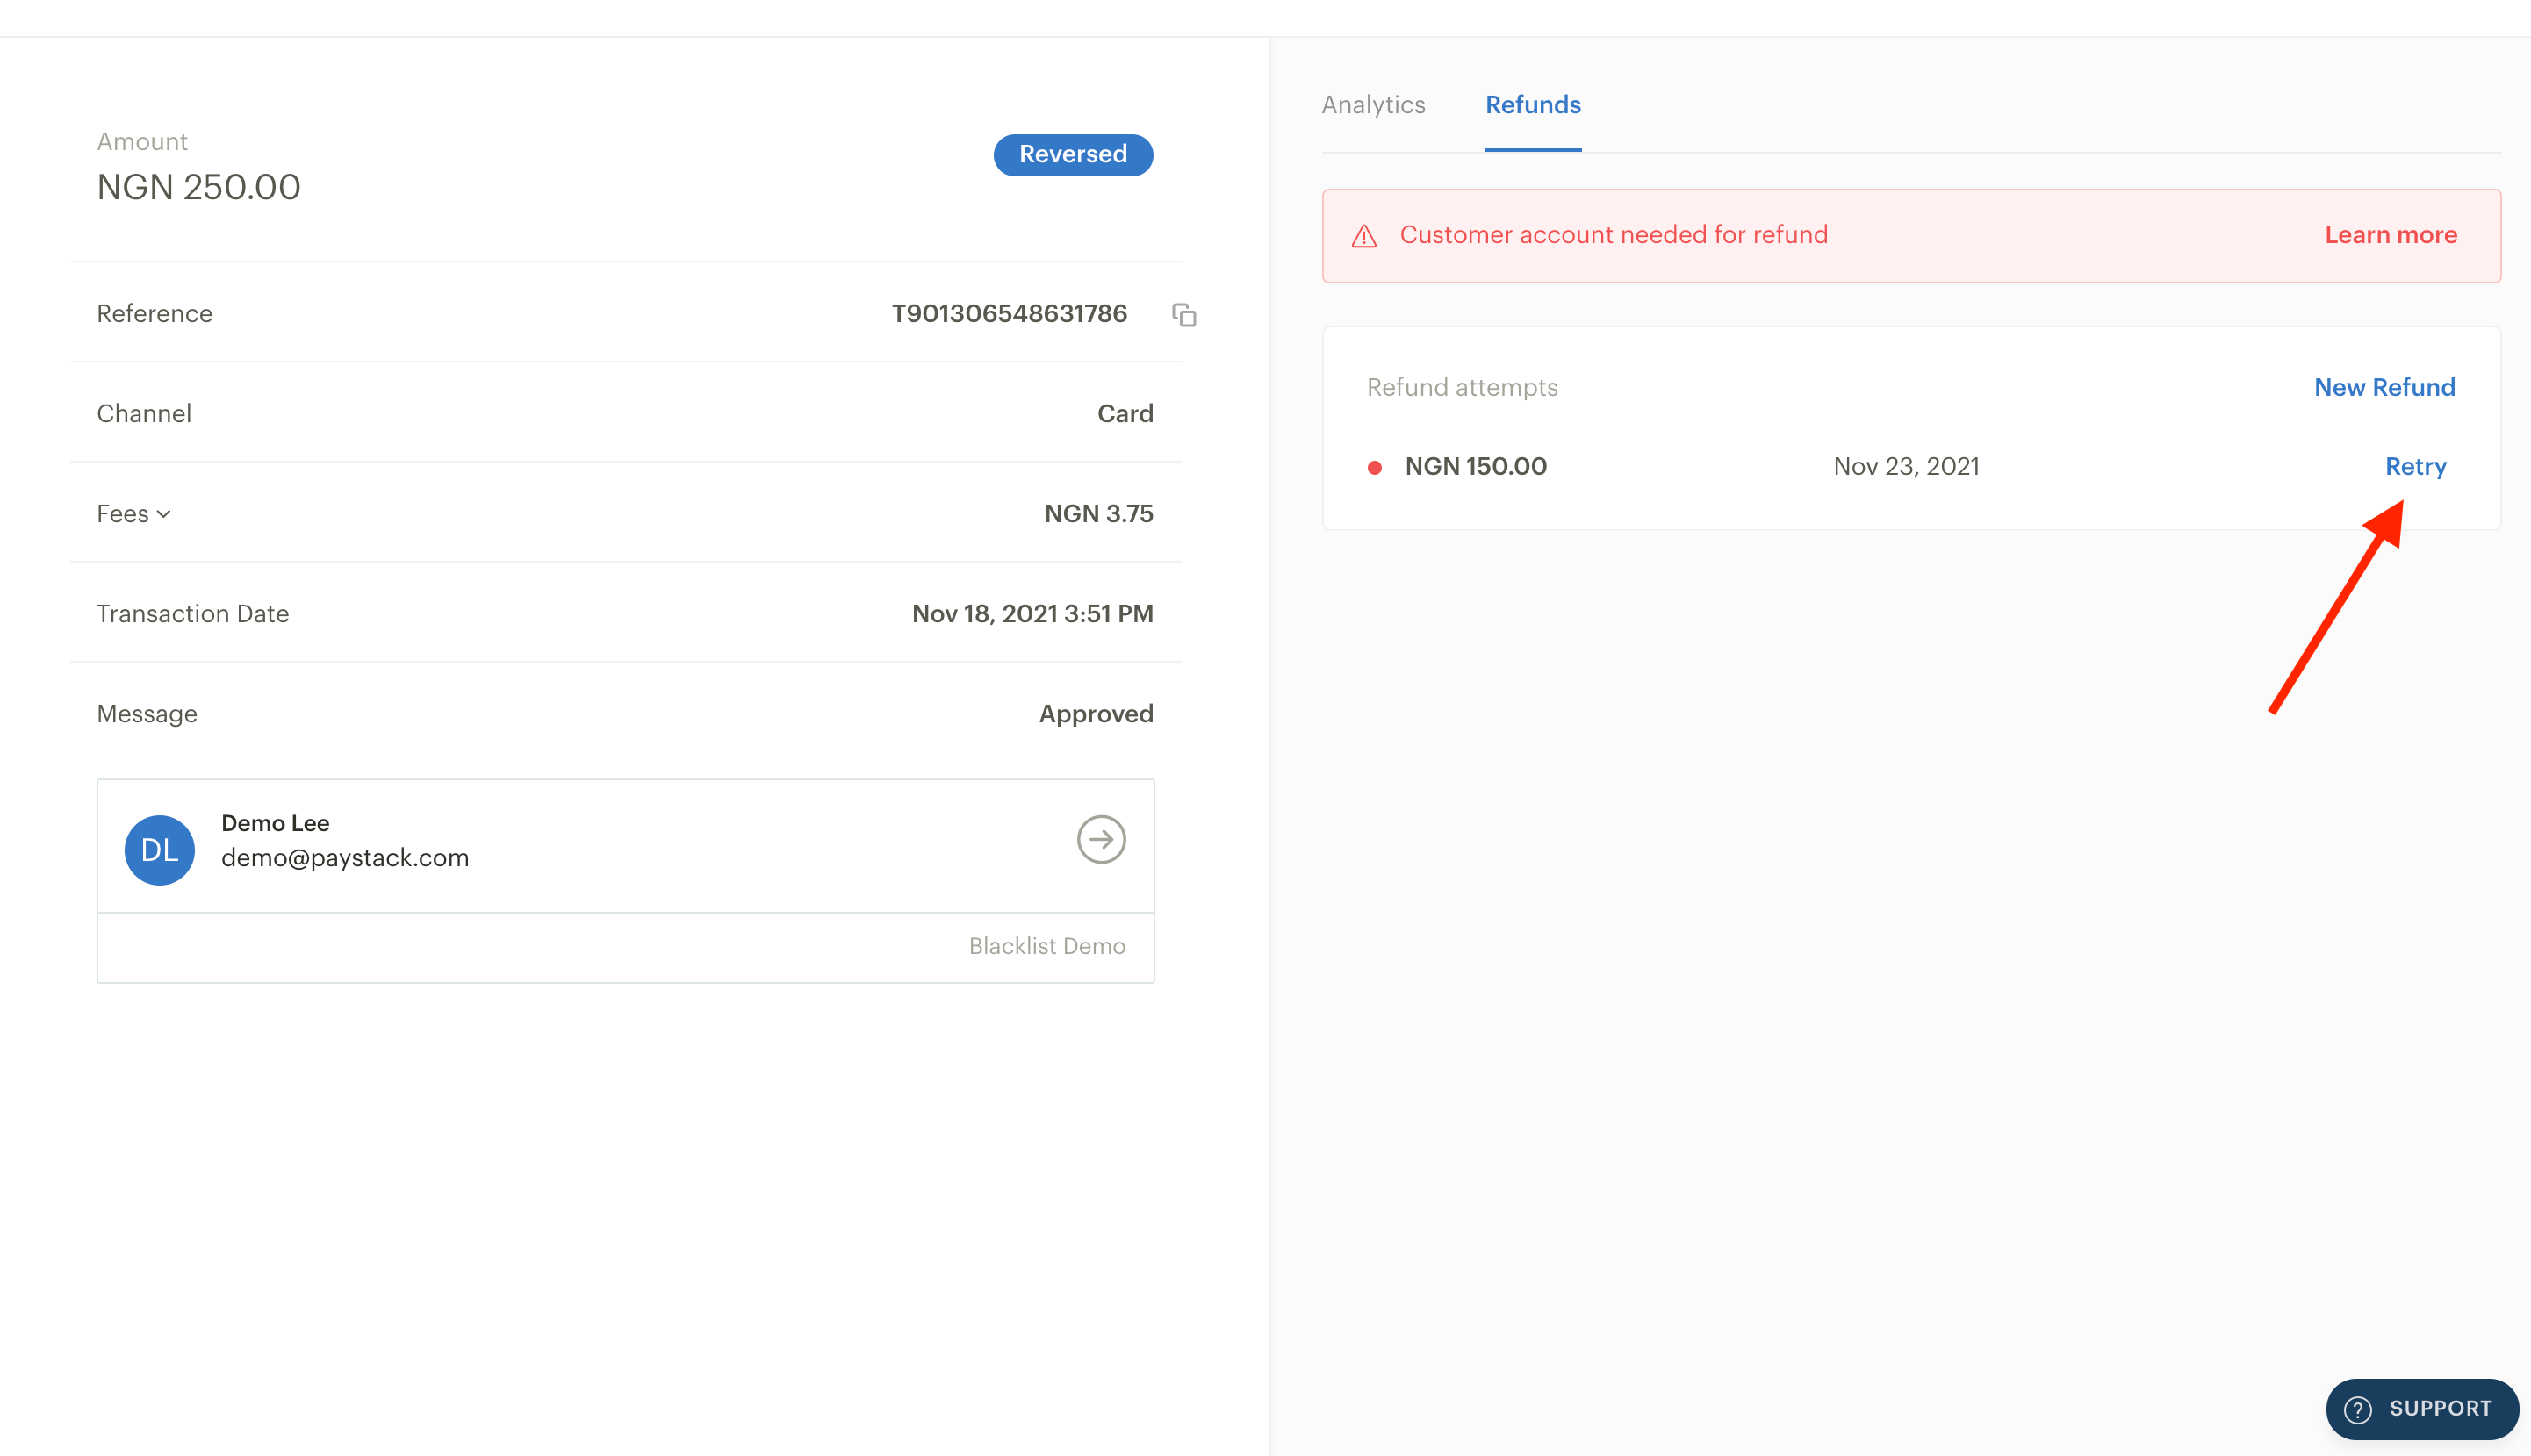
If the refund attempt fails, we'll send a notification to you via email as well as a failed refund webhook event if you have webhooks set up for your business.
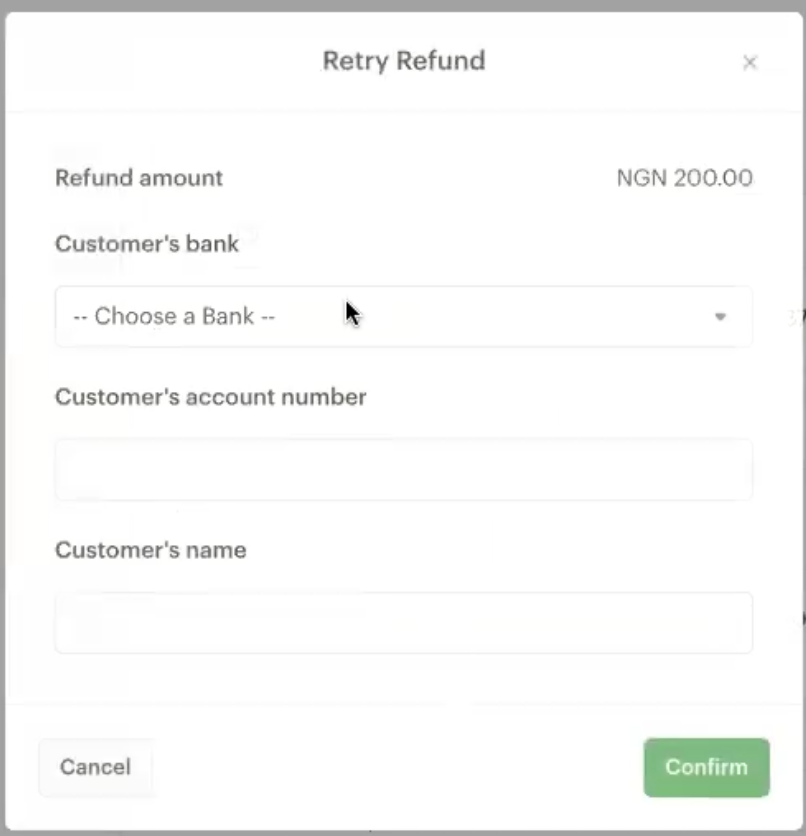
If you have your customer's bank account information, we have provided a way for you to retry the refund from your Paystack Dashboard without an additional fee:
Go to the Transactions page on your Dashboard and find the transaction you'd like to refund. Enter it and go to the Refund tab. A 'Retry button' will be visible beside the failed refund attempt. Click it.
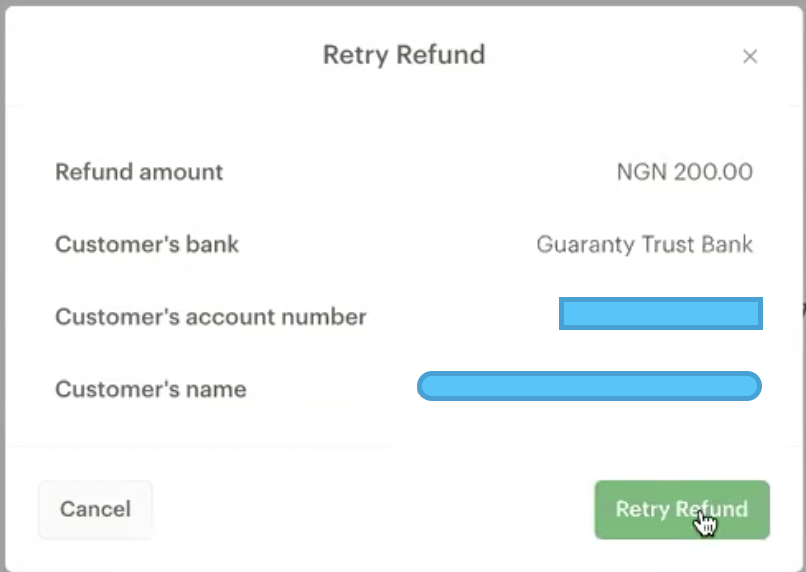
After clicking the 'Retry button', you'll be prompted to enter the customer's account details. To ensure that your refund is transferred back to the correct customer, we'll verify the name of the entered bank account and ask you to confirm it matches that of your customer. You'll see the resolved account information you entered for you to verify.
Once you've confirmed that the resolved account information is correct, click on the 'Confirm' button to complete the refund.
By default, only admins will be able to complete refunds using this method. However, an admin can permit other custom roles to access this feature.
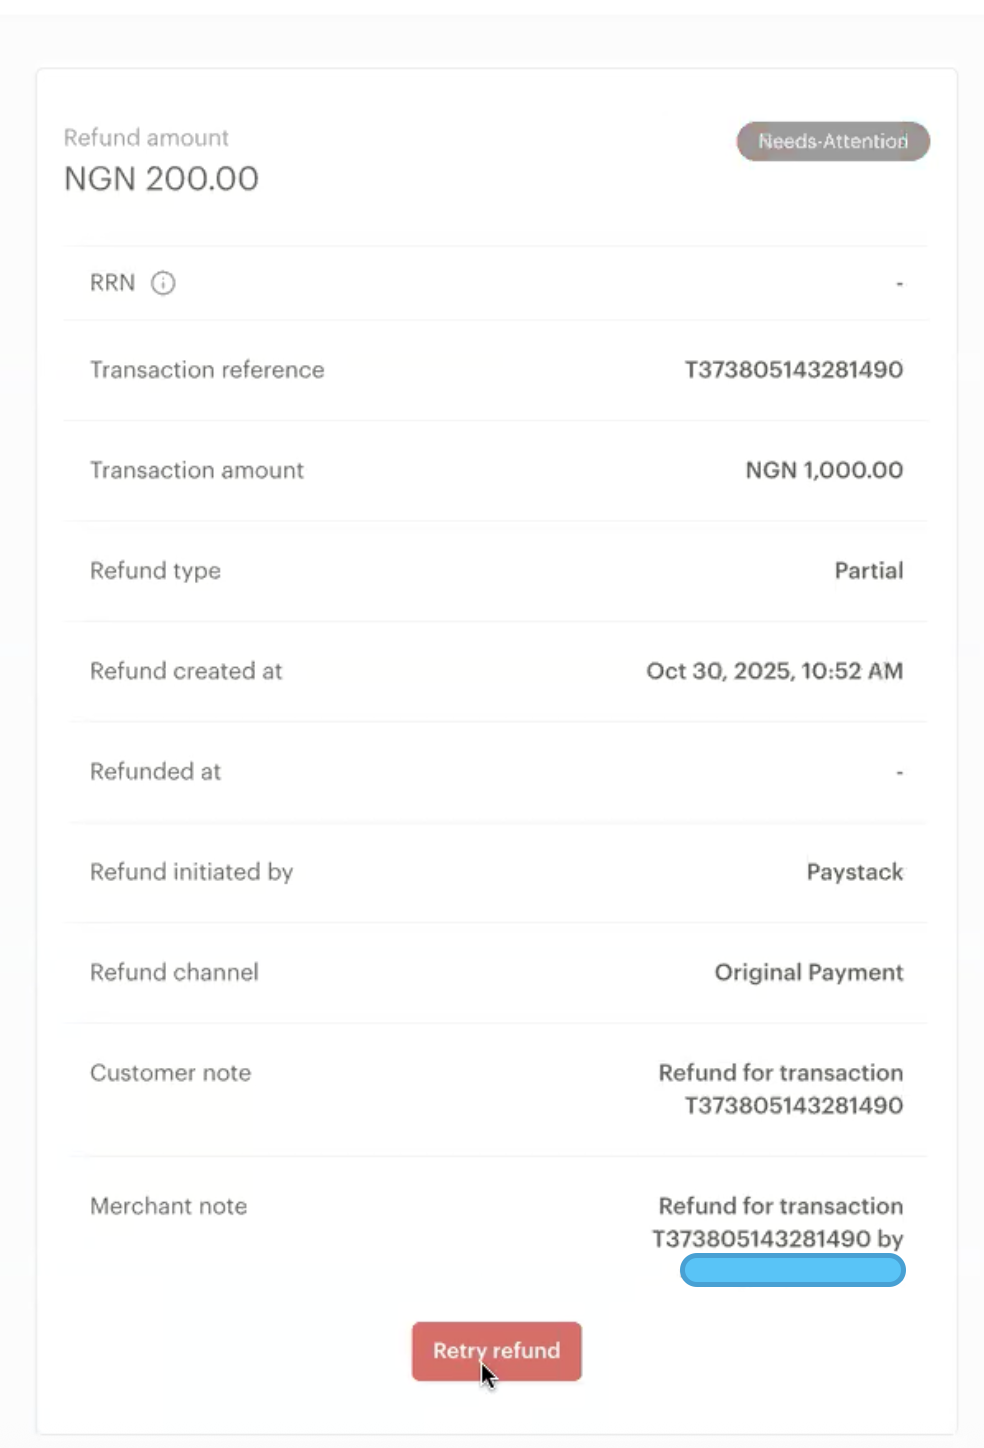
Needs-Attention Refunds
Typically, refunds are sent back to the bank account used for the original, successful payment.
If those bank details weren't captured during the transaction, the refund status will be marked as "needs-attention." This simply means you need to manually enter the customer's bank account details to complete the refund.
Here’s how to do this from your dashboard:
Go to the Refunds page to view the refunds that need attention.

Click on the banner that shows you the refunds that need attention - this will take you to the refunds that the statuses shows “Needs-Attention”.
Next, click on the refund to add the customer’s bank account details. Once the customer’s bank account has been confirmed, click on “Confirm”, then click on “Retry Refund”.
If you create your refunds using our API, please see our documentation on how to manually provide the customer’s bank account details here.
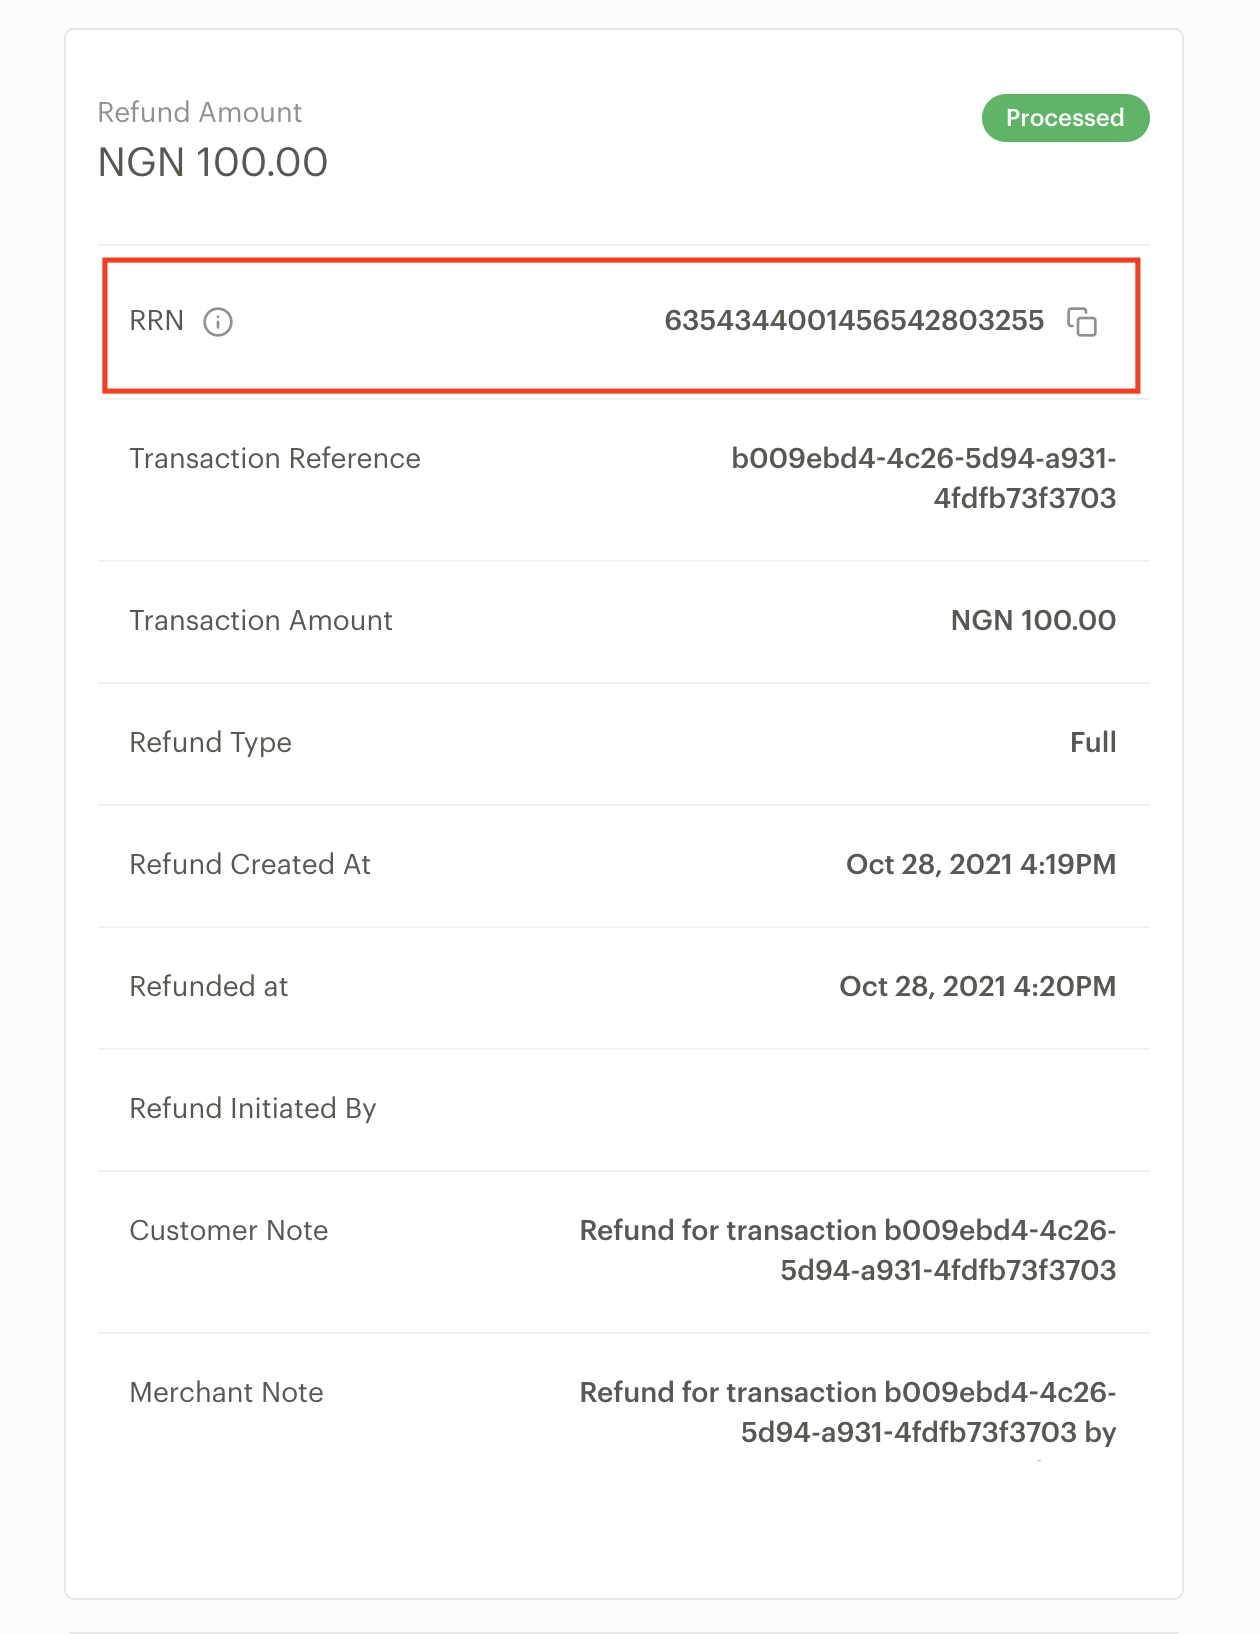
The Refunds page
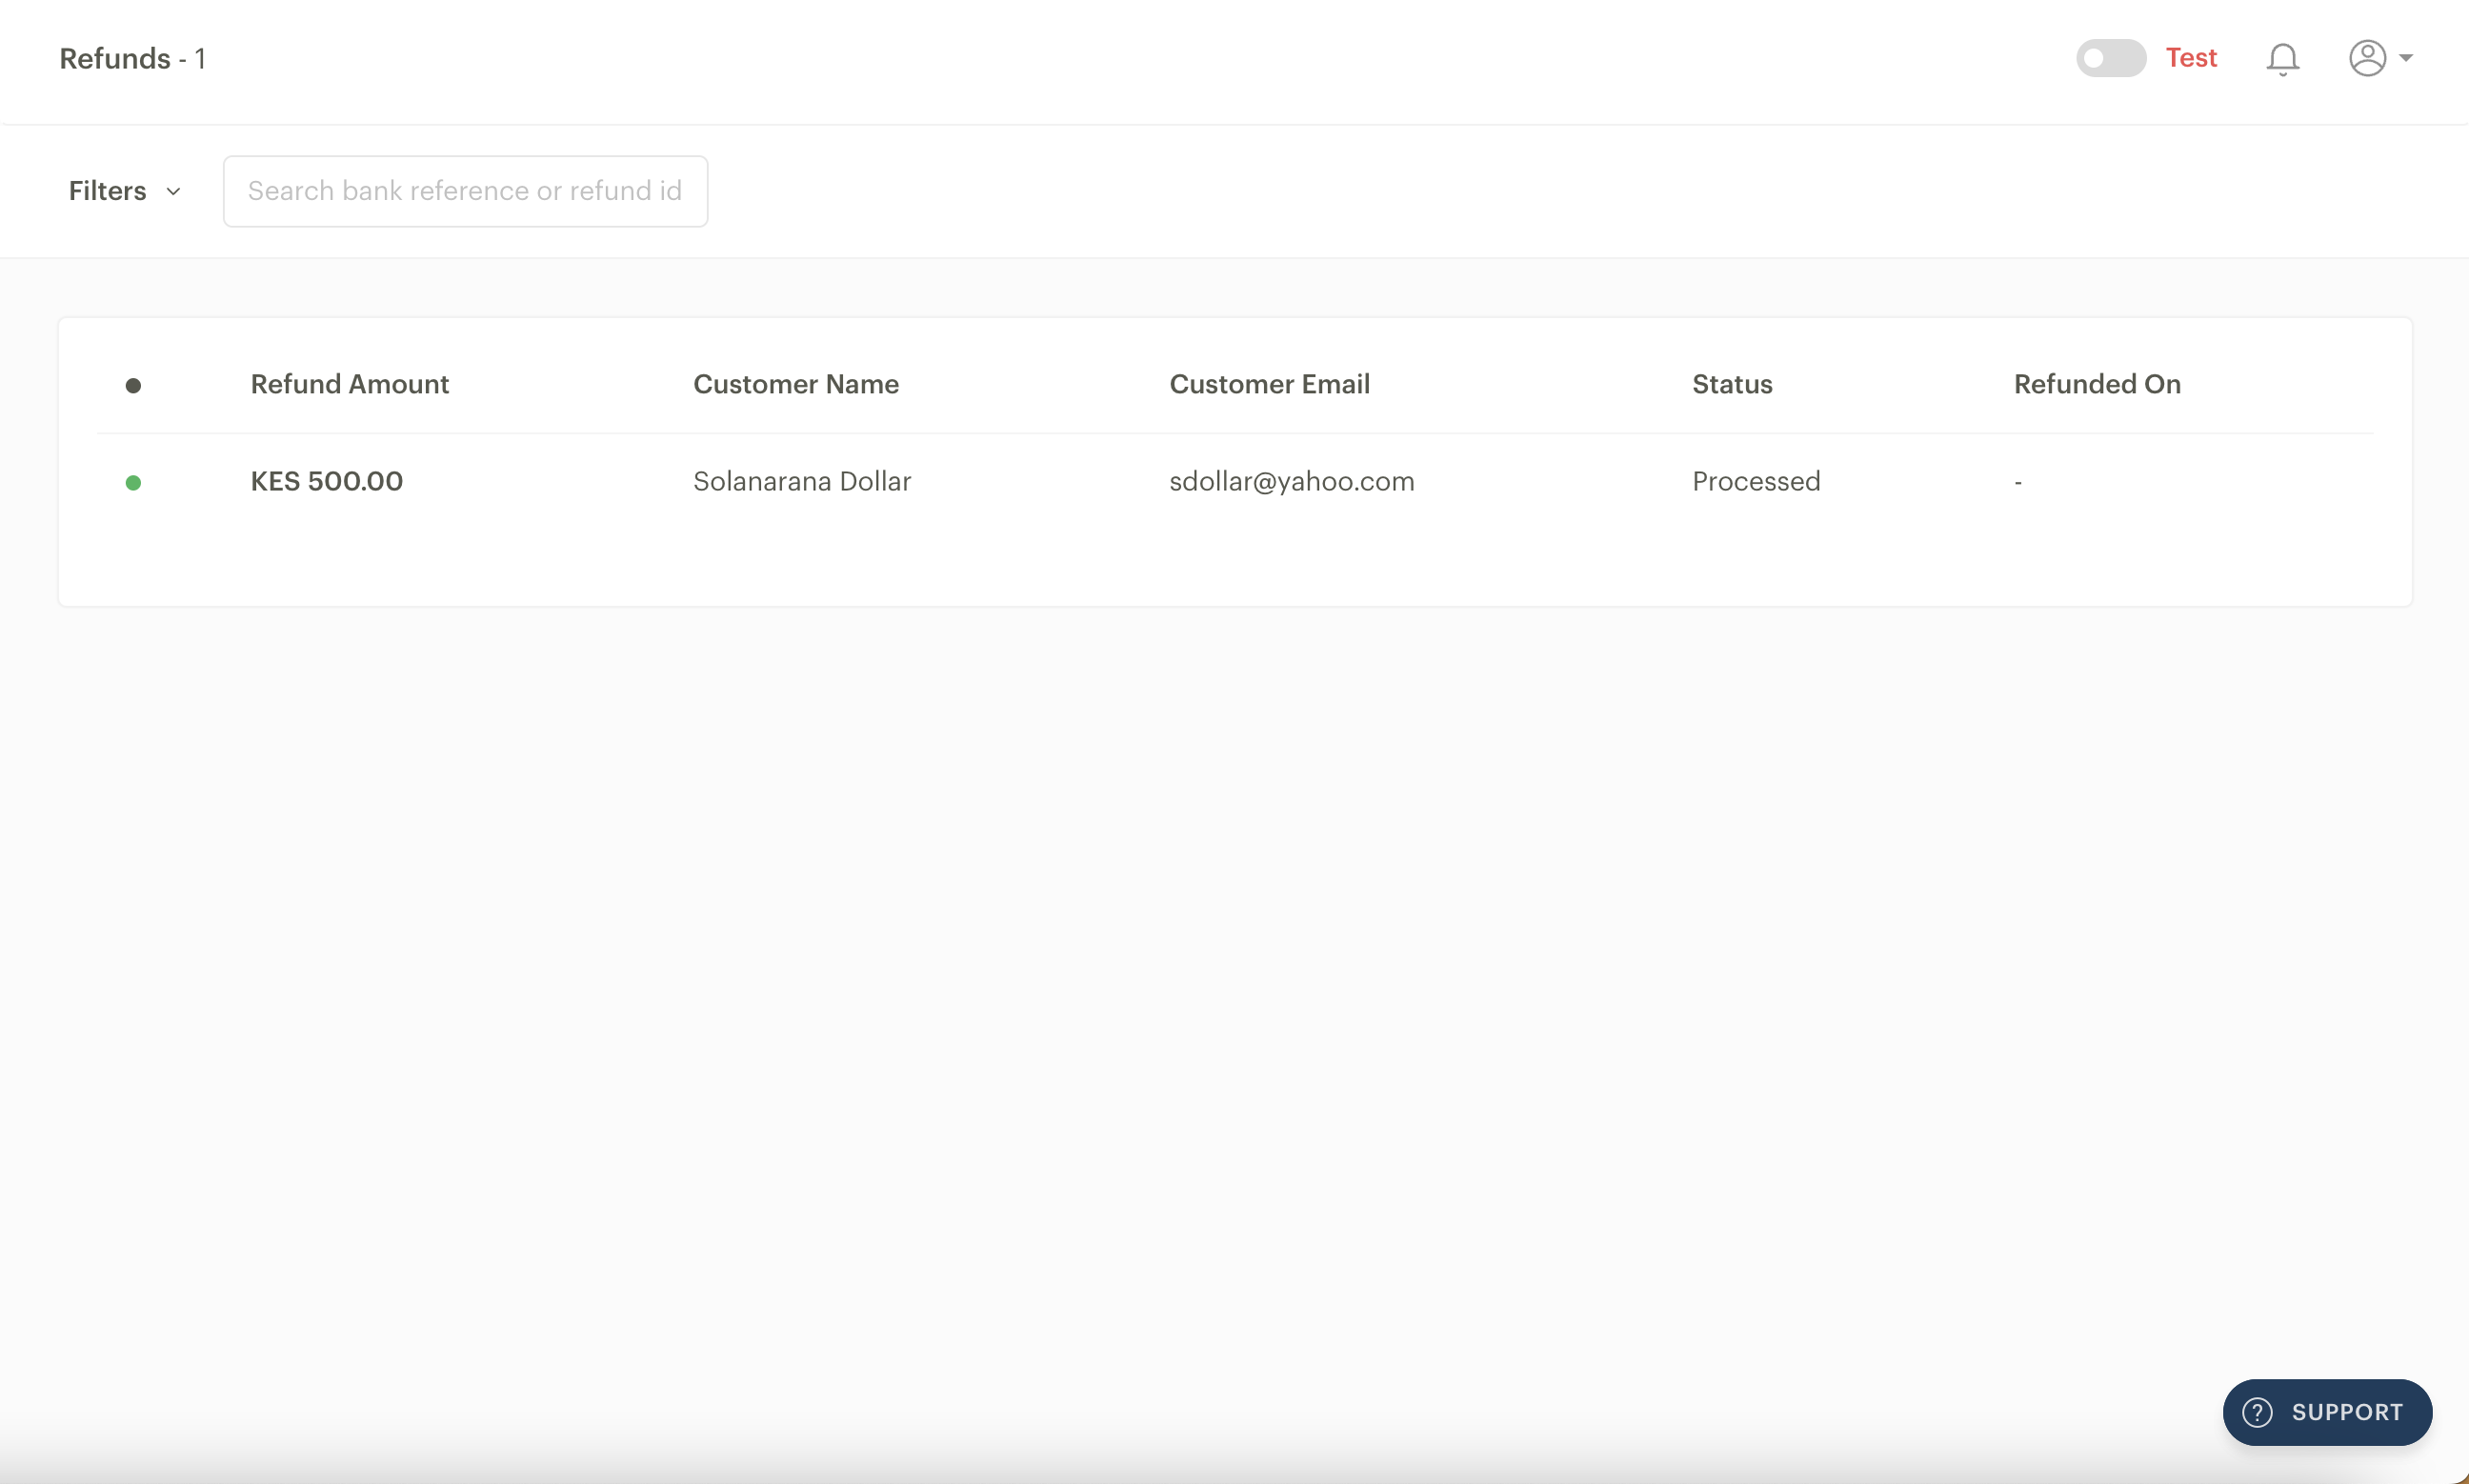
All refunds can be viewed and managed on the Refunds page. Here, you can see all the refunds you have made, including the status of each refund. You can also filter by the refund date, the status, or the amount.
You can also see more information about the refund, such as the Refund Reference Number (RRN), on the Refunds page. In the rare case where a customer is yet to receive their refund within the specified period, the RRN can be shared with the customer as it can be used to follow up with their bank.