
How to setup Paystack on Magento 2
Magento is a powerful and widely used Content Management System (CMS) that stands out for its robust e-commerce capabilities. Known for its scalability and flexibility, Magento caters to businesses of all sizes, from small enterprises to large corporations.
You'll need an SSH client like Terminal (for Linux and MacOS and PuTTY for Windows), Composer, and a working Magento installation to complete the set-up.
This guide walks you through installing and configuring the Paystack payment plugin on Magento 2.
Requirements
Magento 2.4.x
PHP 8.2 or higher
Composer (for the recommended installation method)
SSH access to your server
Installation
Option A: Composer (Recommended)
1. Connect to your server via SSH:
ssh username@yourserver.com2. Navigate to your Magento root directory:
cd /path/to/magento3. Install the module via Composer:
composer require pstk/paystack-magento2-moduleNote: The module is hosted on Packagist. No Magento Marketplace credentials are required.
4. Enable the module and run Magento setup:
php bin/magento module:enable Pstk_Paystack --clear-static-content
php bin/magento setup:upgrade
php bin/magento setup:di:compile
php bin/magento cache:flush
5. Fix file permissions (if your web server runs as a different user):
chown -R www-data:www-data var/ generated/ pub/static/ Replace www-data with your web server's user if different (e.g., nginx, apache).
6. Verify the module is installed:
php bin/magento module:status Pstk_PaystackYou should see: Module is enabled
Option B: Manual Installation
Use this method if you do not have Composer access.
1. Download the latest release from the GitHub releases page.
2. Extract the files into your Magento installation at:
app/code/Pstk/Paystack/Your directory structure should look like:
   app/code/Pstk/Paystack/
   ├── Api/
   ├── Controller/
   ├── Gateway/
   ├── Model/
   ├── Observer/
   ├── composer.json
   ├── etc/
   ├── registration.php
   └── view/
3. Enable the module and run Magento setup:
php bin/magento module:enable Pstk_Paystack --clear-static-content
php bin/magento setup:upgrade
php bin/magento setup:di:compile
php bin/magento cache:flush
4. Verify the module is installed:
php bin/magento module:status Pstk_PaystackConfiguration
Head to your Magento Admin Dashboard and go to Stores -> Configuration. Under the Sales tab, choose Payment Methods. Paystack should be the first option under Other Payment Methods.
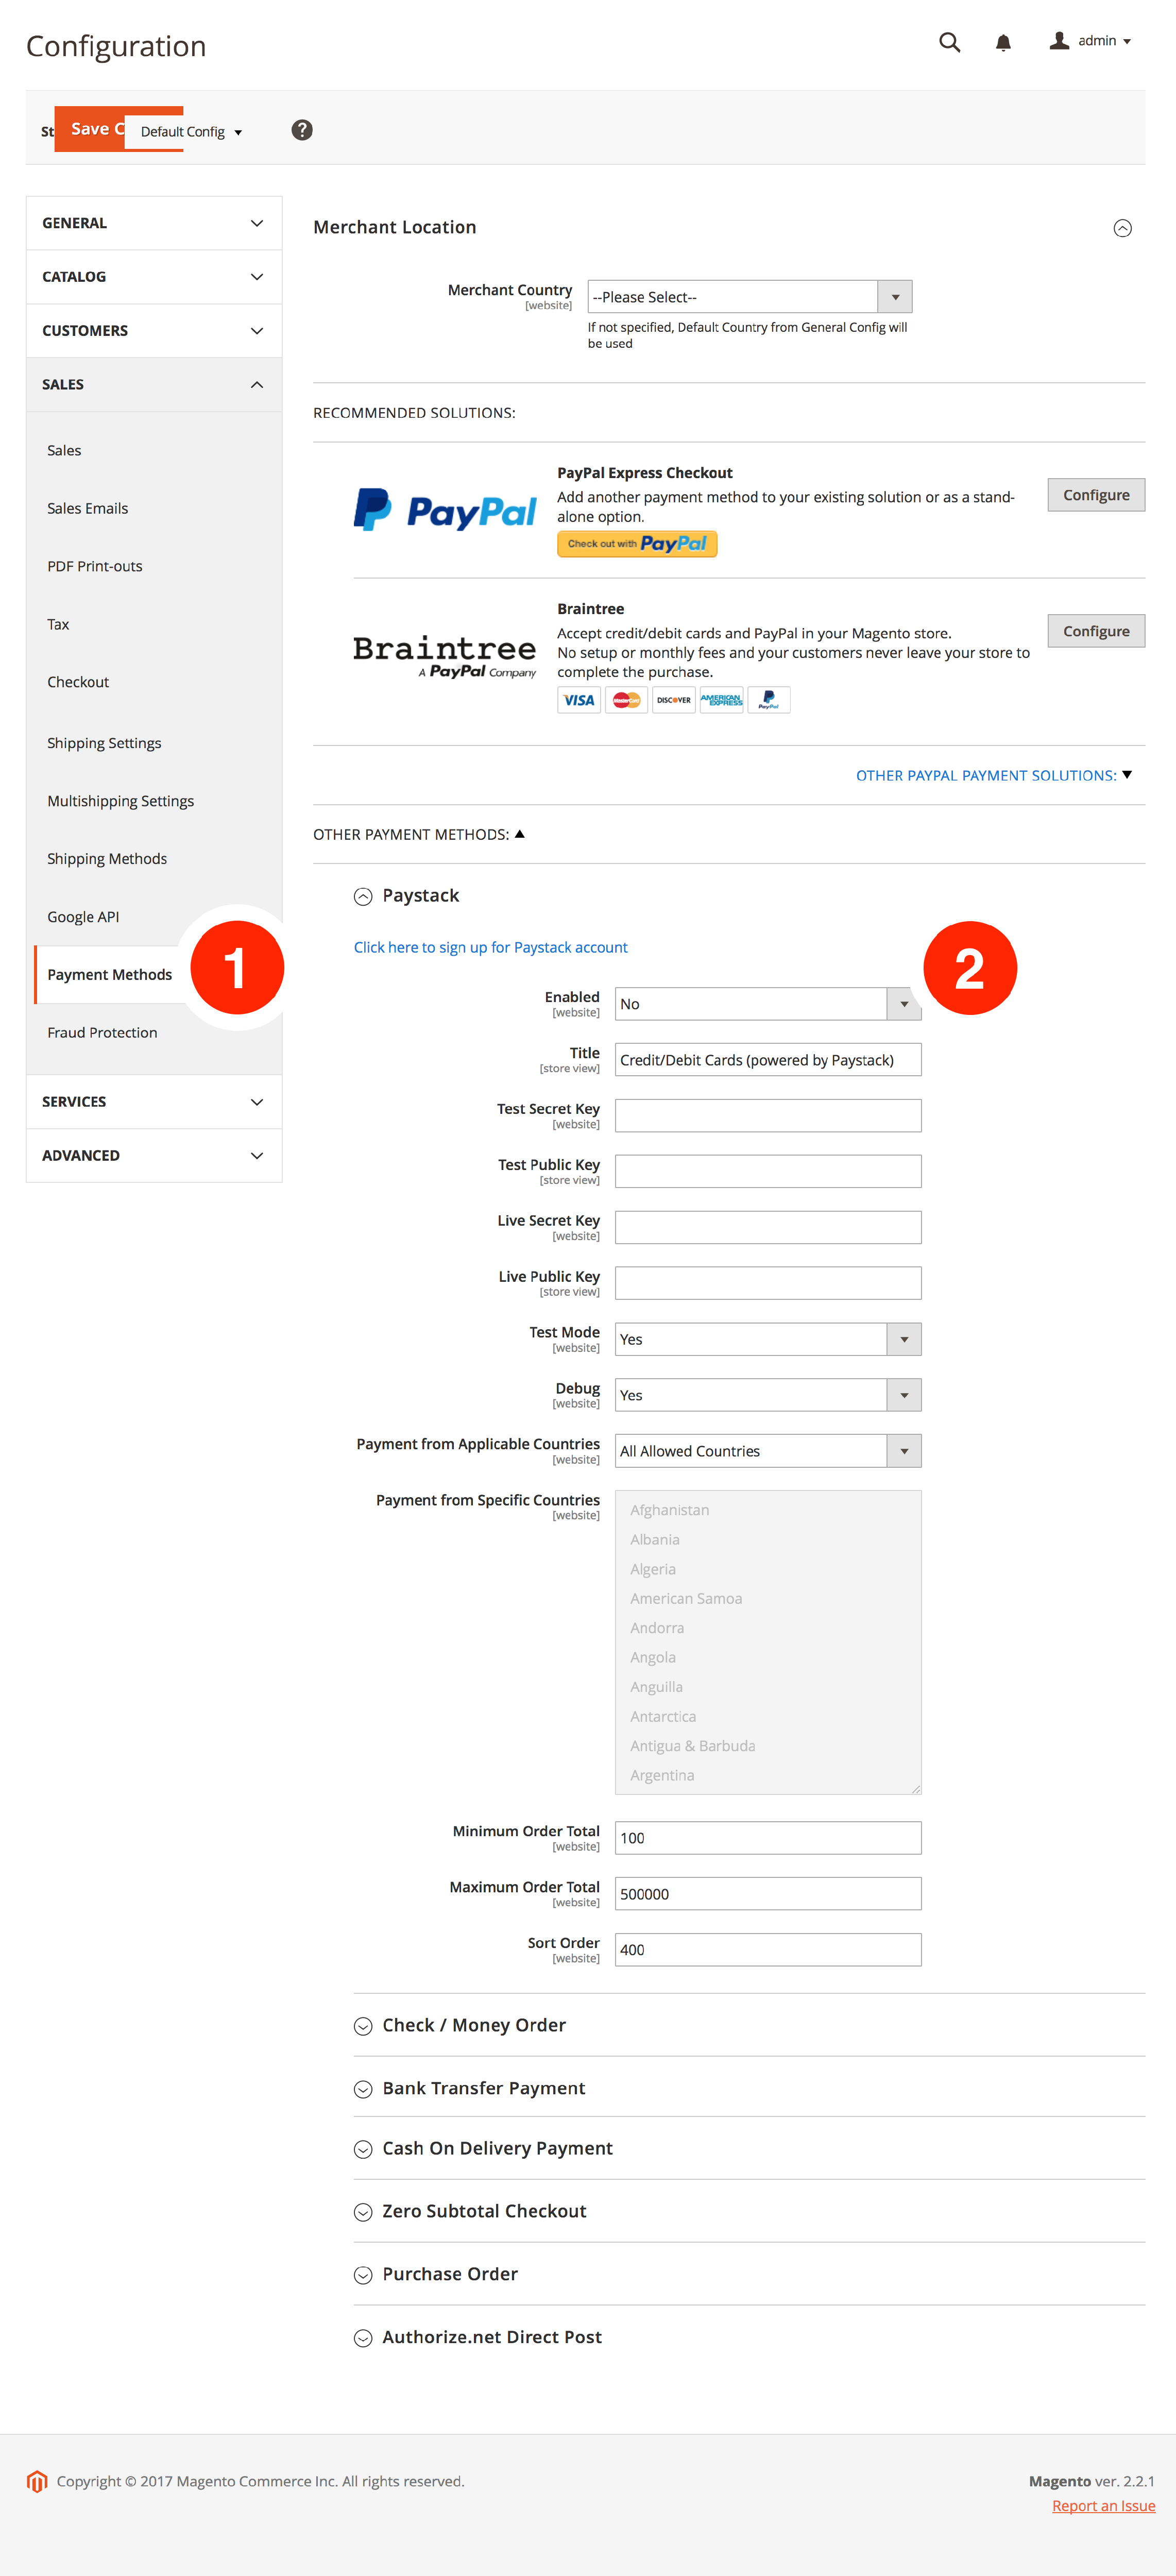
Enable Paystack by clicking the first option in the Paystack section and choosing 'Yes'.
Finally, configure your plugin by inputting your API Keys. You can get your Test and Live API Keys from the Settings page on your Paystack Dashboard. Copy and paste your API keys.
Use Test Keys while testing your website to ensure it works properly, then use Live Keys when you are ready to start accepting payment from customers. Ensure you click the Test Mode dropdown and put 'No' when you are ready to start accepting live payments.
Webhook Setup
Webhooks ensure reliable payment confirmation, even if the customer's browser closes during payment. This is strongly recommended.
1. Log in to your Paystack Dashboard.
2. Go to Settings > API Keys & Webhooks.
3. Set the Webhook URL to:
https://yourdomain.com/paystack/payment/webhookReplace yourdomain.com with your actual store URL.
4. The module handles charge.success events and updates order status automatically.
Important: The webhook URL must be publicly accessible over HTTPS.
If you encounter any issues while integrating the plugin, please get in touch with us at techsupport@paystack.com or via our contact form.