How to set up Paystack on OpenCart
OpenCart is an open-source online store management system and shopping cart platform that has gained popularity for its user-friendly interface and robust features. It is a plugin that can be integrated into various websites to manage e-commerce activities.
Important to note
The Paystack OpenCart plugin isn't compatible with Opencart version 4.0.2.3. It is currently only compatible with version 3.0.3.2.
Setting up your OpenCart plugin
Follow this link to download the Paystack OpenCart plugin. When you extract the downloaded zip file, it should contain two folders: 'Admin' and 'Catalog'. Upload both folders to the root of your OpenCart website, which has its own Admin and Catalog folders.
Merge the Paystack plugin folders with the root folders so that the contents of the Plugin' Admin' and 'Catalog' folders are contained in the root 'Admin' and 'Catalog' folders. Be careful not to replace the root folders with the plugin folders. This will crash your site. If you cannot merge the folders, follow their folder structures and place all the plugin files in the corresponding directories in the root folders.
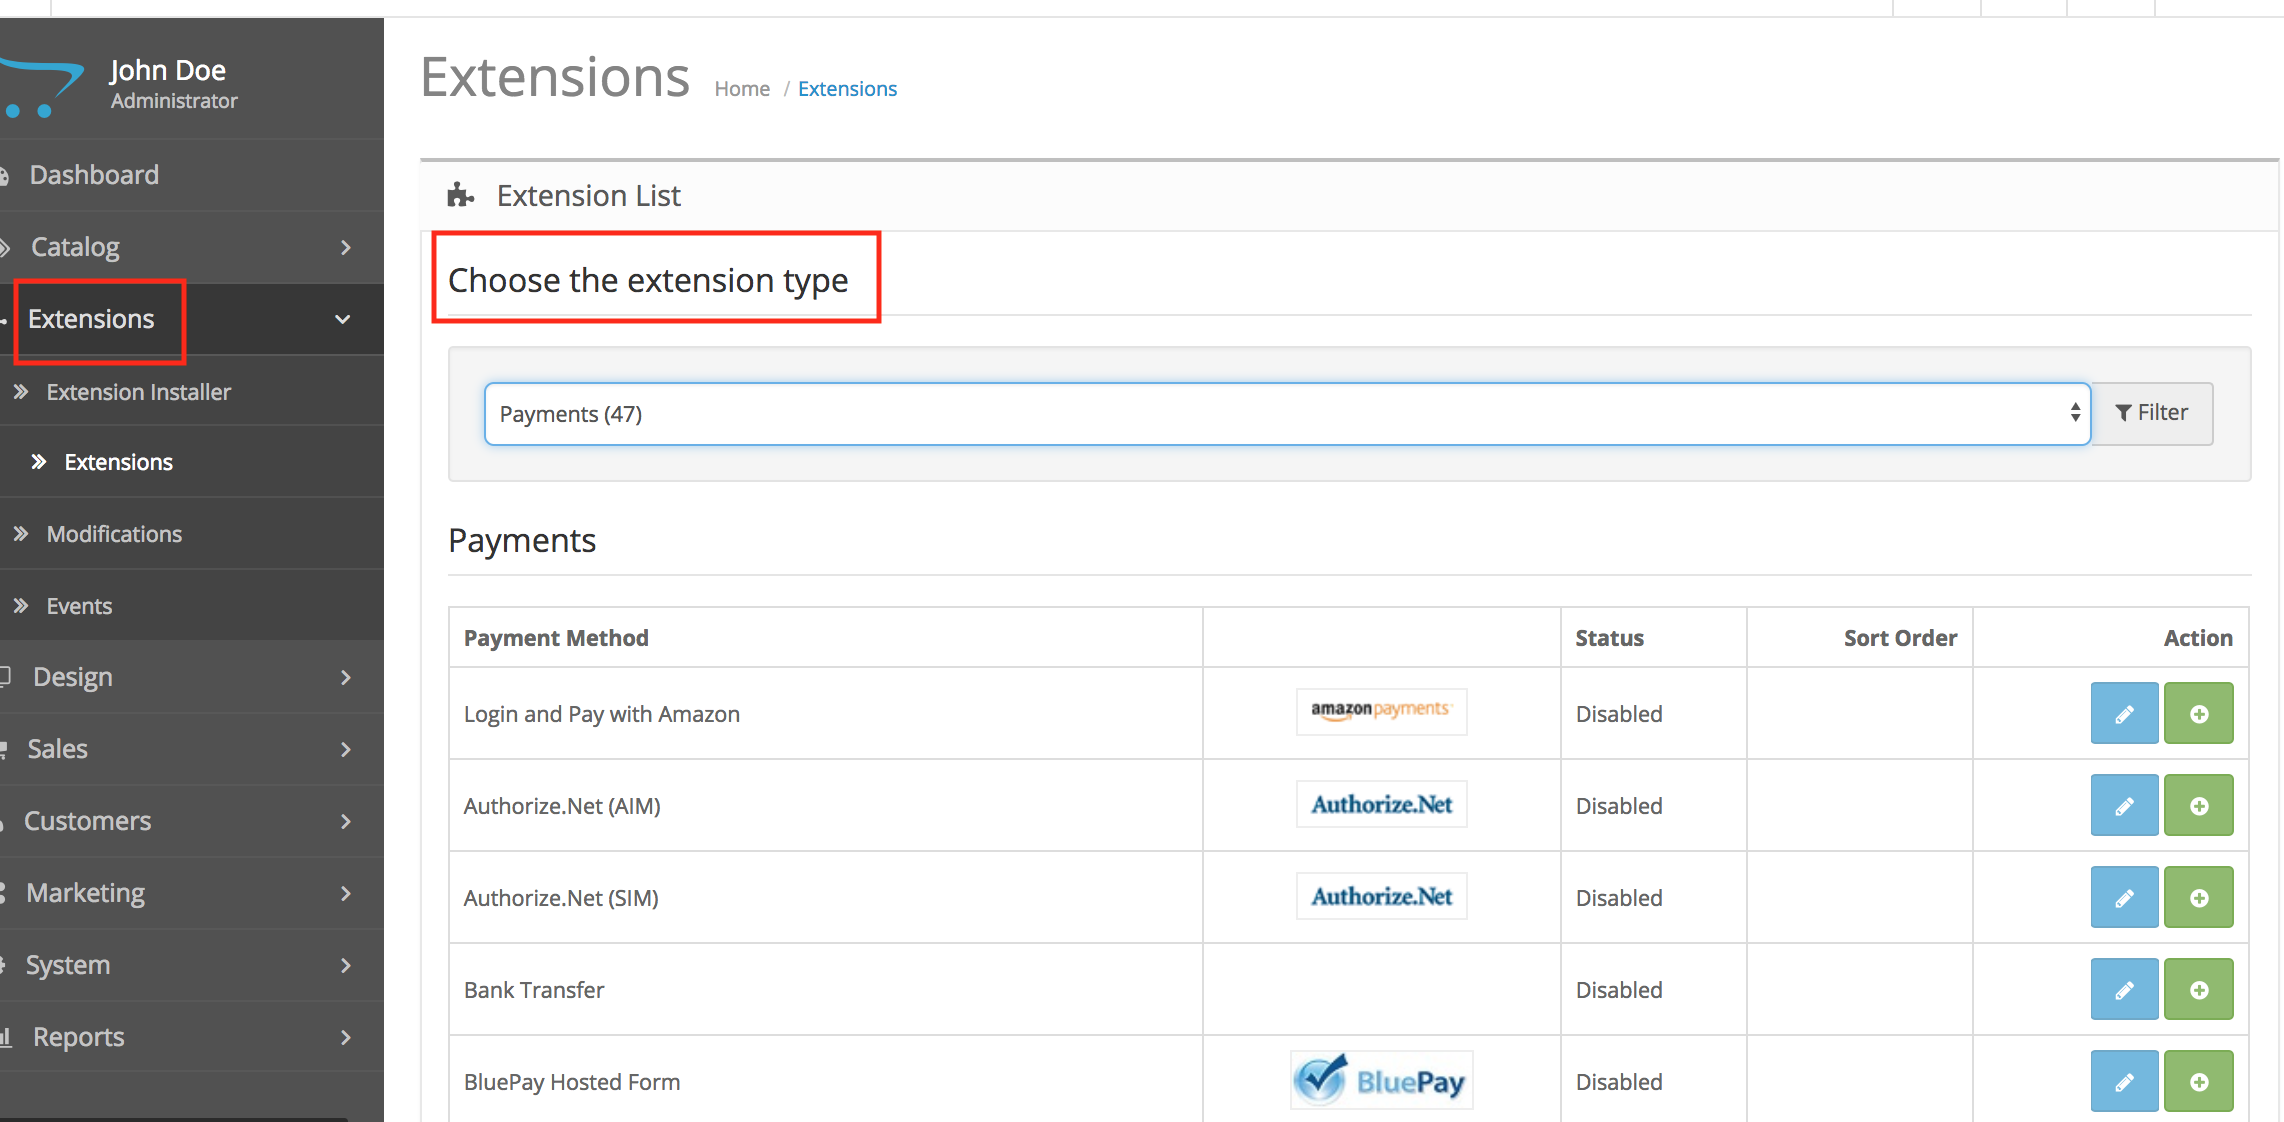
Next, go to your OpenCart dashboard menu and select Extensions, then select Extensions on the submenu to see your list of extensions. Click on the Choose Extension Type dropdown and select Payments. This will show a list of Payments extensions available on your site.
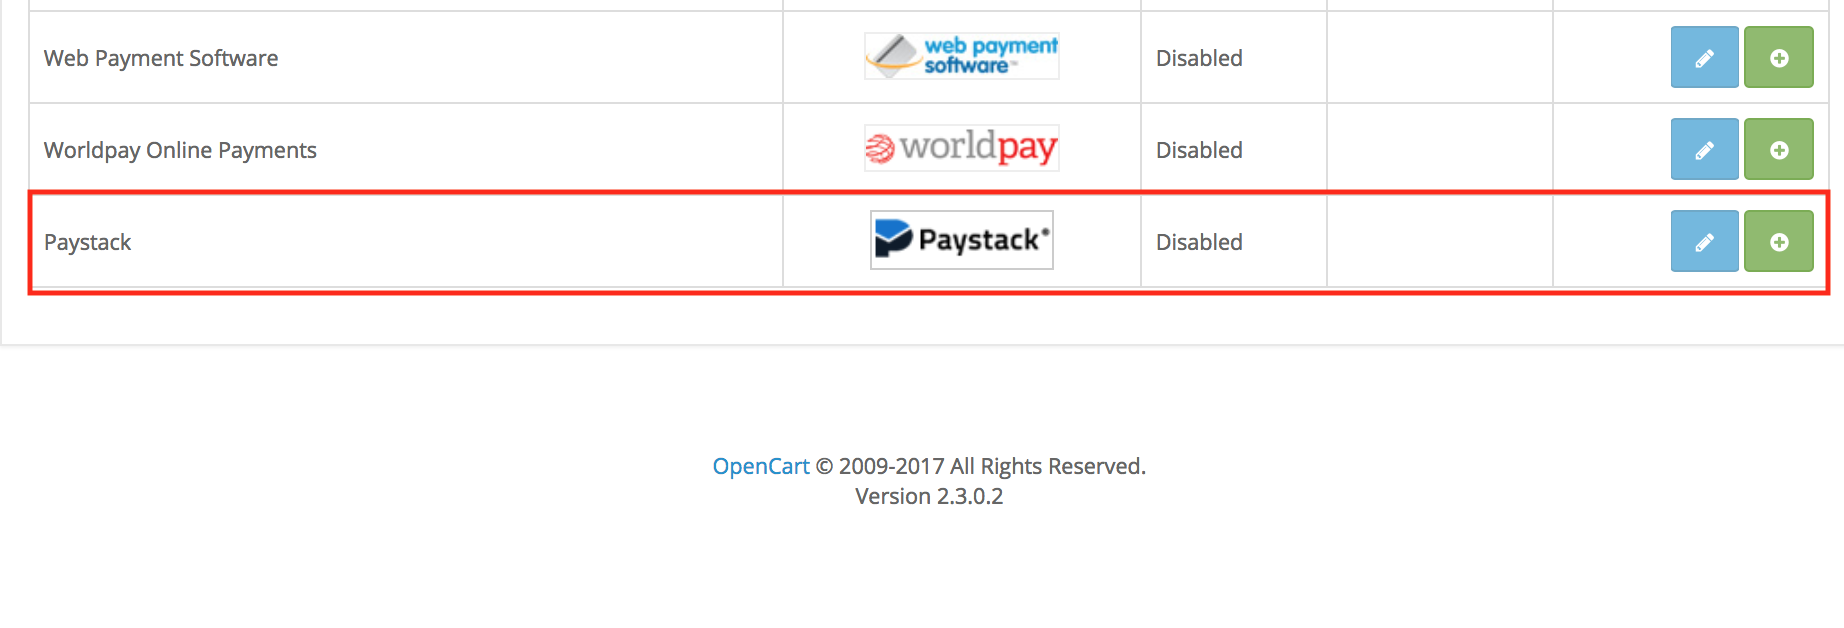
Scroll down till you find Paystack. You can see that it hasn't been installed on the site, and it is still Disabled. If you are still looking for Paystack on this list, you probably didn't install the files correctly or the wrong version.Click on the green '+' button beside Paystack to install it. This should take a few seconds. After that, click on the blue Edit button to configure and enable Paystack.
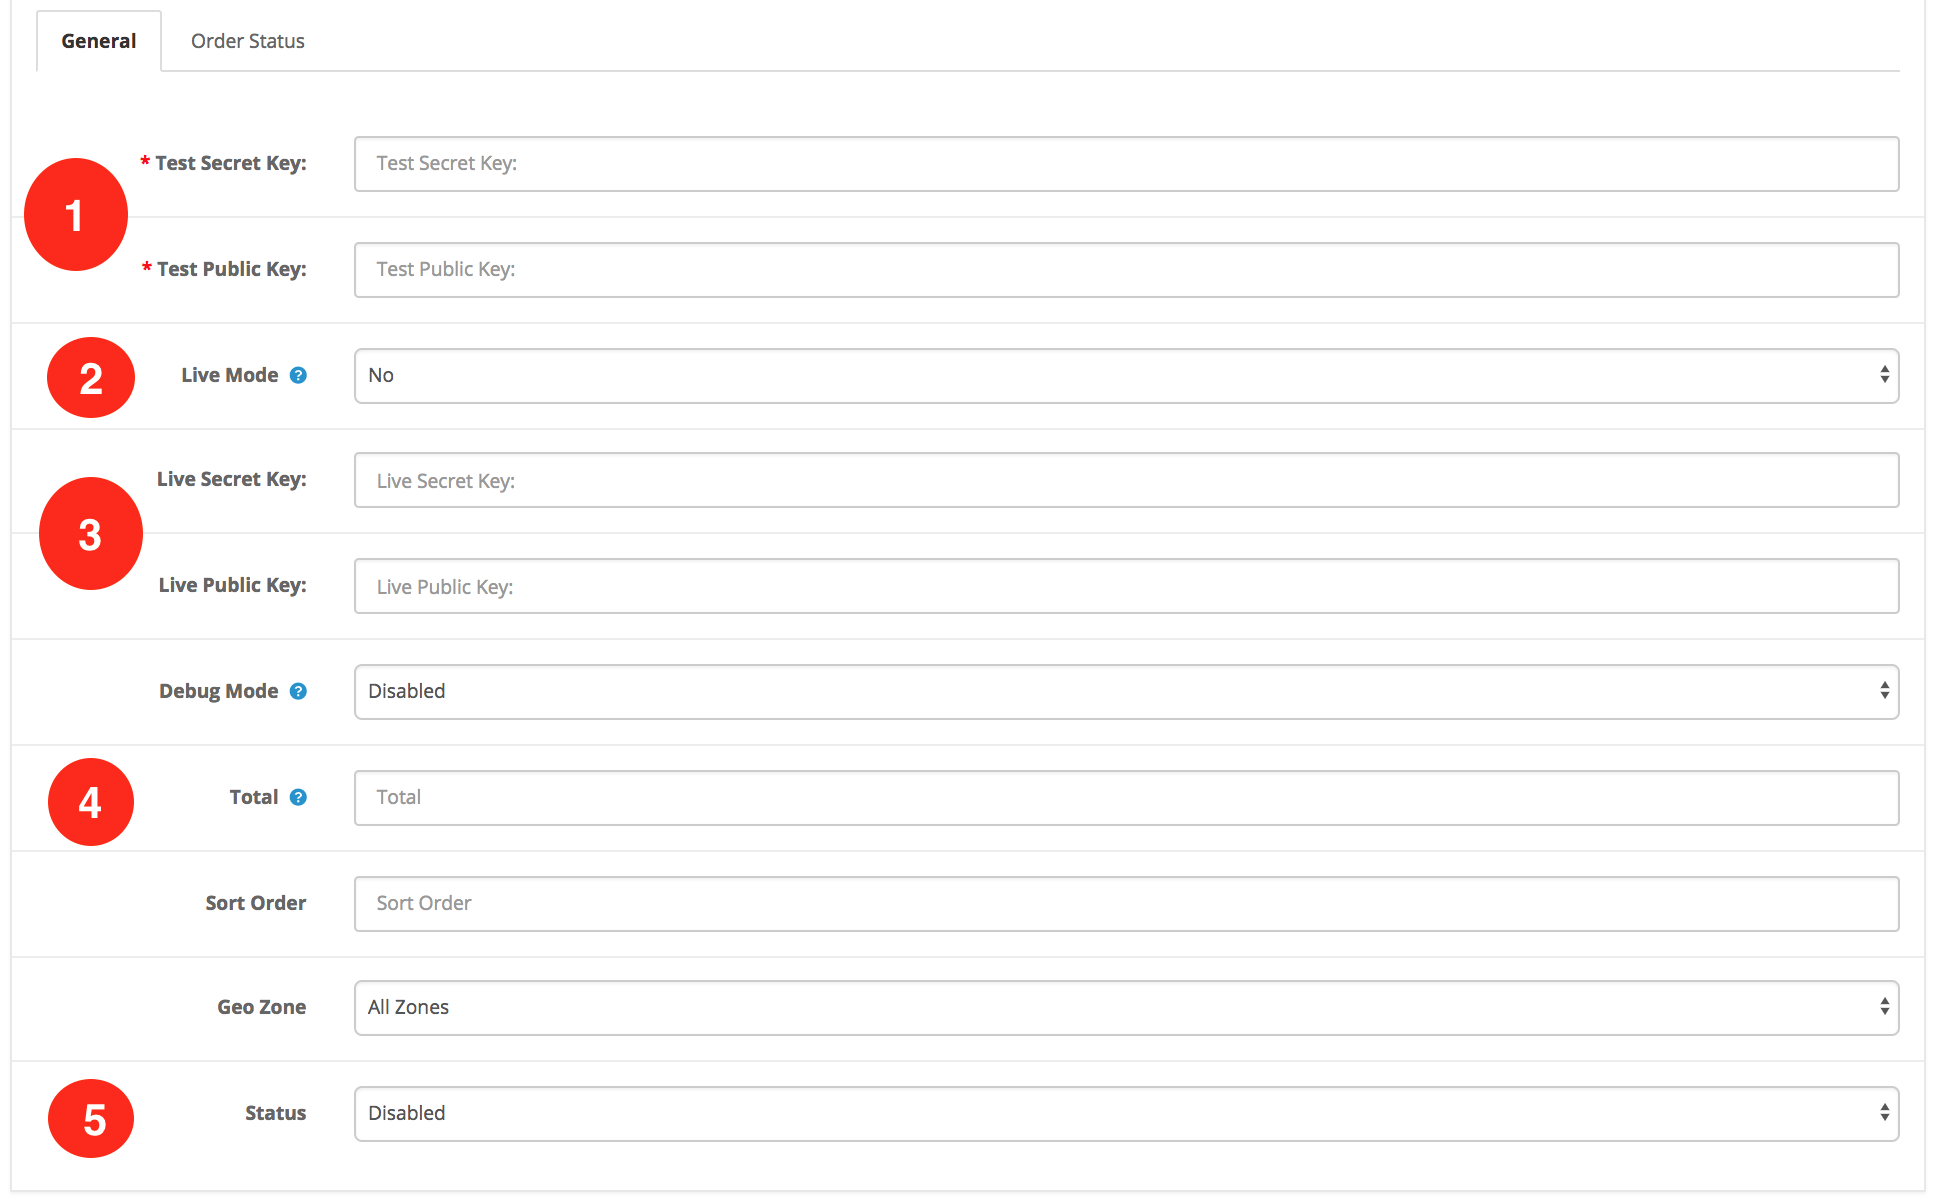
Next, you'll need to edit a few settings:
1. Test Keys: You can get your Test (and Live) API Keys from the Settings page on your Paystack Dashboard. Copy and paste the keys.
2. Live Mode: Live Mode allows your site to process live payments. Paystack will enable you to switch the Live Mode on or off so your site can use the Test Keys. The Test Parameters will allow you to simulate a transaction without using real money.
If you set the Live Mode dropdown to 'No', Paystack will use your Test API keys to parse the payments, meaning that the orders processed then will be done with test cards. No real money is exchanged; therefore, no real value should be delivered.
When you are ready to start receiving live payments, switch the Live Mode to Yes.3. Live Keys: You can get your Live API Keys from the Settings page on your Paystack Dashboard. Copy and paste the keys.
4. Total: This field allows you to set the minimum amount an order has to have before it can be processed using Paystack. If you want to use Paystack to process all payments on your site, you must leave this field empty.
5. Status: Switch this to 'Enabled.'
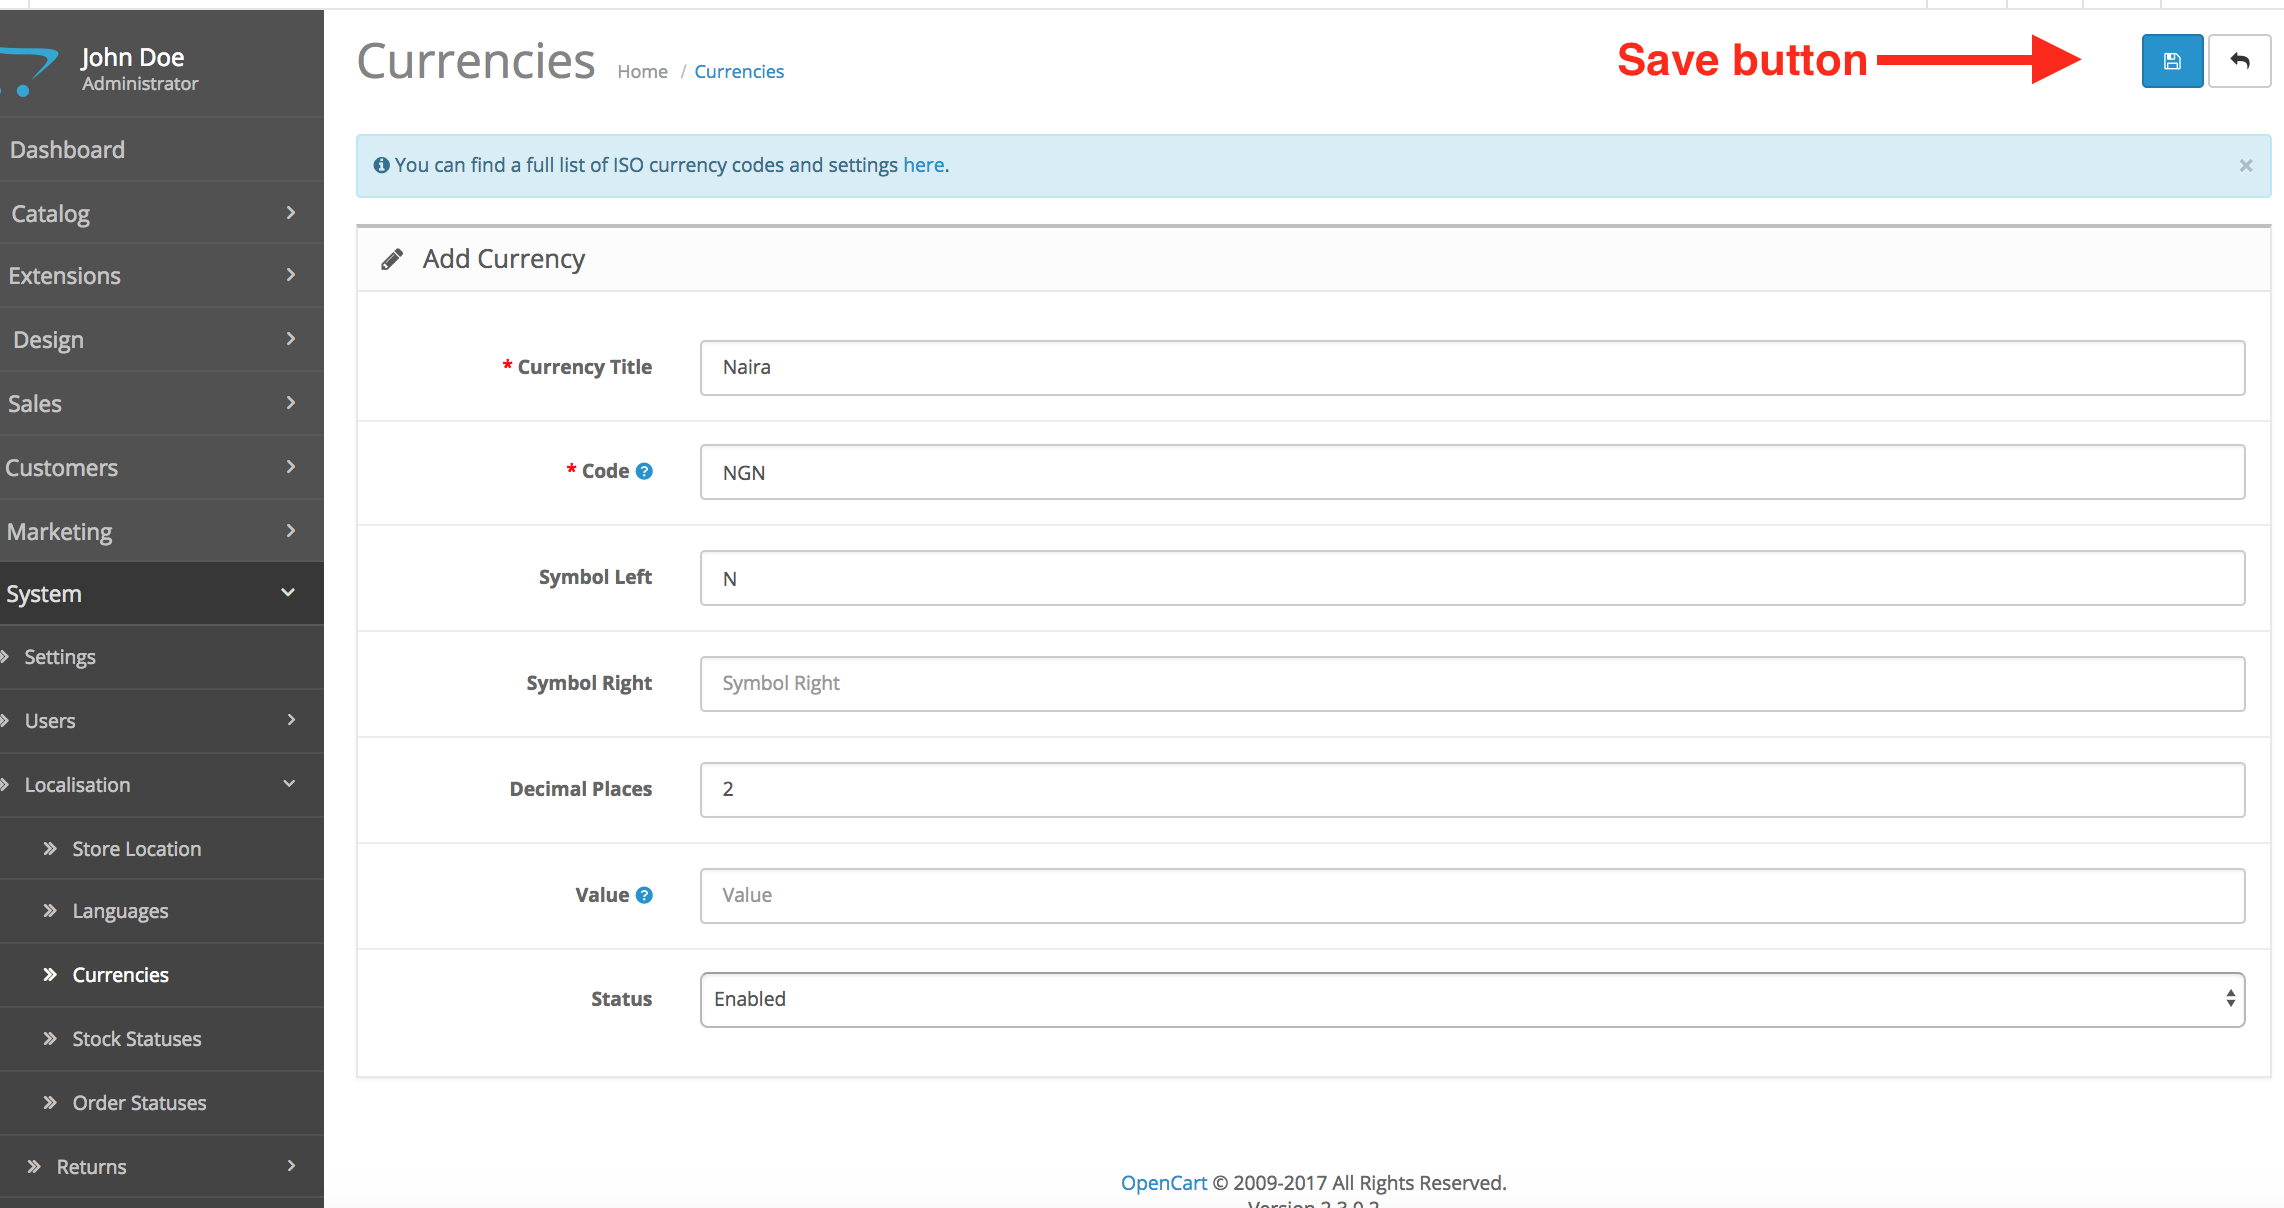
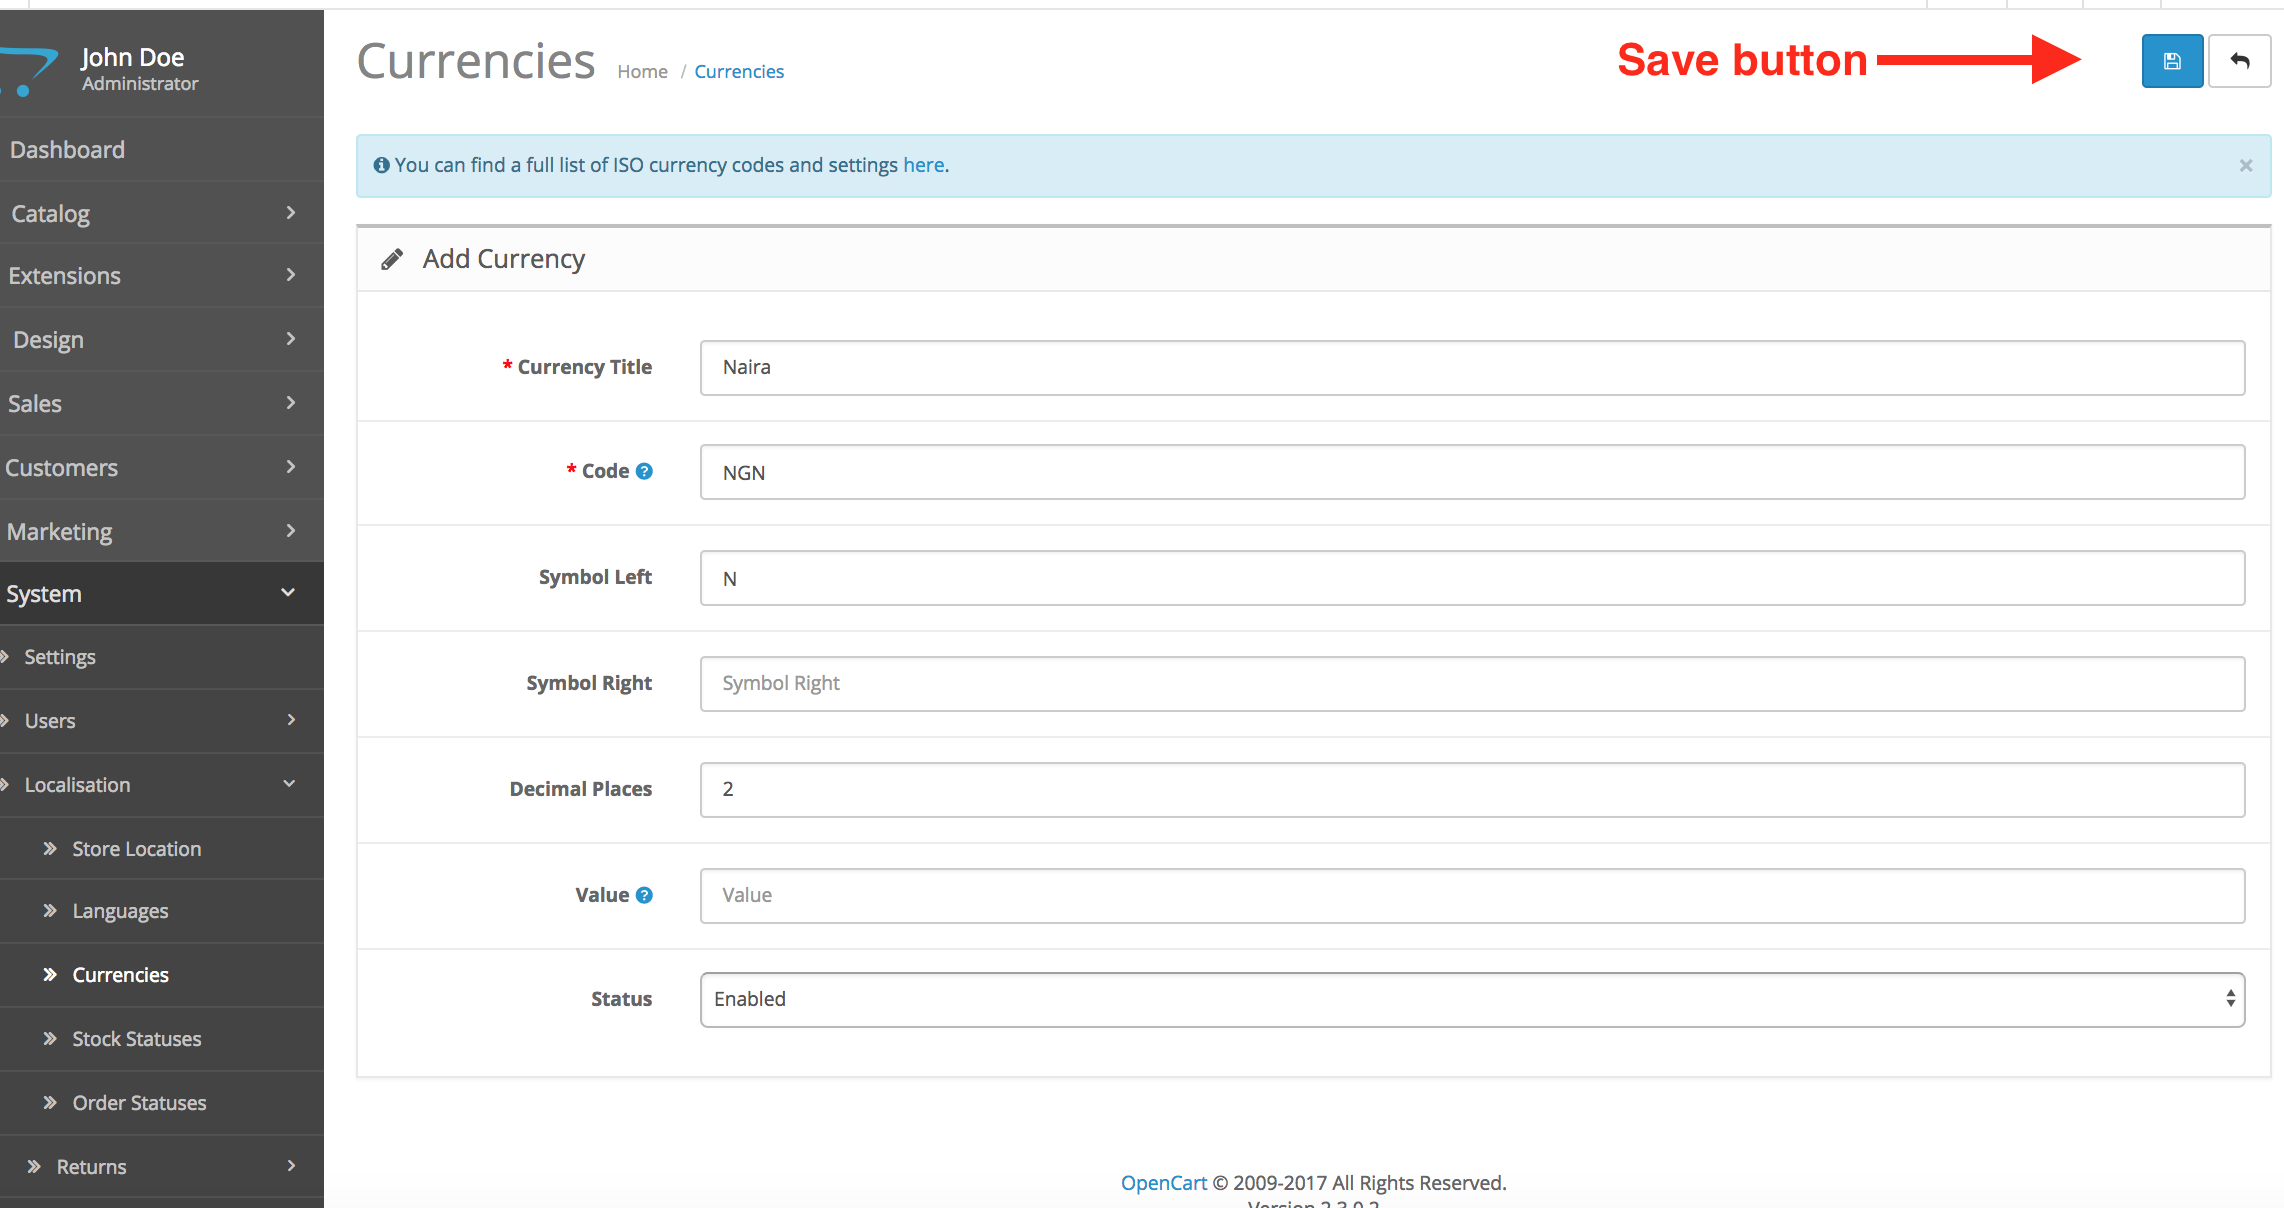
The Paystack plugin works when the default currency is Naira. If you haven't done this already, go to your OpenCart dashboard → System → Localisations → Currencies and click the blue + button to open the Add Currency form. Fill and save the form to create a new currency relevant to where your business is based.
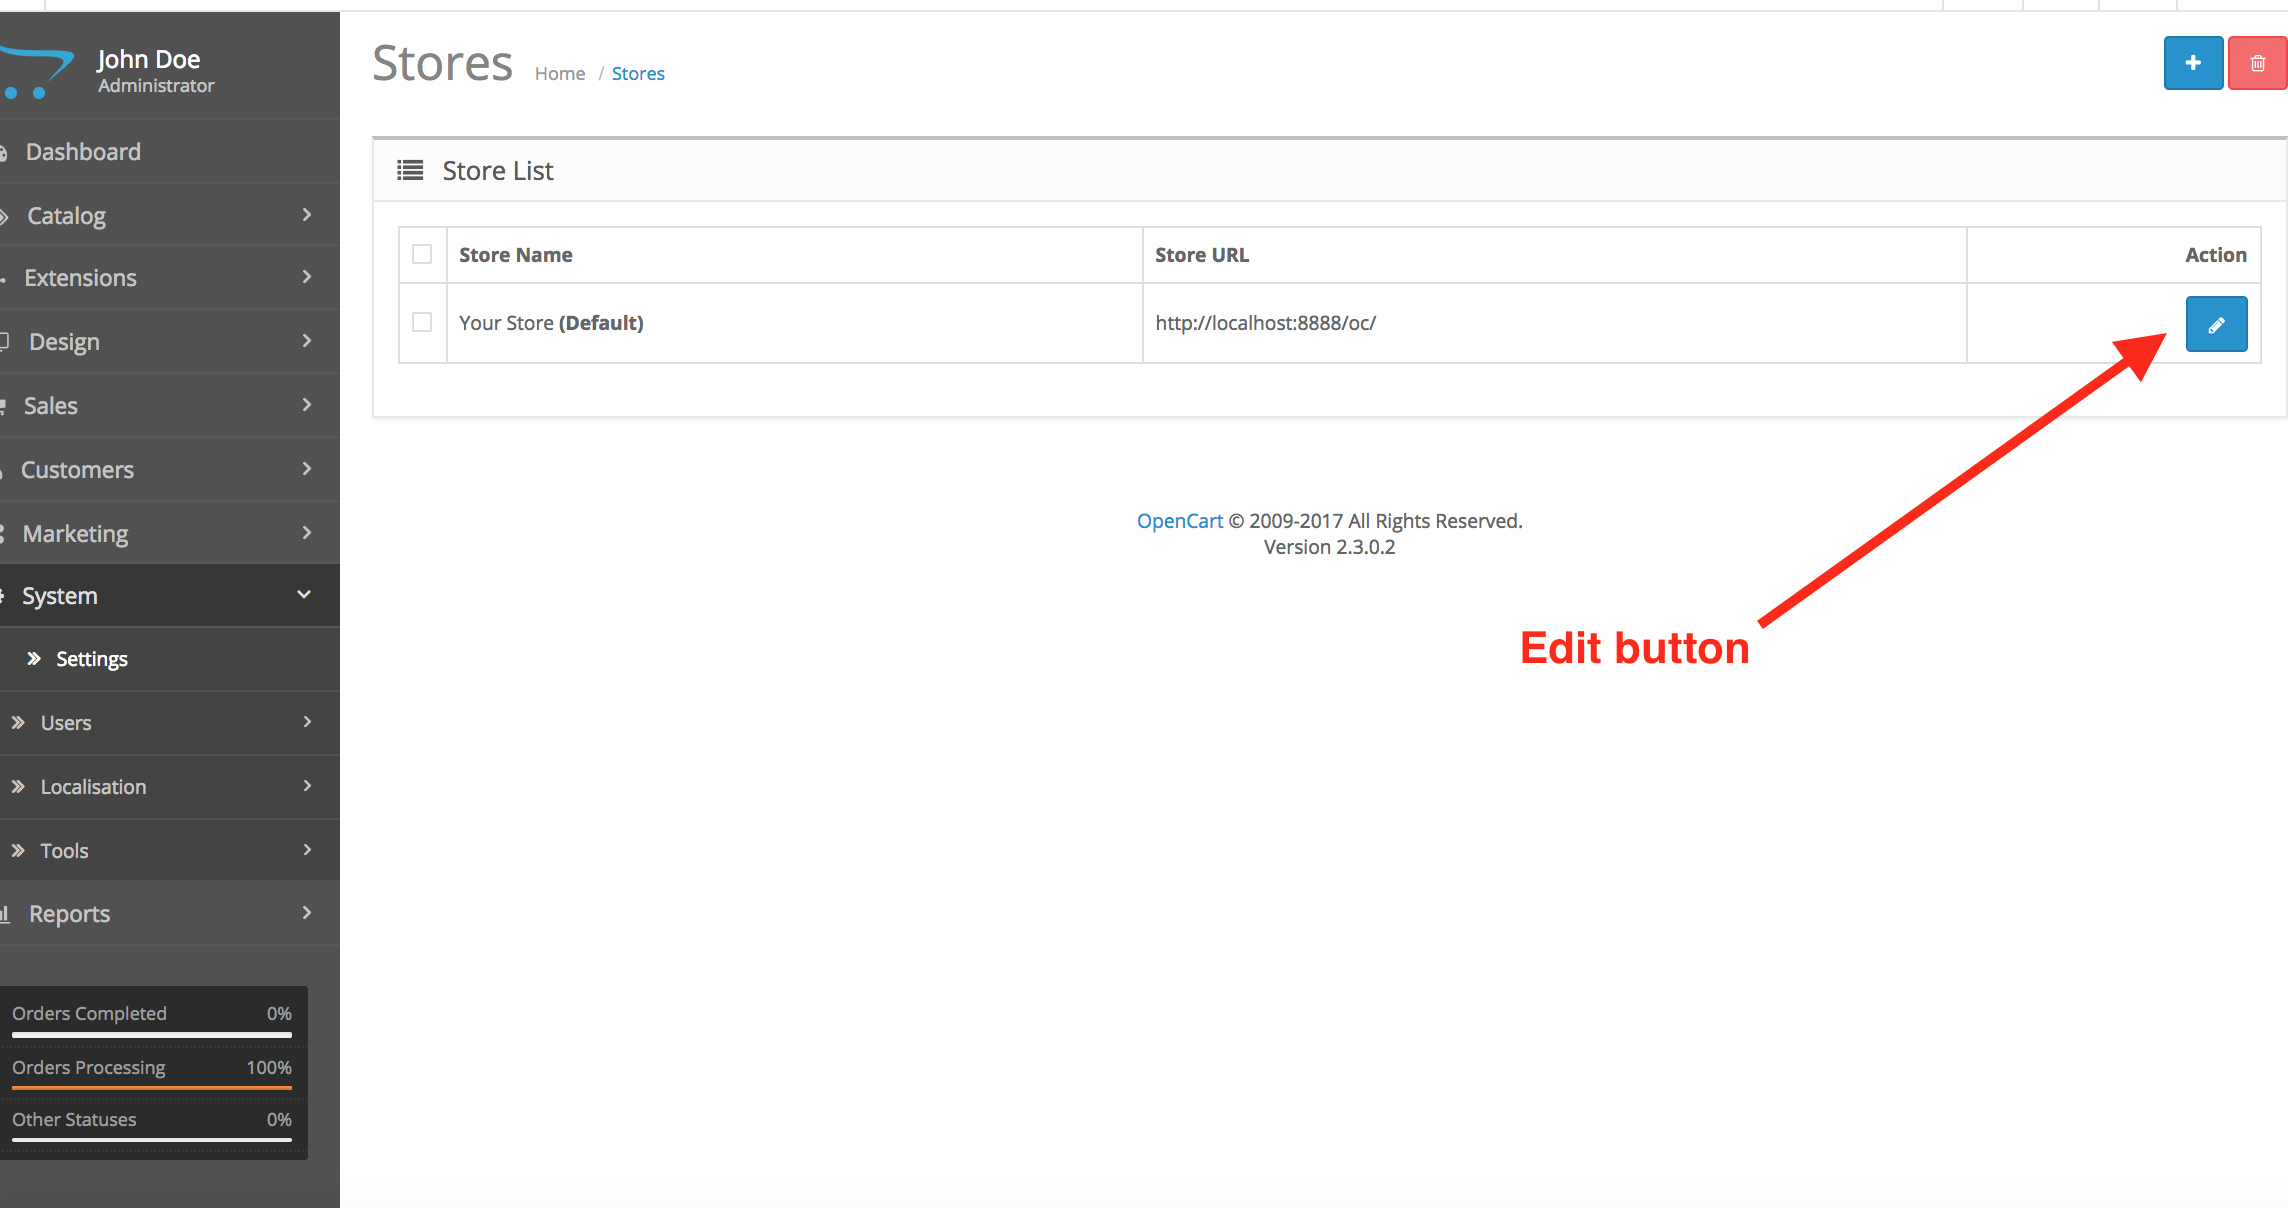
Next, go to System → Settings to see your stores. Click the store edit button.
Go to the Currency section and make the relevant currency your default currency.
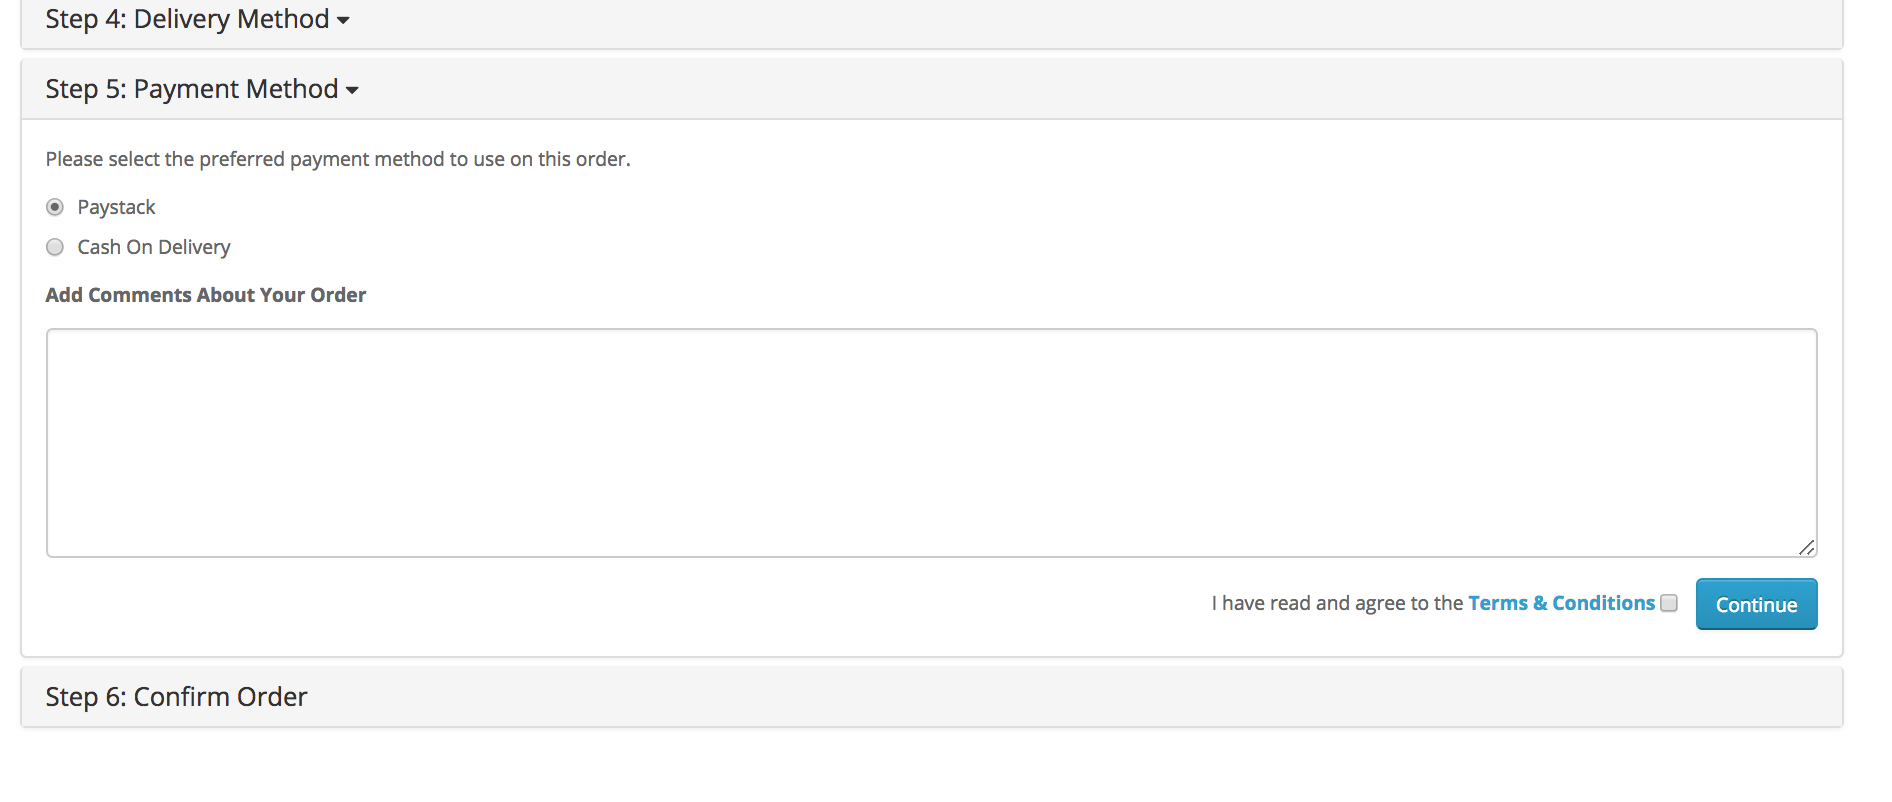
If you've followed all the steps correctly, you should see the Paystack option on the list of payment options on your checkout page.
If you encounter any issues while integrating the plugin, please get in touch with us at techsupport@paystack.com or via our contact form.

