How to set up Paystack on Magento 1
Magento is a powerful and widely used Content Management System (CMS) that stands out for its robust e-commerce capabilities. Known for its scalability and flexibility, Magento caters to businesses of all sizes, from small enterprises to large corporations.
You’ll need a working a working Magento installation to complete the set up.
Setting up your Magento 1 plugin
Follow this link to download the latest version of the plugin. The file will be in .tgz format.
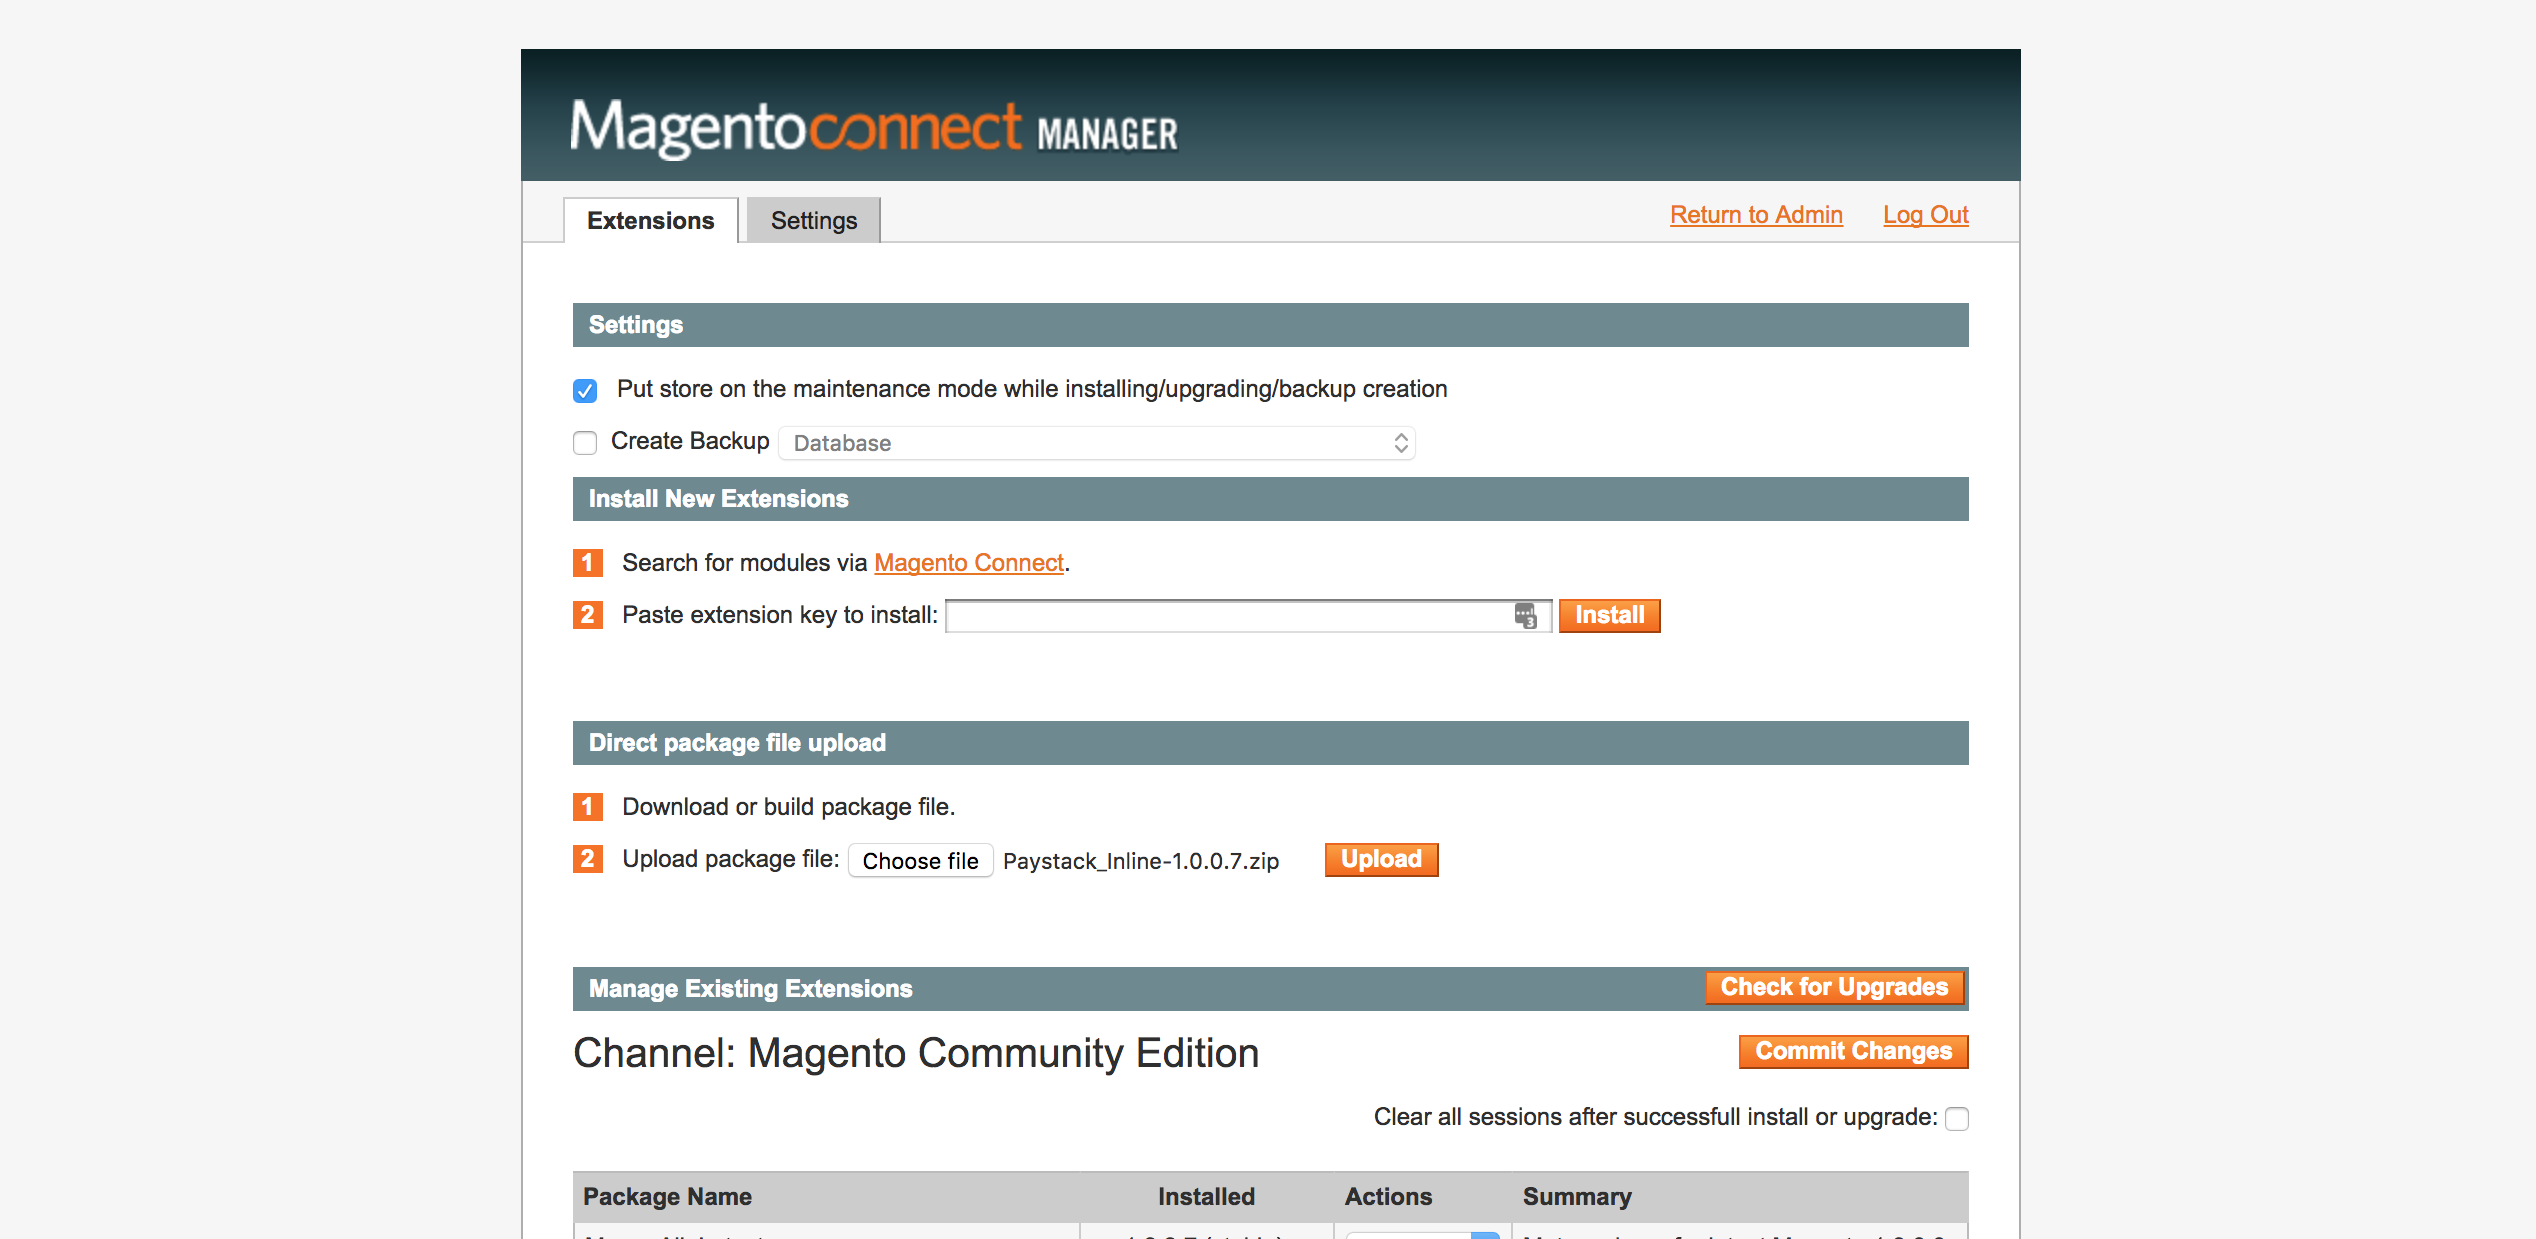
Login to your Store Admin and go to System -> Magento Connect -> Magento Connect Manager. Scroll to 'Direct package file upload' and click 'Choose File'. Choose the downloaded .tgz file.
Click Upload to get a response, as shown below. Once you see this, your extension is installed correctly and ready for use.
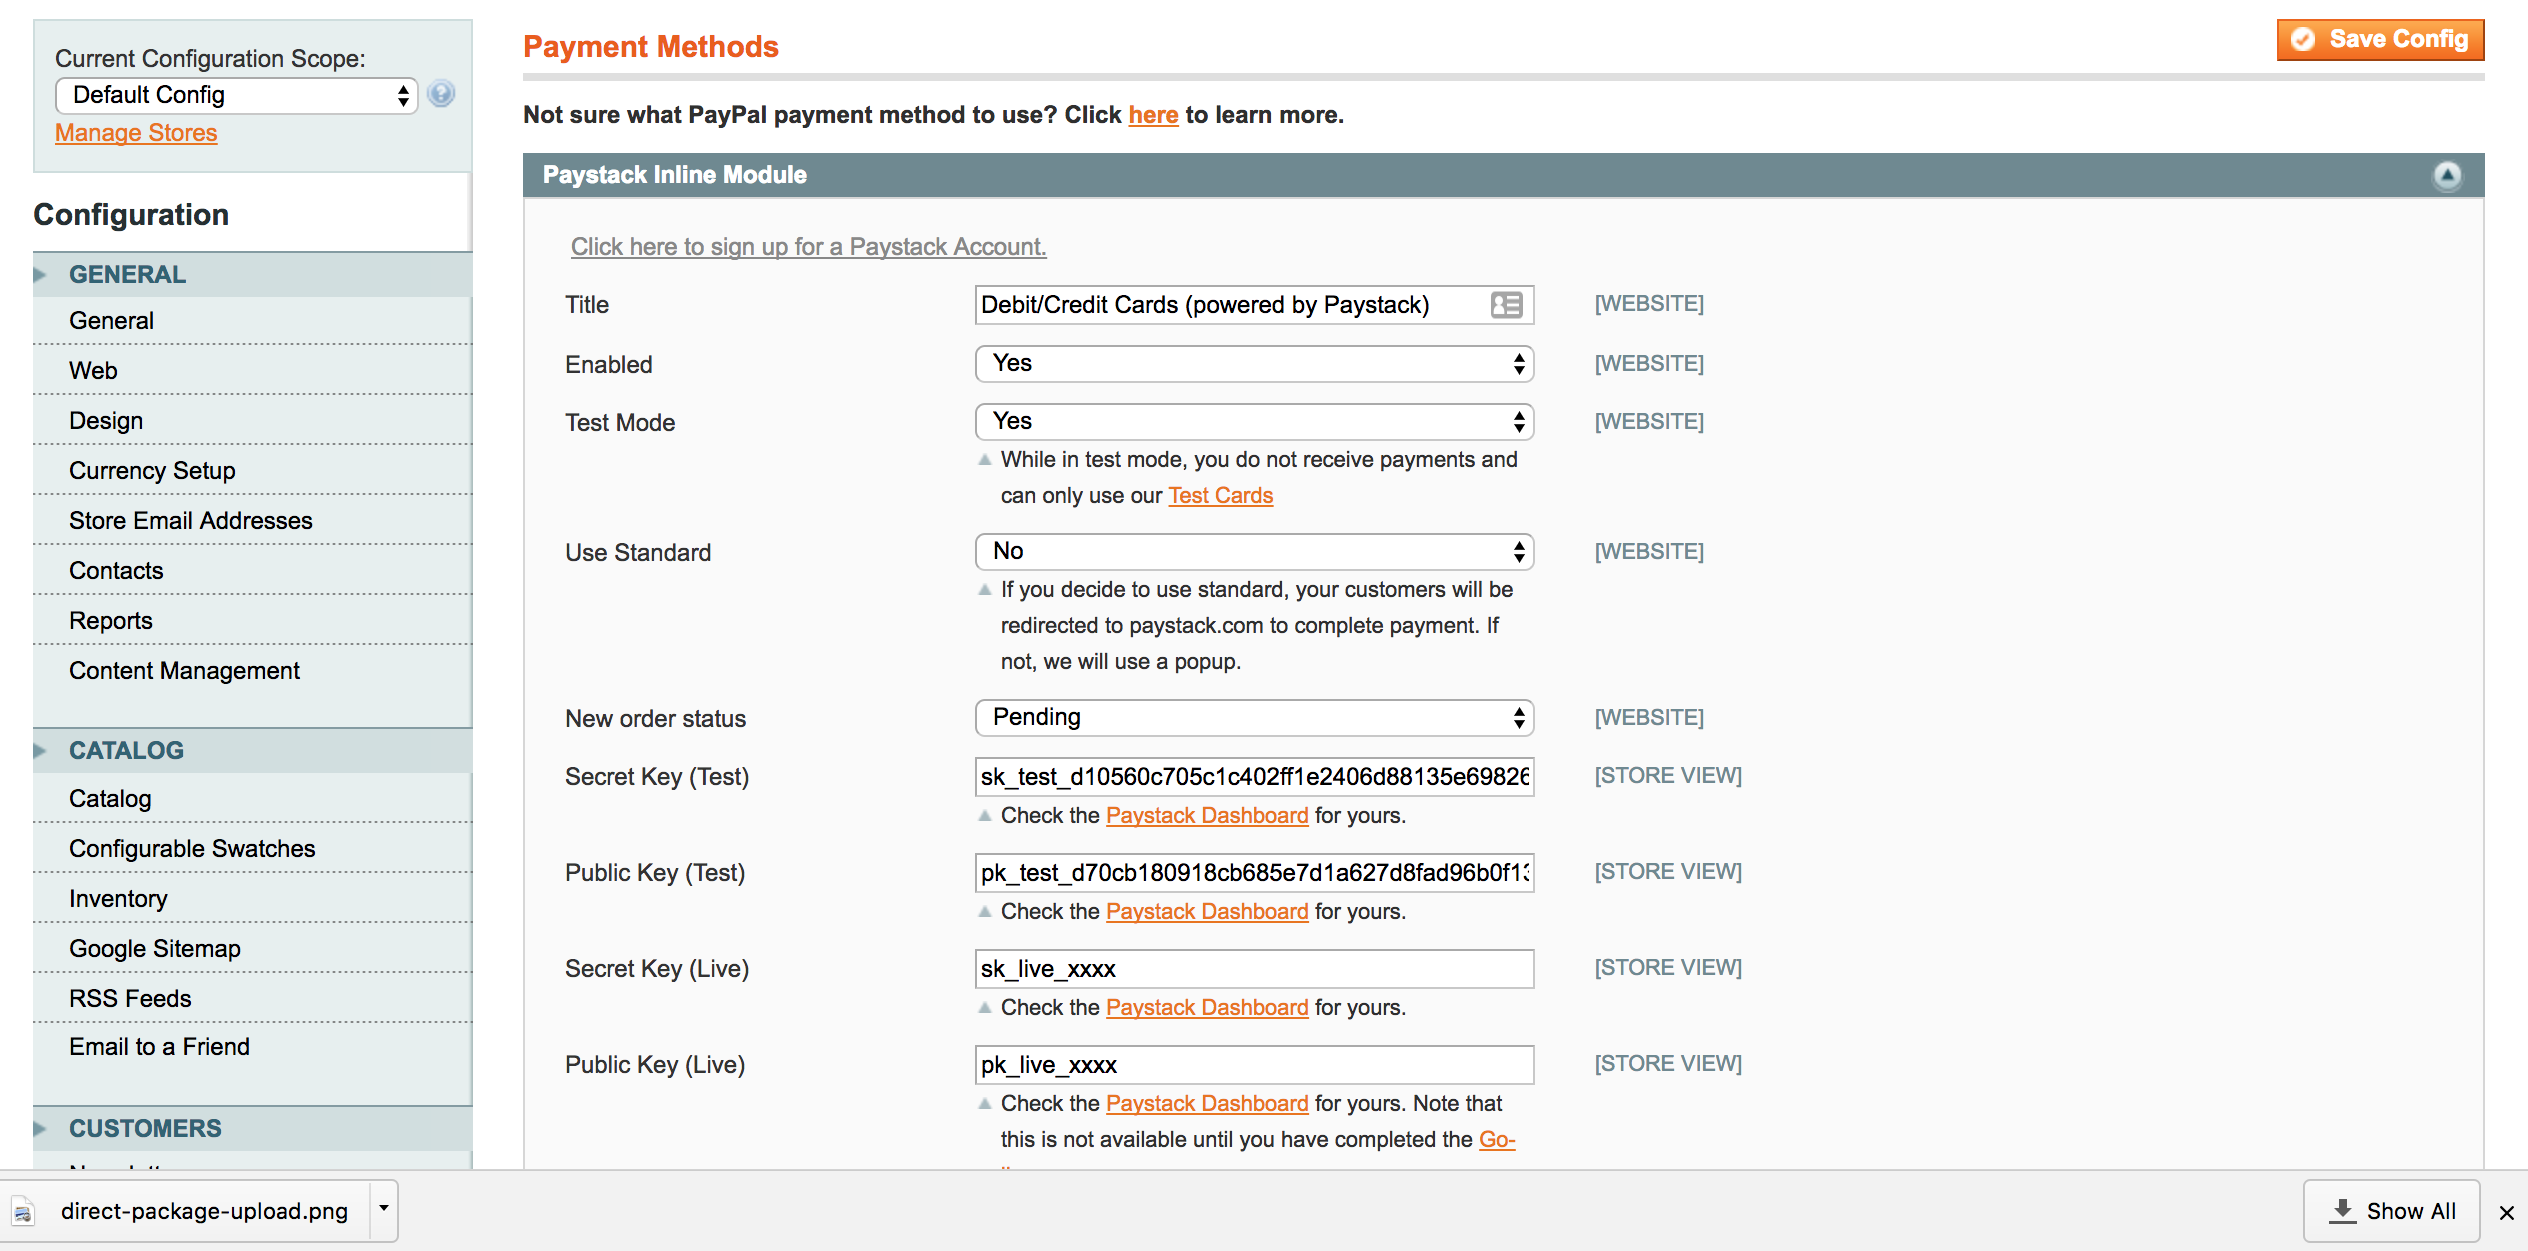
Go to the System -> Configuration in the Magento Admin panel and select Payment Methods from the Sales section on the left‐hand configuration menu.
Find the Paystack Inline Module and click the title to expand if not already expanded. You may also change the title of the module, specifying what you'd want your customers to see when choosing to pay via Paystack.
Copy and paste your API keys. You can get your Test and Live API Keys from the Settings page on your Paystack Dashboard. Click on the 'Save Config' button.
Set your Webhook URL on your Paystack Dashboard to ‘//your/magento/site/root/paystack/webhook/handler’.
If you encounter any issues while integrating the plugin, please reach out to us at techsupport@paystack.com or via our contact form.


