How to set up Paystack on Joomla - Virtuemart
The Joomla-VirtueMart plugin is a powerful combination that transforms Joomla, a highly versatile Content Management System (CMS), into a complete e-commerce platform. By seamlessly integrating with Joomla, VirtueMart provides a seamless solution for creating online stores.
To get started, you need to find the right Paystack extension for your Joomla site. At the moment, we have extensions for Virtuemart, Icejoomla, and BreezingCommerce. We'll discuss how to set up Paystack on Virtuemart, but please note that the process is similar for all the other extensions.
Setting up your Joomla - Virtuemart plugin
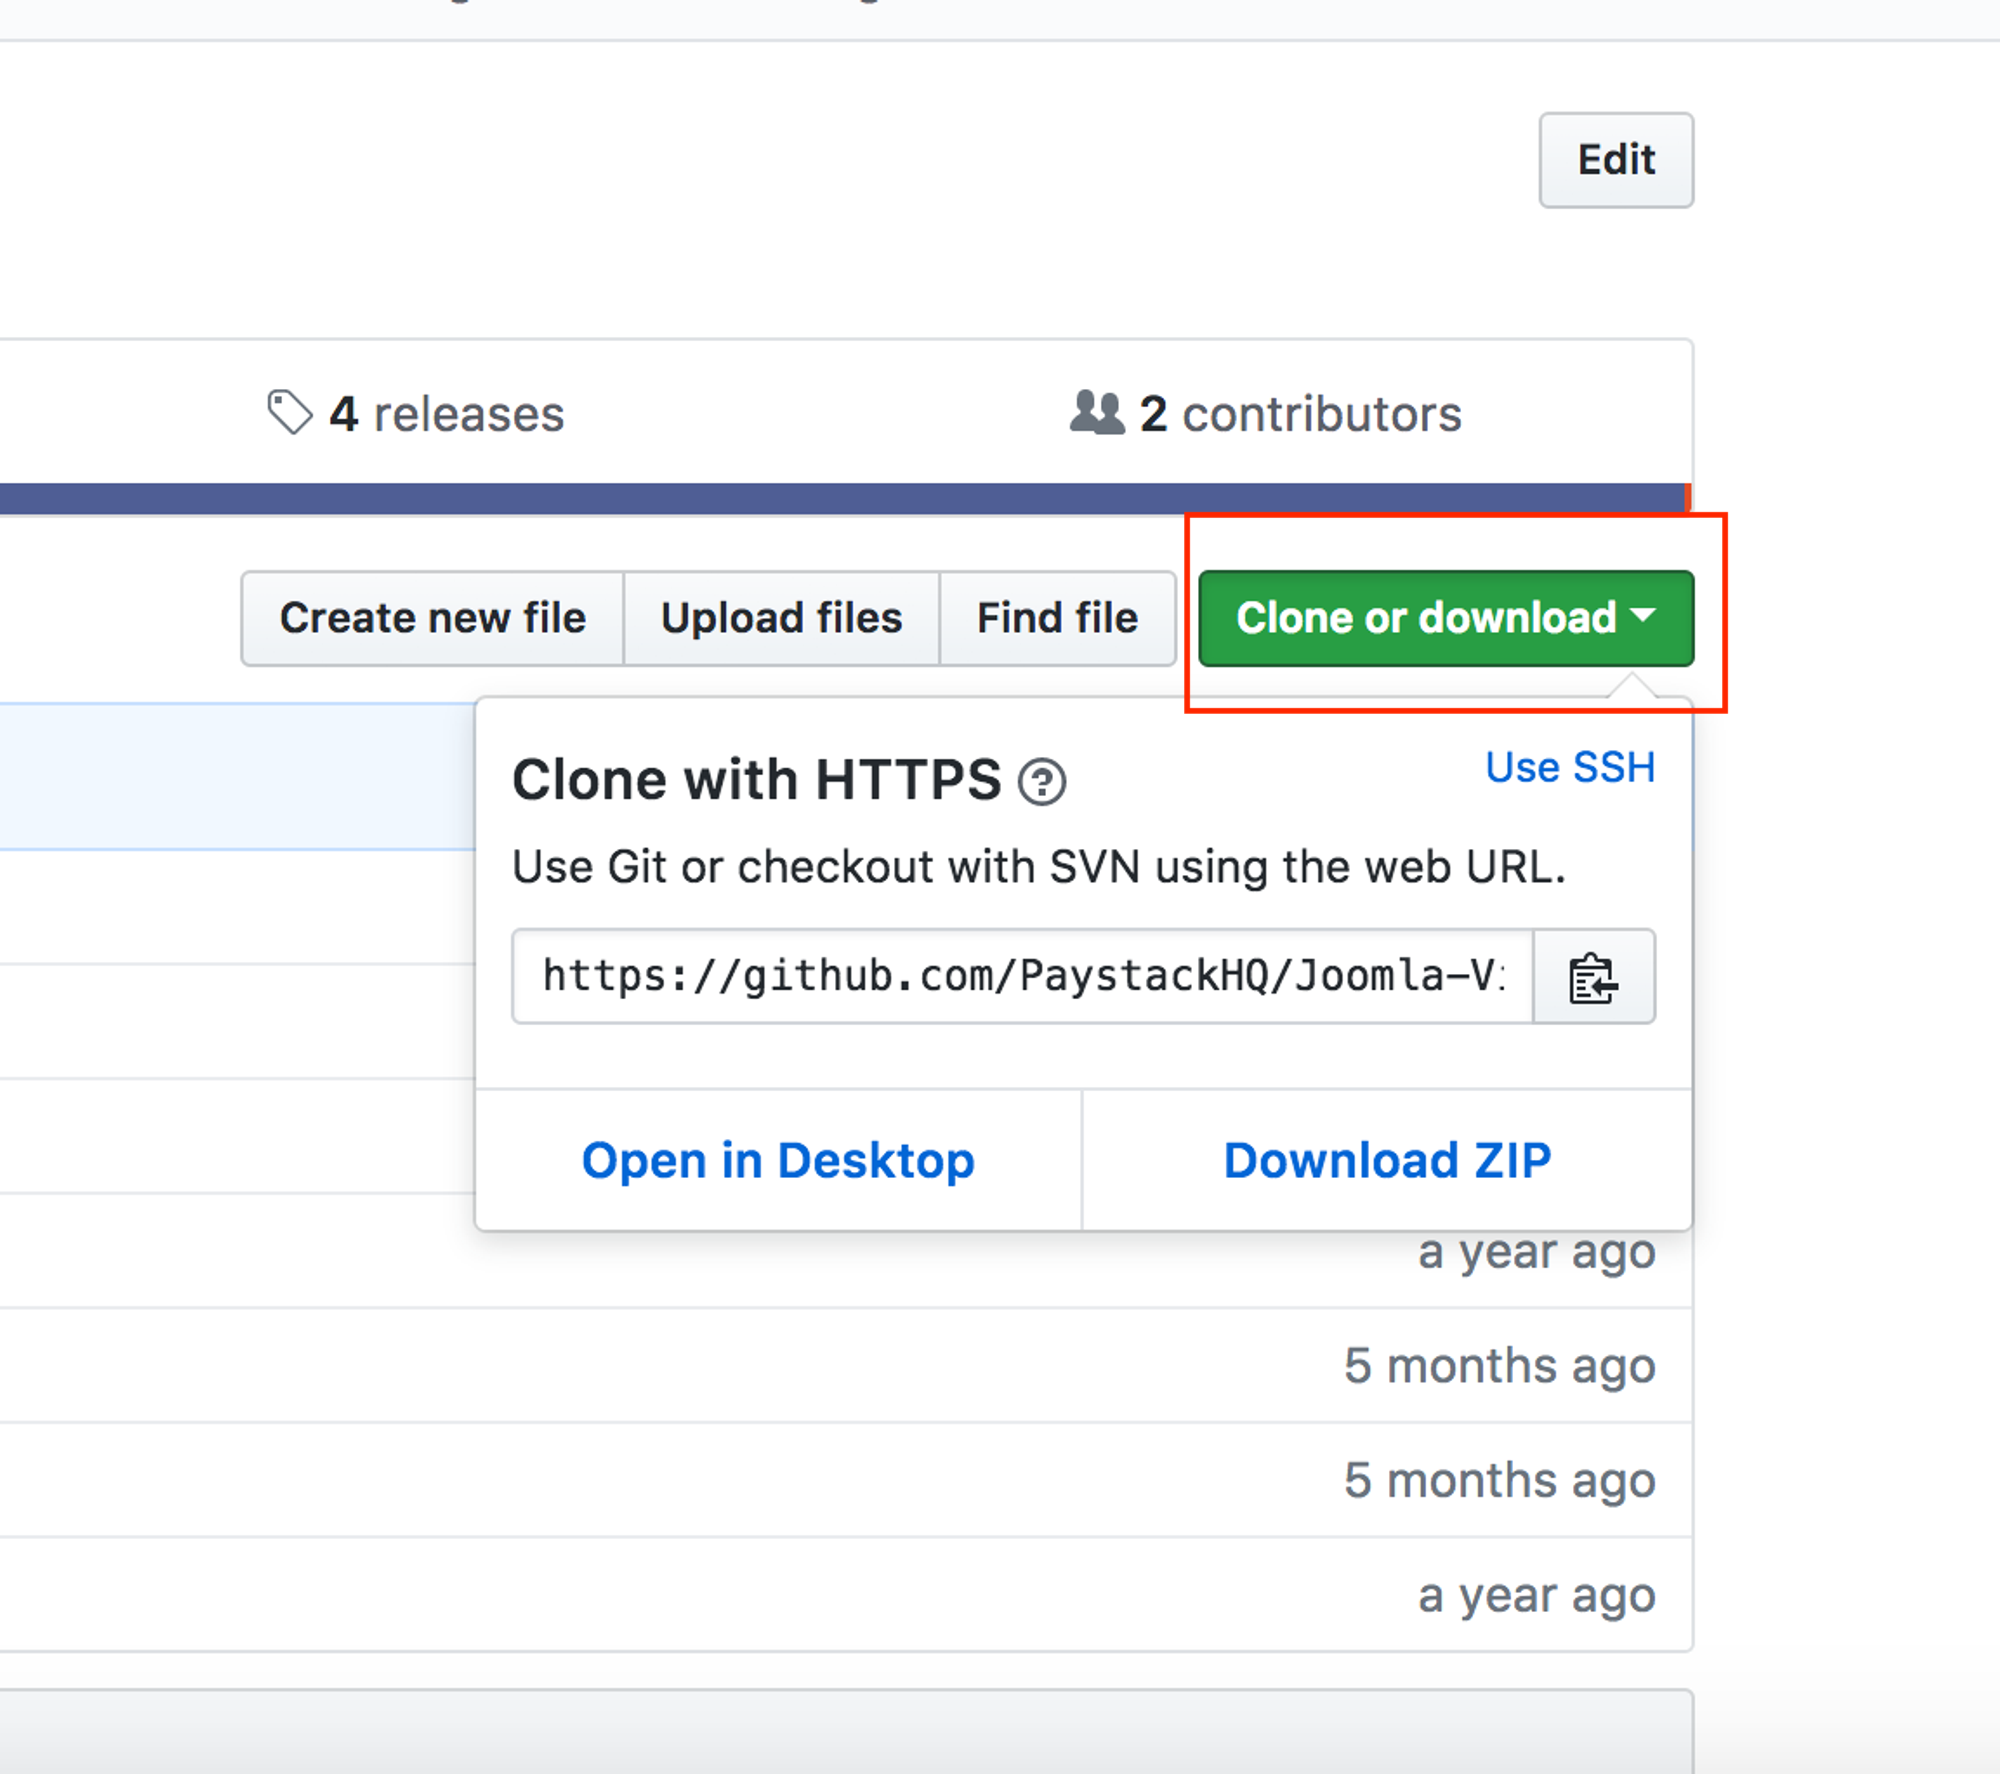
Follow this link to download the Virtuemart Paystack plugin from Github. Click on the ‘Clone or Download’ button and the ‘Download Zip’ button that shows up on the pop-up page.
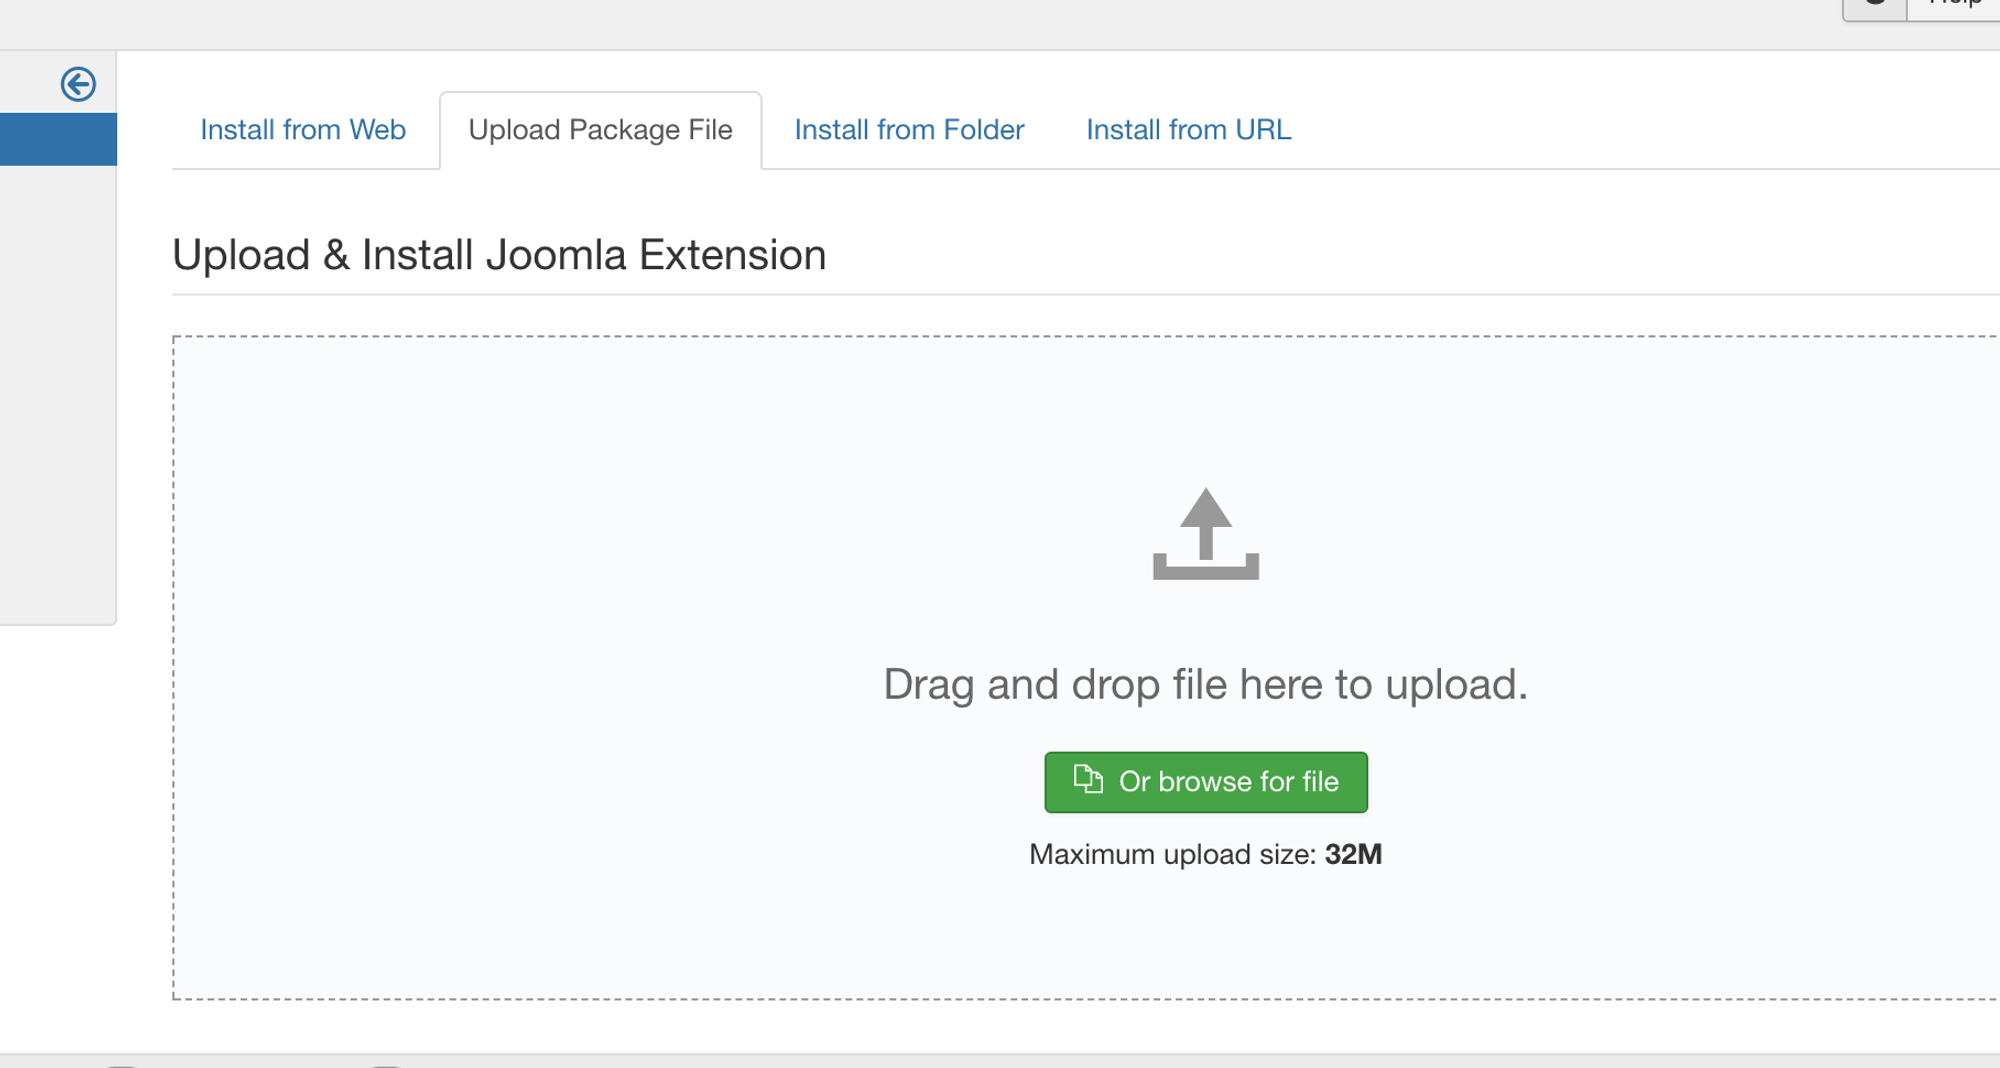
Go to your Joomla Dashboard -> Extensions -> Manage and click on ‘Install’. On the Install page, select ‘Upload Package File’ and upload the downloaded zip file. This will install and configure the plugin.
On your Joomla Settings page, click on Virtuemart and select ‘Payment Methods’.
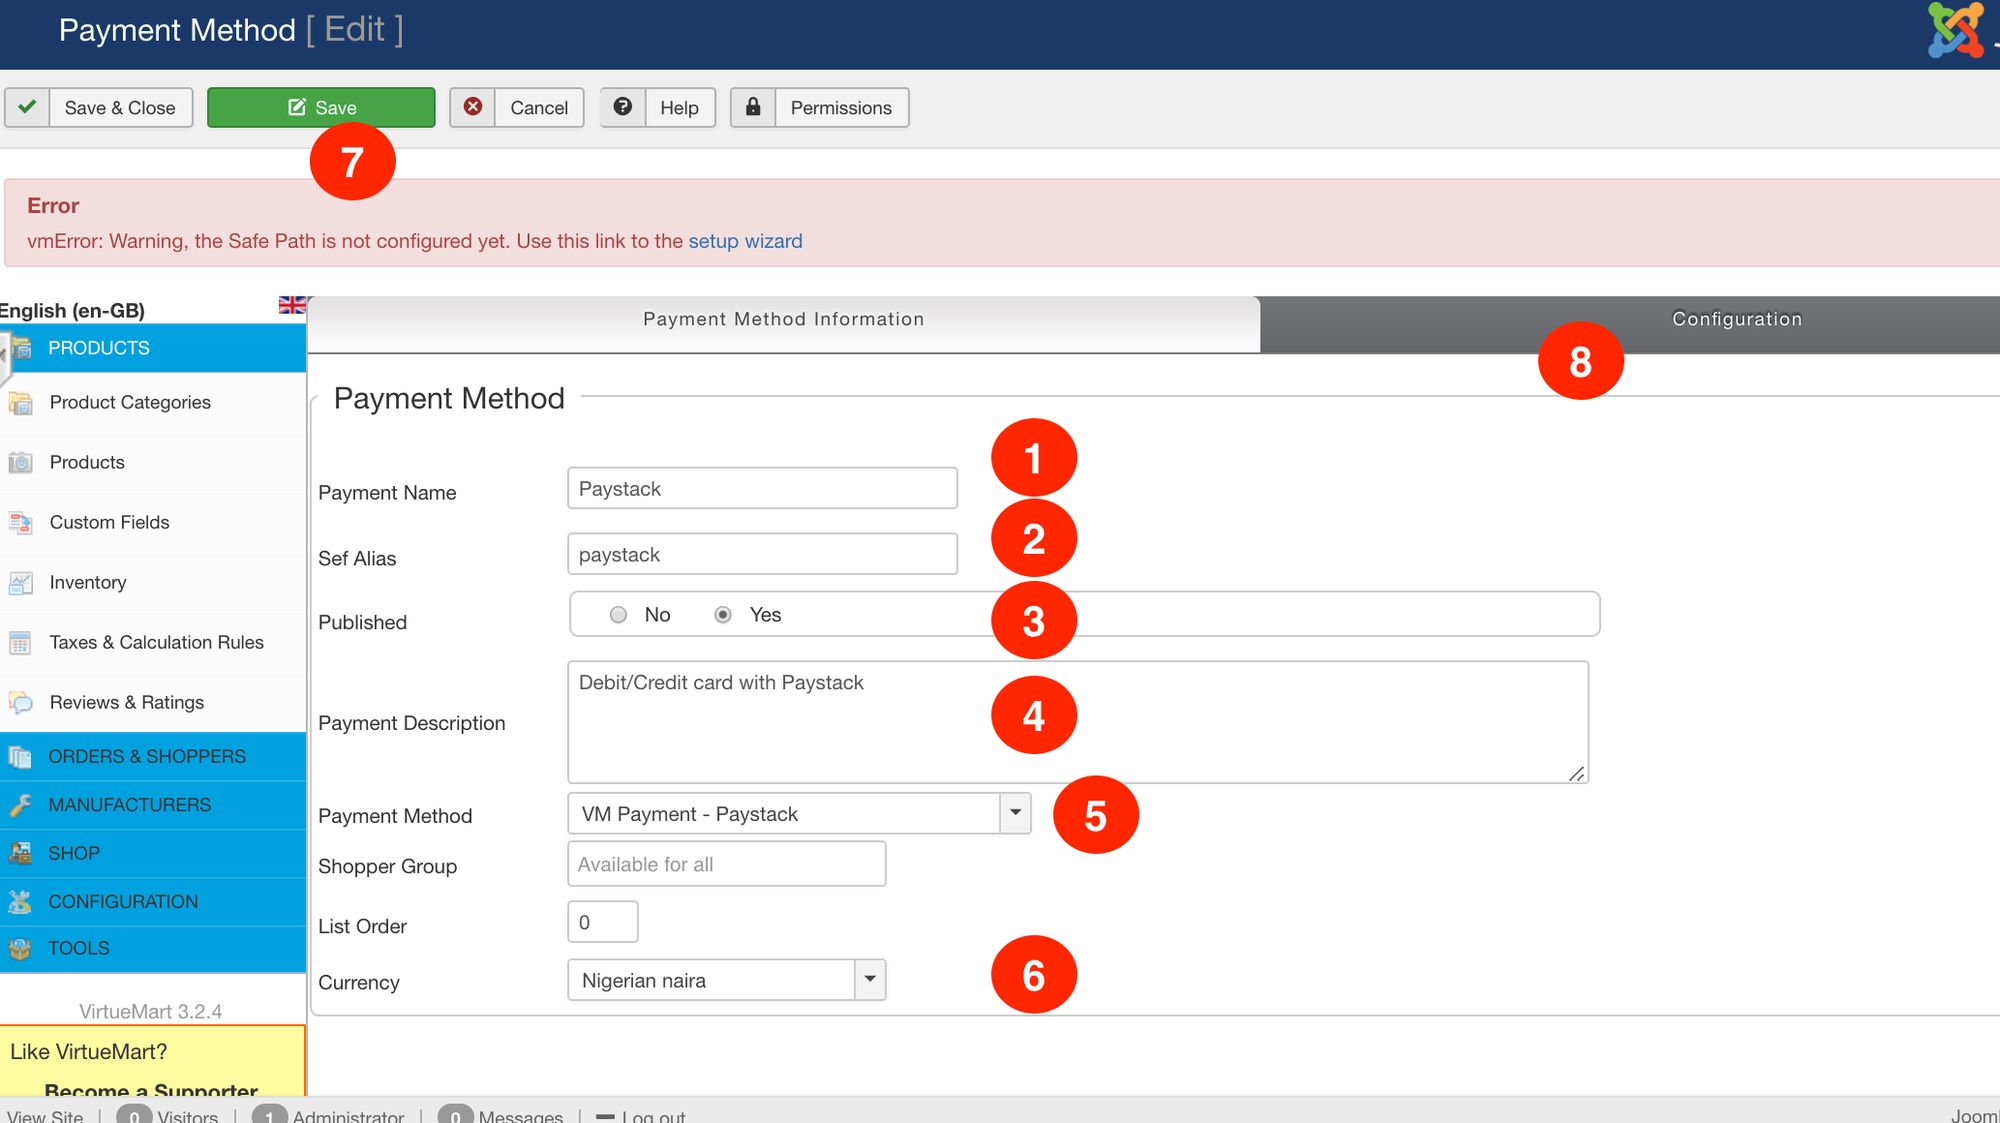
When the page opens, you'll see the list of Payment methods available on your Virtuemart Plugin. To add Paystack, click on the ‘New button at the top. After this, you’ll need to fill in the fields as seen below:
Payment Name: Fill in the name 'Paystack.'
Set Alias: Also enter 'Paystack.'
Published: Set to Yes.
Payment Description: This is the text that describes this Payment option to the user on checkout. You can enter 'Pay with your Debit/Credit Card.'
Payment Method: Click on the dropdown and select ‘VM Payment - Paystack’ from the options. Please ensure you save the payment method option after choosing it.
Currency: Select the relevant currency for your country from the list in the dropdown.
Save: The save button.
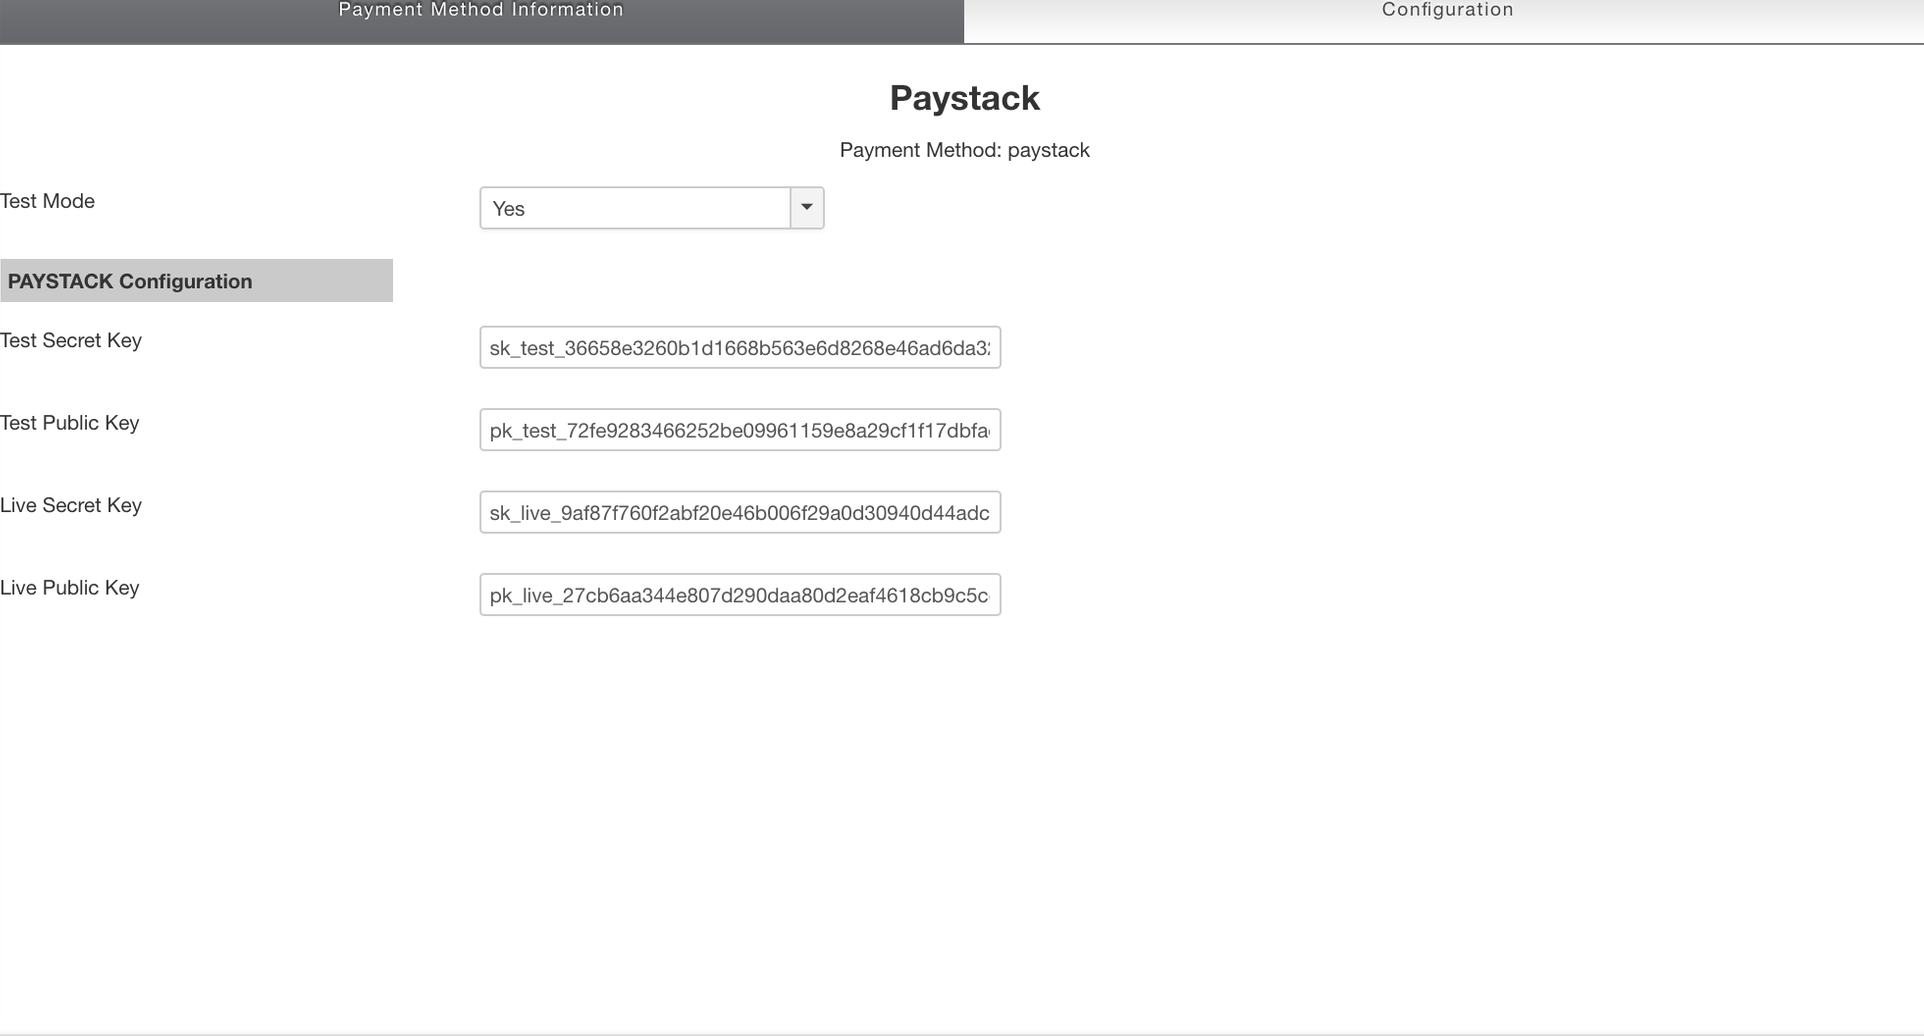
Click on ‘Save’ at the top of the page. When the page saves, click on the Configuration tab. This will open the configuration page, where you will be required to enter your API keys.
You can get your Test and Live API Keys from the Settings page on your Paystack Dashboard. Copy and paste your API keys.
After completing these steps, you should see Paystack listed as a payment option on the checkout form.
If you encounter any issues while integrating the plugin, please get in touch with us at techsupport@paystack.com or via our contact form.


